Keeping the hood aligned
My 1963 truck hood closed perfectly before I removed it to do an engine swap. I used this very simple method to make sure it would go back on exactly the way it was before removal. This method eliminated all the fine adjustments and "tweaking things a bit" once I bolted stuff back together.
This works well for original parts that are already aligned but need to be removed for repair or restoration. My hood, hinges and hood release were already aligned in the EXACT POSITION I wanted before I drilled any holes.
You will need a drill and a few sharp 1/8" drill bits. A few shop picks that are about 1/8" diameter are handy too.
Drill two holes in all the pieces before disassembly. The pictures explain the rest. Use the drill bits or picks to re-align the parts when bolting things together again. This takes the guess work out of the process.
The video at the end shows the nice alignment and how well the hood closes after assembly.
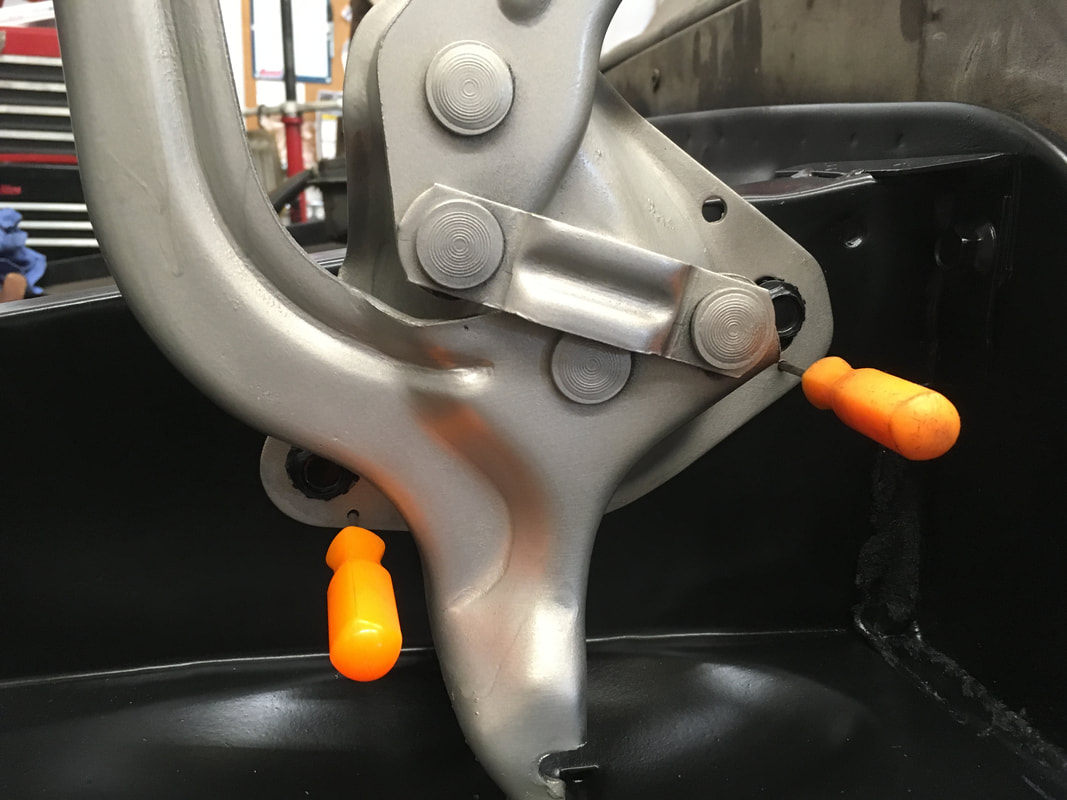
Drill two holes where the hinges bolt to the hood.
Do both hinges. This is a BEFORE photo.
Do both hinges. This is a BEFORE photo.

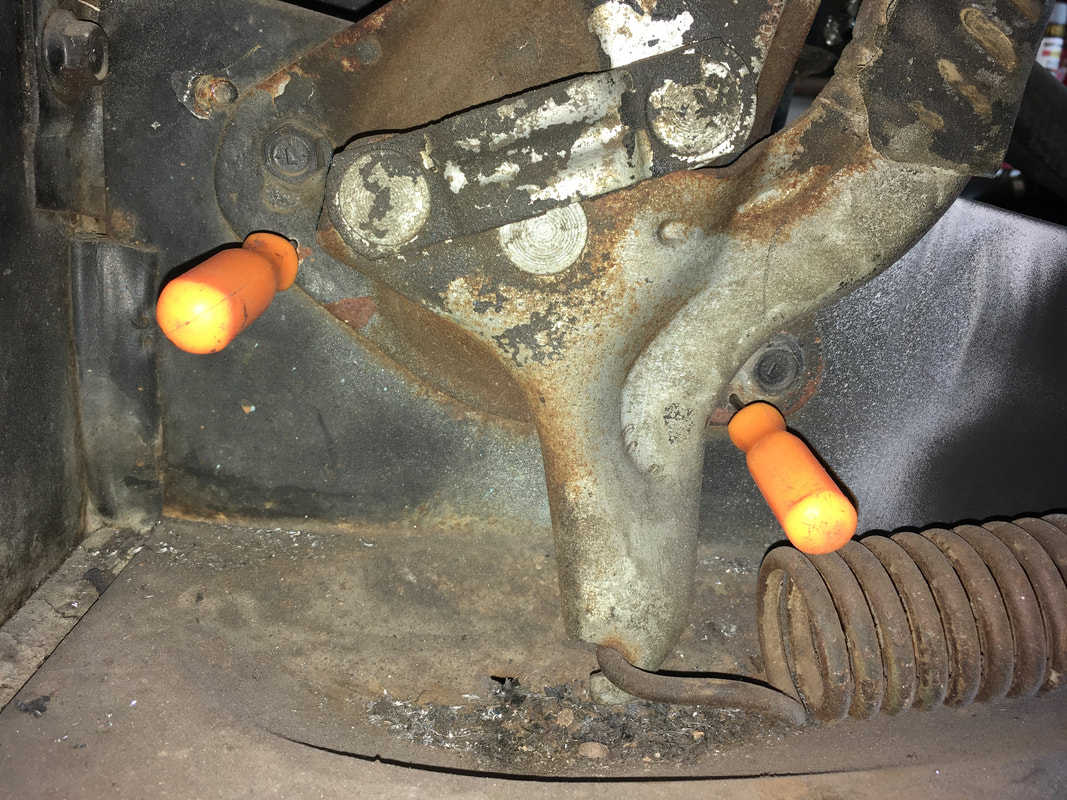
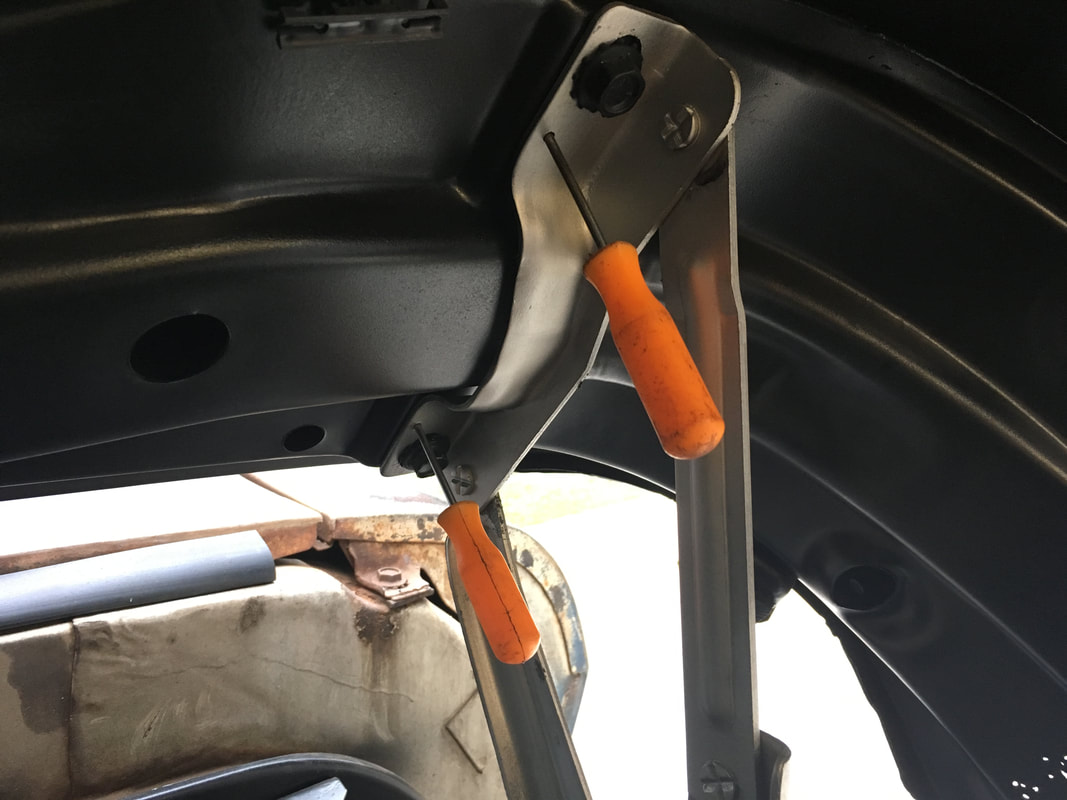
Drill two holes where the hinge meets the inner fenders.
Do both sides.
Do both sides.
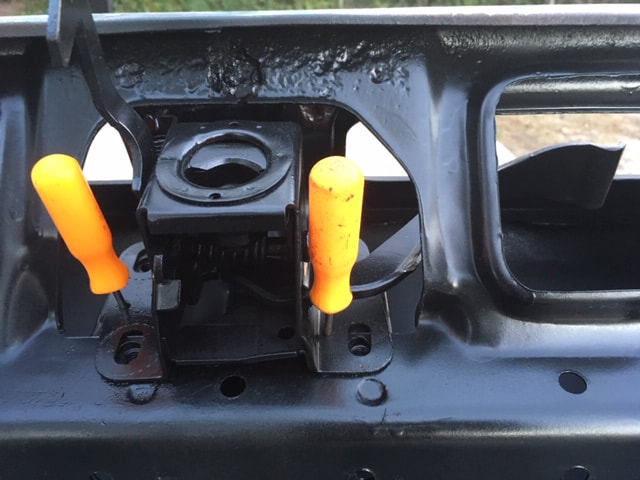
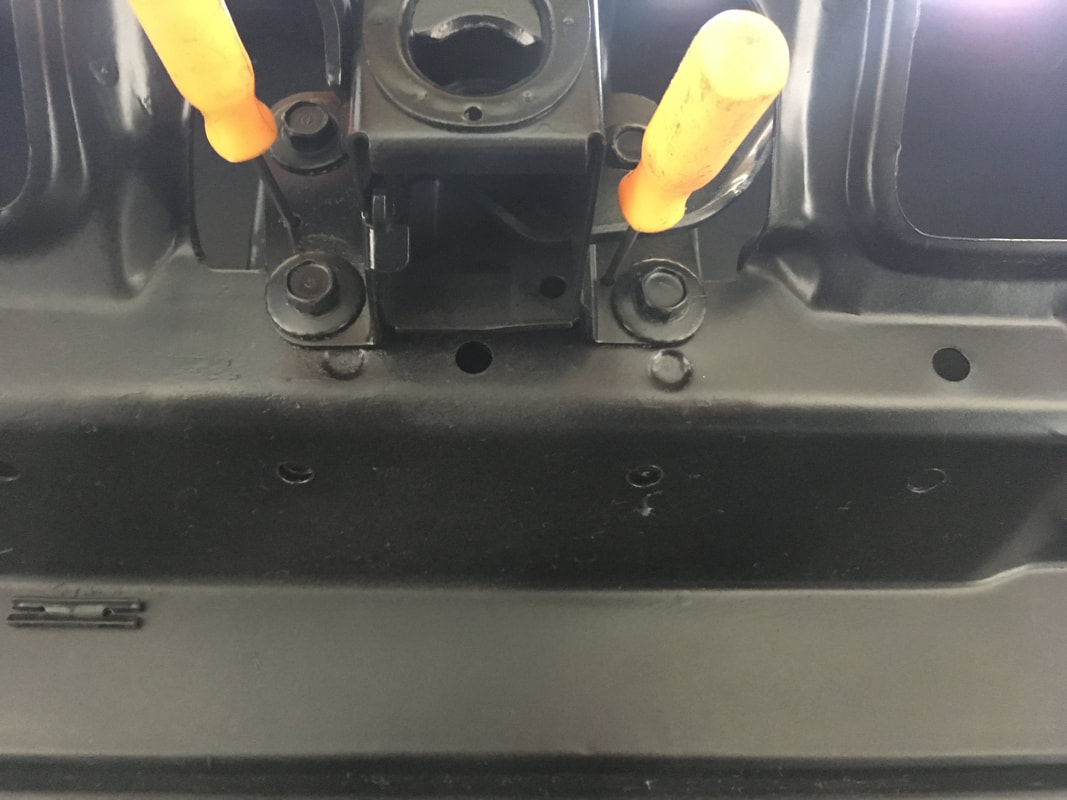
Two more holes for the hood release mechanism.
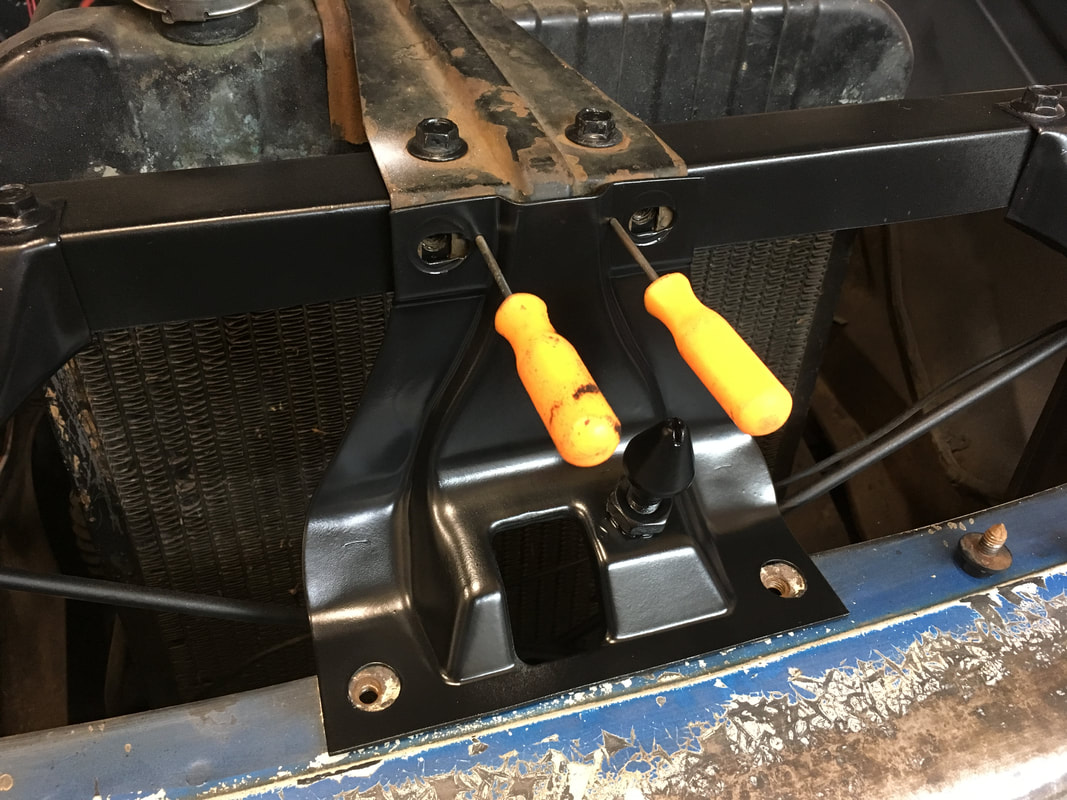
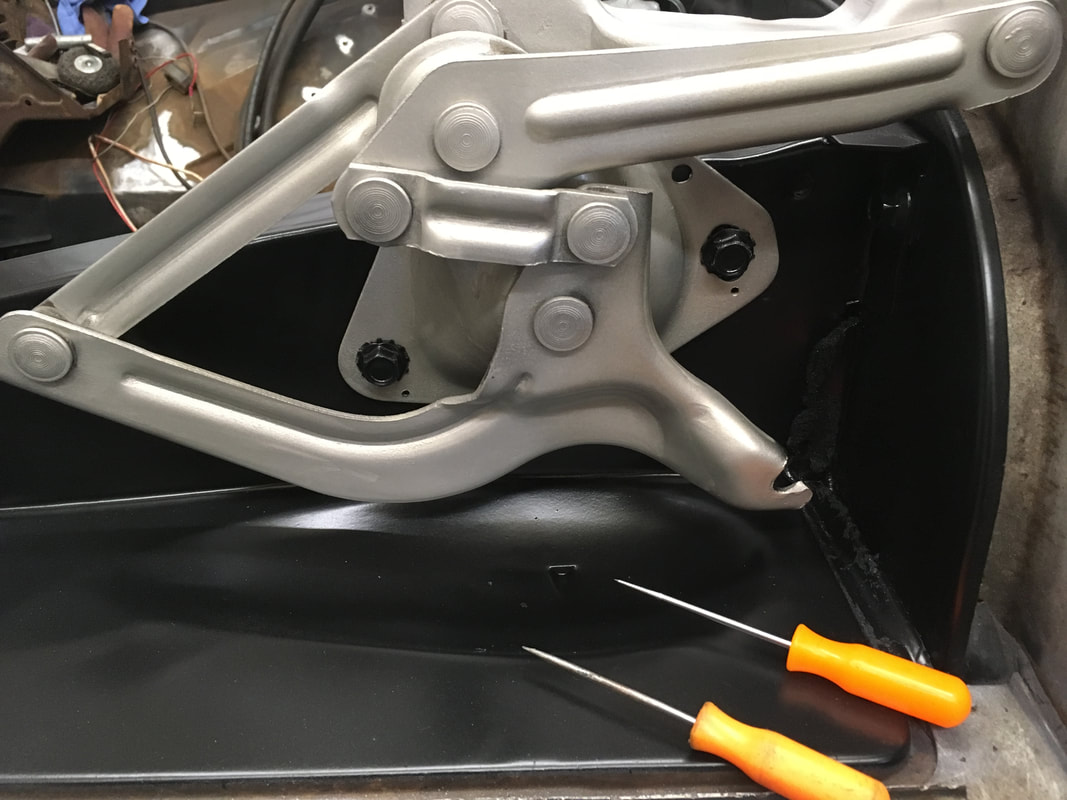
Two more holes for the radiator clamp and hood latch pin. Bolts were removed to get a better picture.
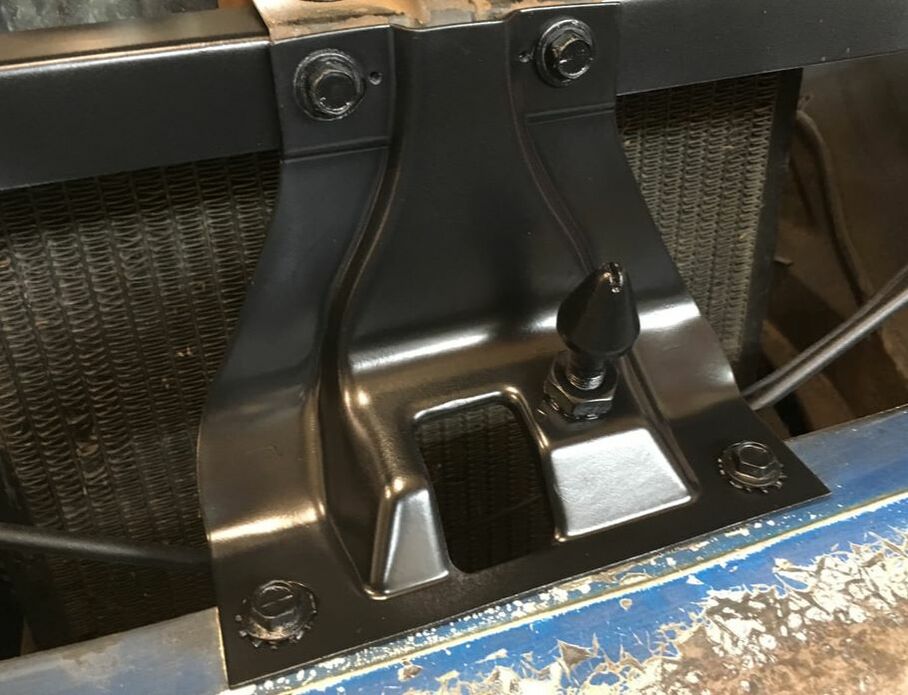
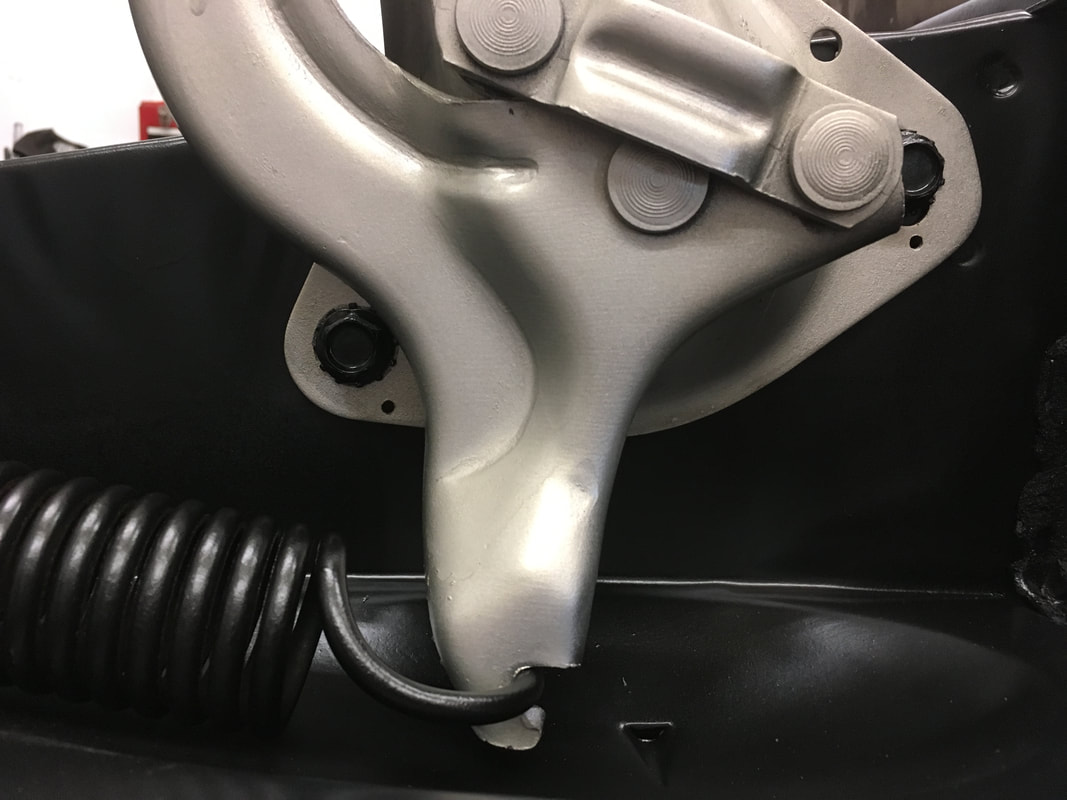
After restoration, it bolts right back where it was.
Once the hinge was restored, the alignment holes made it easy to get perfect alignment without scratching the paint. Here's the DS hinge going back on.
Now the spring can be put back on. Believe me, trying to adjust the hinges with the spring fighting you is not any fun. The spring usually wins and paint gets scratched.
The hood release mechanism is back in place and I'm sure it will line up perfectly with the catch pin.
The hinge top plate has slotted holes. During reassembly, two picks in the alignment holes made sure the bolts pinched the hinge in exactly the right place. The same was done for the PS hinge.
My engine bay restoration is done and the hood is back on. Using alignment holes took all the frustration out of the reassembly process. I didn't need to make any adjustments. Watch the video at the bottom.
VIDEO shows the hood closing and that original alignment was maintained.

