Alignment Tools - it's easier than you think.
Here are some ways to measure your own front end alignment at home with simple tools. Since vehicles are different, please follow the instructions in your service manual to make any needed adjustments to your alignment.
Three topics are discussed below.
Section 1. Using a Trammel Bar to measure front alignment toe
Section 2. Using an iPhone app for measuring Camber
Section 3. Using an iPhone app for measuring Caster (under construction)
Section 1: Using a Trammel Bar to measure front alignment toe
What is it?
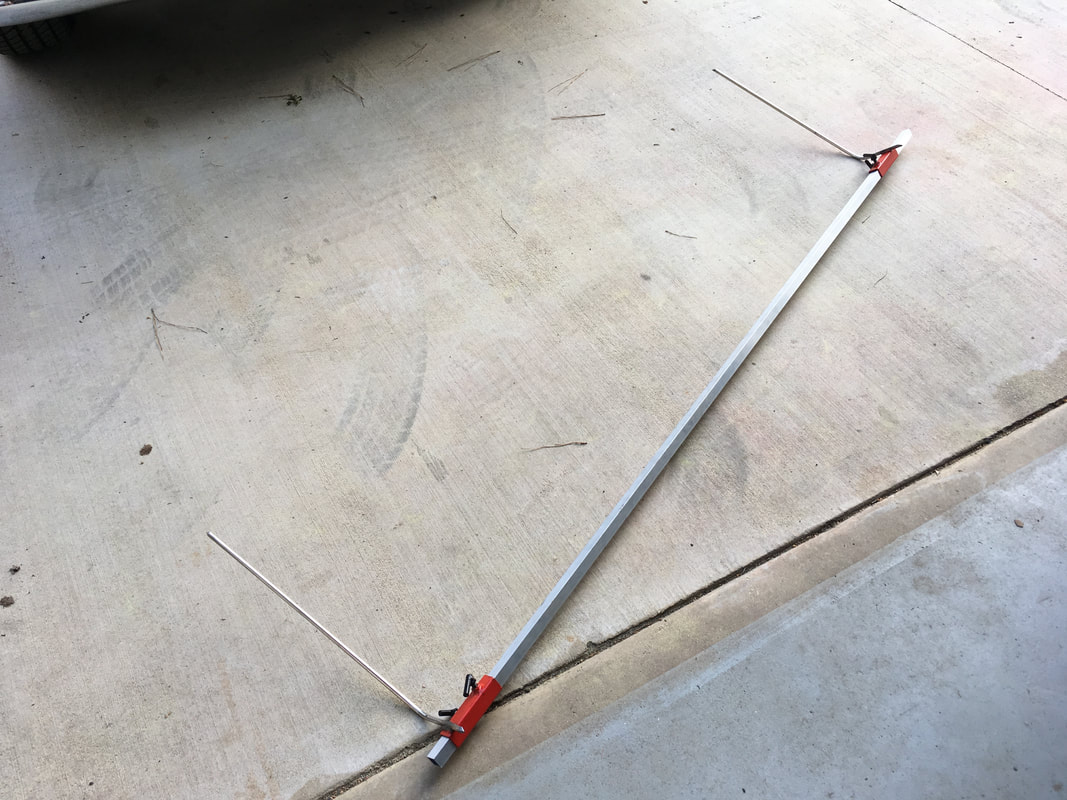
This tool is really just a giant caliper. This particular design allows the user to lay it on the shop floor.
Here's how I made mine.
THE BAR: I bought a 6 foot stick of 3/4" aluminum square tube. More than 6 feet is fine, but don't get less than 6 feet. Steel is fine, but aluminum is lighter. It must not flex.
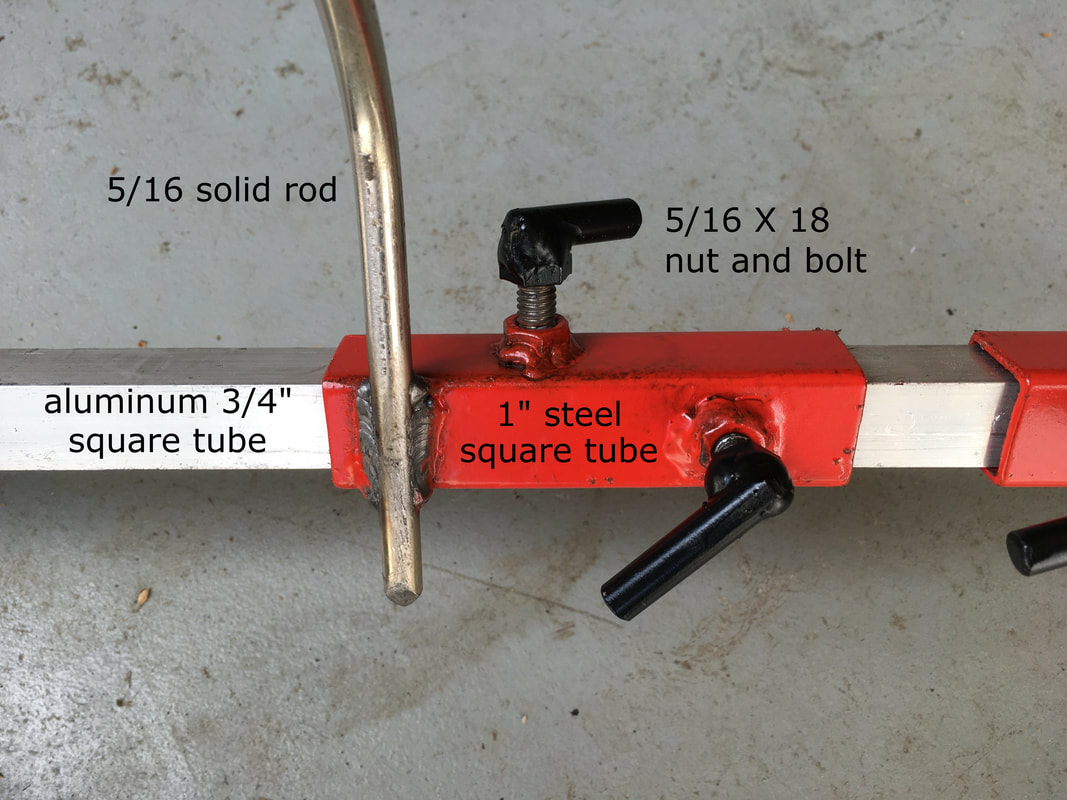
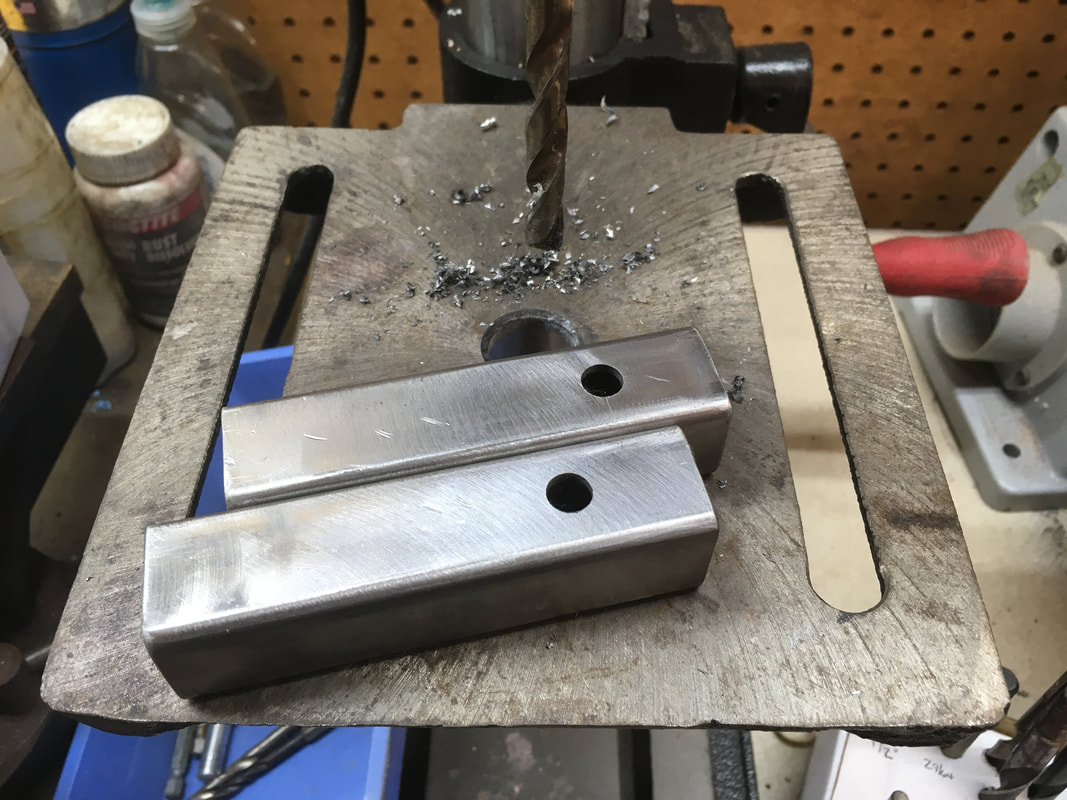
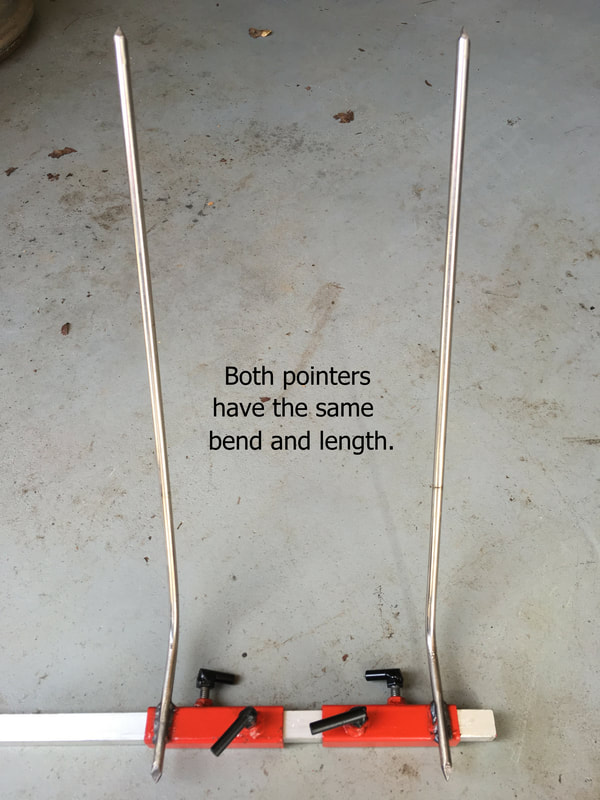
THE SLIDERS: The 2 red sliders are made from 4" of 1" steel square tube. I drilled 4 holes and welded 5/16" X 18 nuts centered over each hole for the 5/16" X 18 locking bolts. The wings welded on the bolt heads save my thumbs. I also ground the bottom of each bolt flat. When locked on the bar, the sliders should not wiggle at all.
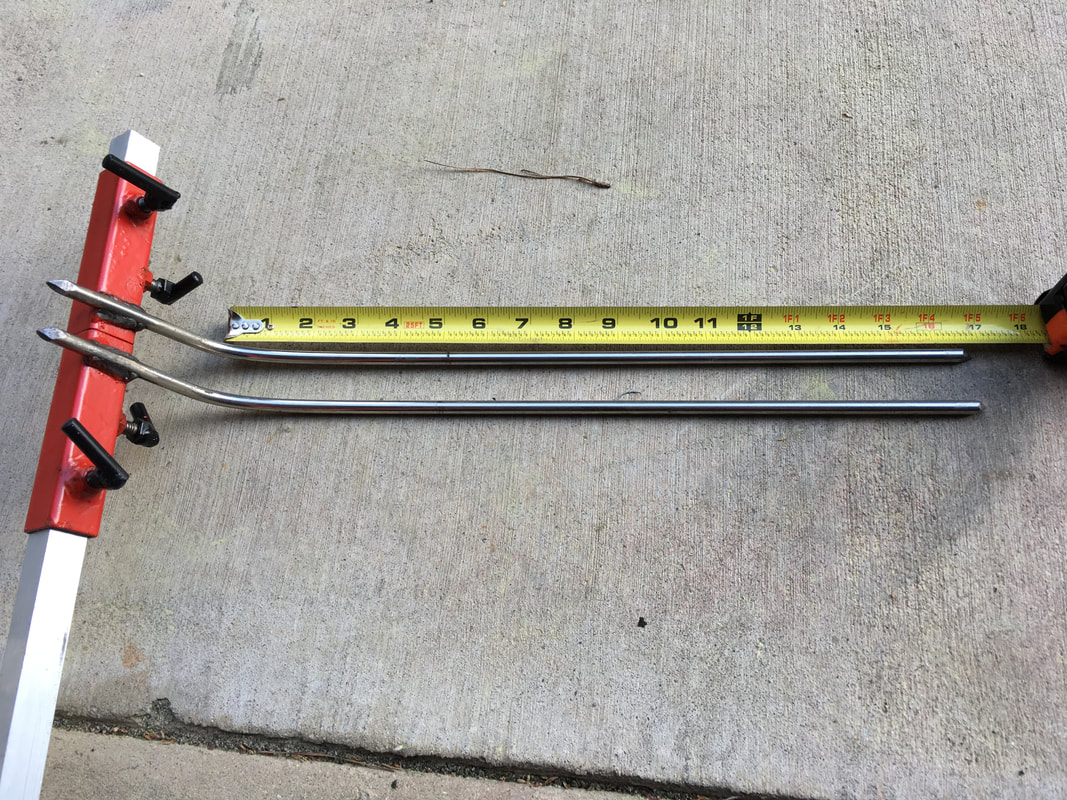
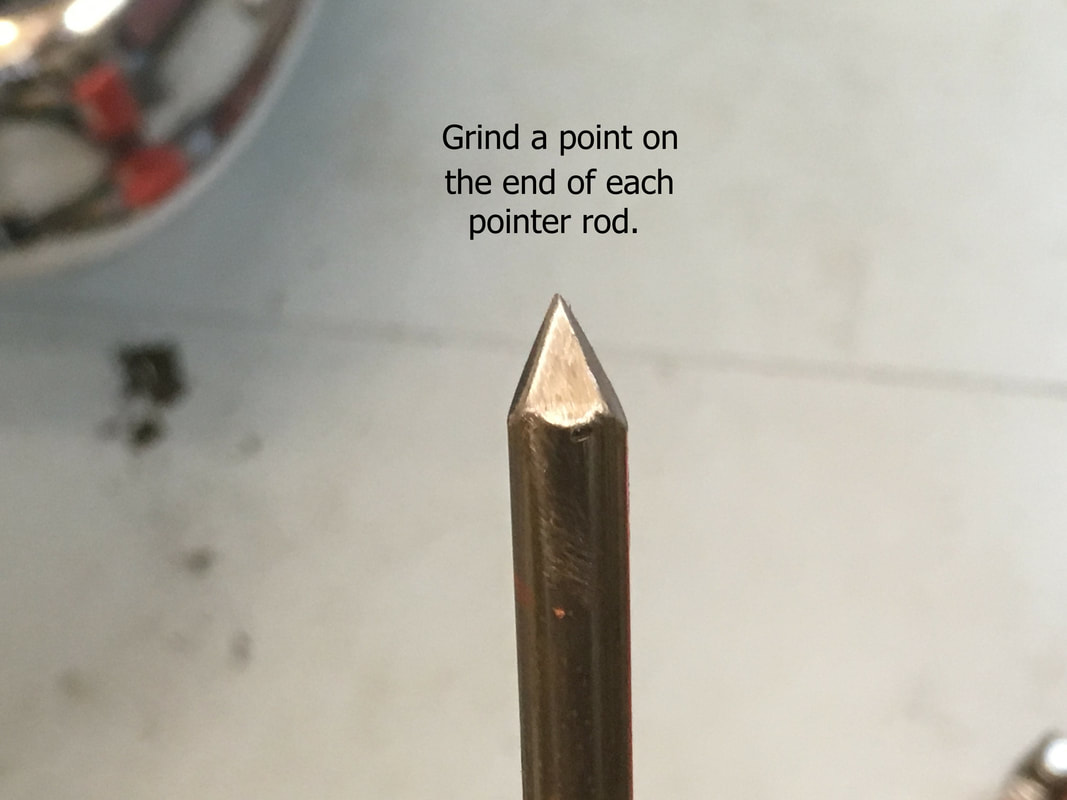
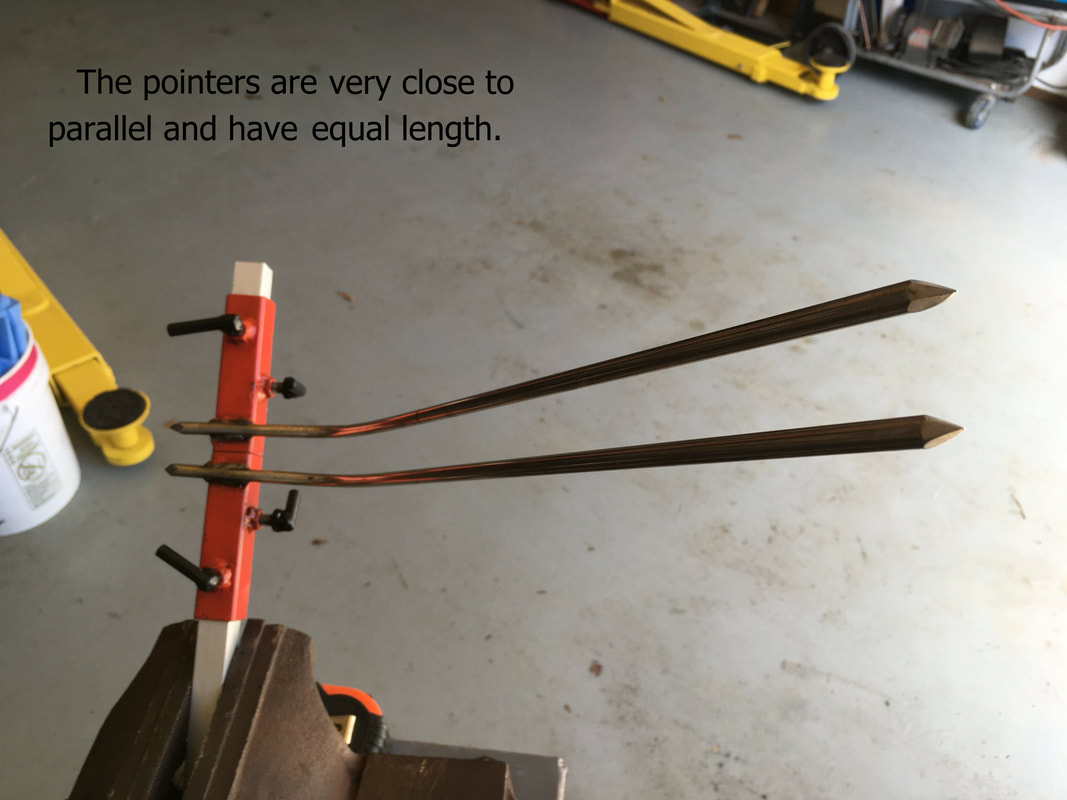
THE POINTERS: I bent two 21" pieces of 5/16" solid steel rod - mine are 21" long and bent up at about 30 degrees at the 17" mark. I just clamped them together in a vise at the 4" mark and bent them until I was happy. That way they were bent the same. These rods were then welded to the 4" sliders. Tweak the bends and grind the rod tips to make the rods as parallel and identical as possible. You will notice that my pointer rods have a point on both ends. The end with the short point is easier to work with if the vehicle is up on a lift. After installing new tie rods and adjustment sleeves, I use the short point end to make initial adjustments while the vehicle is still on the lift.
Using the tool
If the tires were recently off the ground, drive a short distance or move the vehicle around so the front suspension will return to normal. The vehicle should be on level ground. Have the tires pointing straight ahead. Set the park brake for safety.
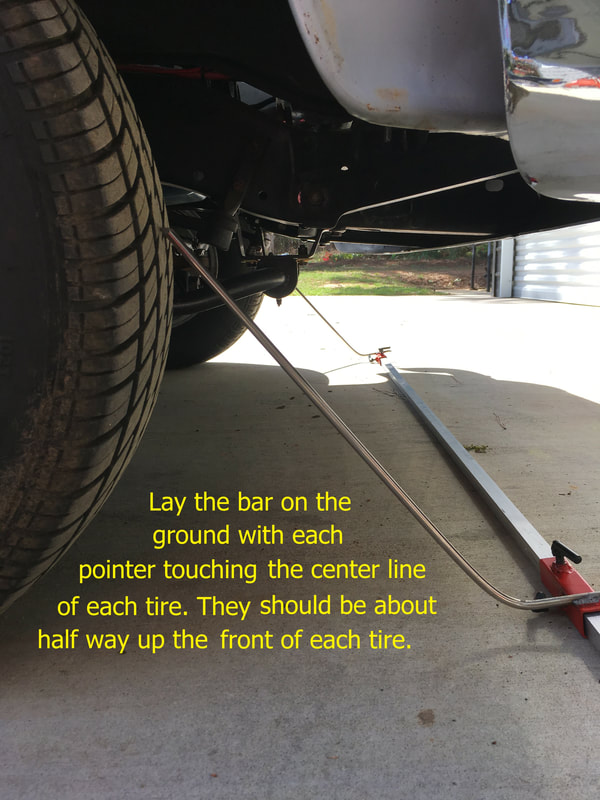
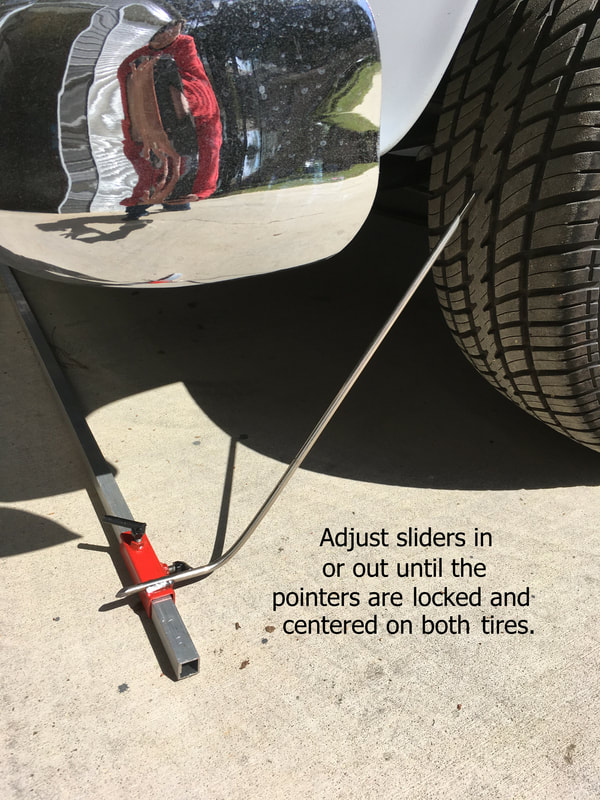
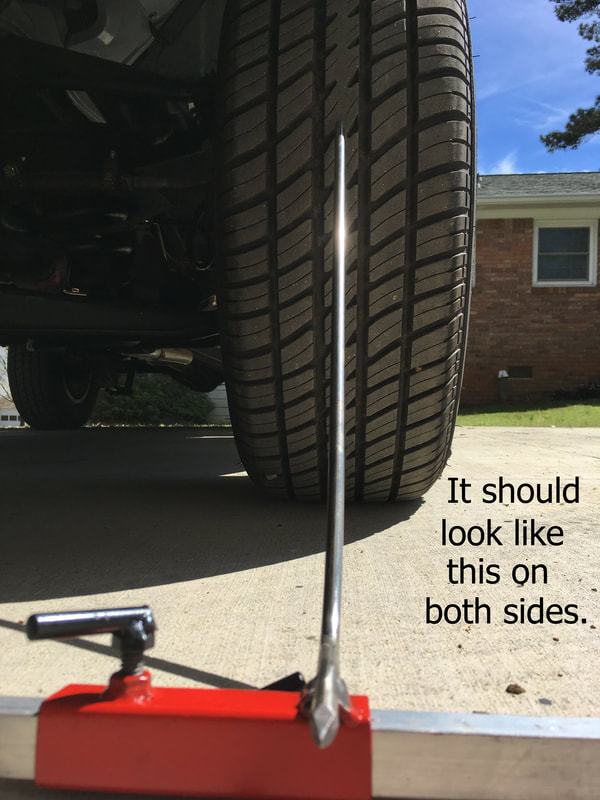
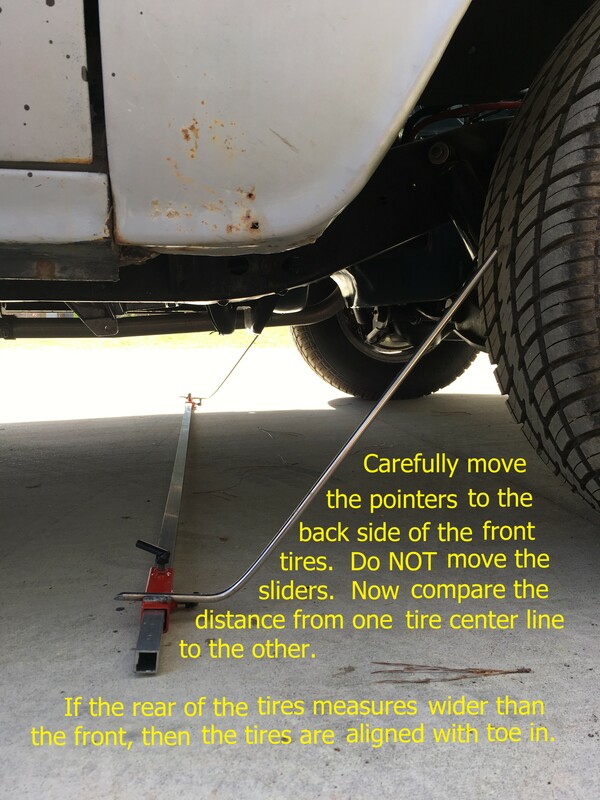
Half way up the front of each front tire, make a mark at the exact center of the tire tread. Set the bar on the ground and adjust the pointers so they are pointing at the marks. Lock the sliders in place and re-check the pointers to be sure they have not moved. The distance between your pointers will now be compared to the same location on the back side of the tires. Move the pointers to the back side of the tires. If the tires have ZERO toe, the pointers will again be at the center of the tire treads half way up the tire. If the measurement at the rear of the tires is wider than the front, then the tires have front toe-in. (Example: Rear measures 3/16" wider than the front. That means the tires have 3/16" toe-in).
Once your alignment toe is properly set to the factory specification, drive the vehicle and recheck with the pointers. If your steering wheel is not centered while driving straight ahead, you will need to turn the tie rods on both sides an equal amount (left or right) until the steering wheel is straight again. Check alignment toe again. Quick and easy.
This tool is really just a giant caliper. This particular design allows the user to lay it on the shop floor.
Here's how I made mine.
THE BAR: I bought a 6 foot stick of 3/4" aluminum square tube. More than 6 feet is fine, but don't get less than 6 feet. Steel is fine, but aluminum is lighter. It must not flex.
THE SLIDERS: The 2 red sliders are made from 4" of 1" steel square tube. I drilled 4 holes and welded 5/16" X 18 nuts centered over each hole for the 5/16" X 18 locking bolts. The wings welded on the bolt heads save my thumbs. I also ground the bottom of each bolt flat. When locked on the bar, the sliders should not wiggle at all.
THE POINTERS: I bent two 21" pieces of 5/16" solid steel rod - mine are 21" long and bent up at about 30 degrees at the 17" mark. I just clamped them together in a vise at the 4" mark and bent them until I was happy. That way they were bent the same. These rods were then welded to the 4" sliders. Tweak the bends and grind the rod tips to make the rods as parallel and identical as possible. You will notice that my pointer rods have a point on both ends. The end with the short point is easier to work with if the vehicle is up on a lift. After installing new tie rods and adjustment sleeves, I use the short point end to make initial adjustments while the vehicle is still on the lift.
Using the tool
If the tires were recently off the ground, drive a short distance or move the vehicle around so the front suspension will return to normal. The vehicle should be on level ground. Have the tires pointing straight ahead. Set the park brake for safety.
Half way up the front of each front tire, make a mark at the exact center of the tire tread. Set the bar on the ground and adjust the pointers so they are pointing at the marks. Lock the sliders in place and re-check the pointers to be sure they have not moved. The distance between your pointers will now be compared to the same location on the back side of the tires. Move the pointers to the back side of the tires. If the tires have ZERO toe, the pointers will again be at the center of the tire treads half way up the tire. If the measurement at the rear of the tires is wider than the front, then the tires have front toe-in. (Example: Rear measures 3/16" wider than the front. That means the tires have 3/16" toe-in).
Once your alignment toe is properly set to the factory specification, drive the vehicle and recheck with the pointers. If your steering wheel is not centered while driving straight ahead, you will need to turn the tie rods on both sides an equal amount (left or right) until the steering wheel is straight again. Check alignment toe again. Quick and easy.
|

|
Section 2: Using an iPhone app for measuring Camber
Modern technology has turned cell phones into modern tools. I recently discovered an iPhone app that allows me to measure wheel Camber and Caster. Let's do Camber first.
I downloaded the app to my iPhone for $3. That was easy. Now I want to know if this app is accurate. Otherwise, I just wasted $3.
To check accuracy, I compared Camber readings from my iPhone app to readings from a Longacre Racing Caster/Camber Tool. This assumes that the Longacre Tool was accurately calibrated for accuracy at the factory. Accurate calibration of the iPhone app is dependent on the user.
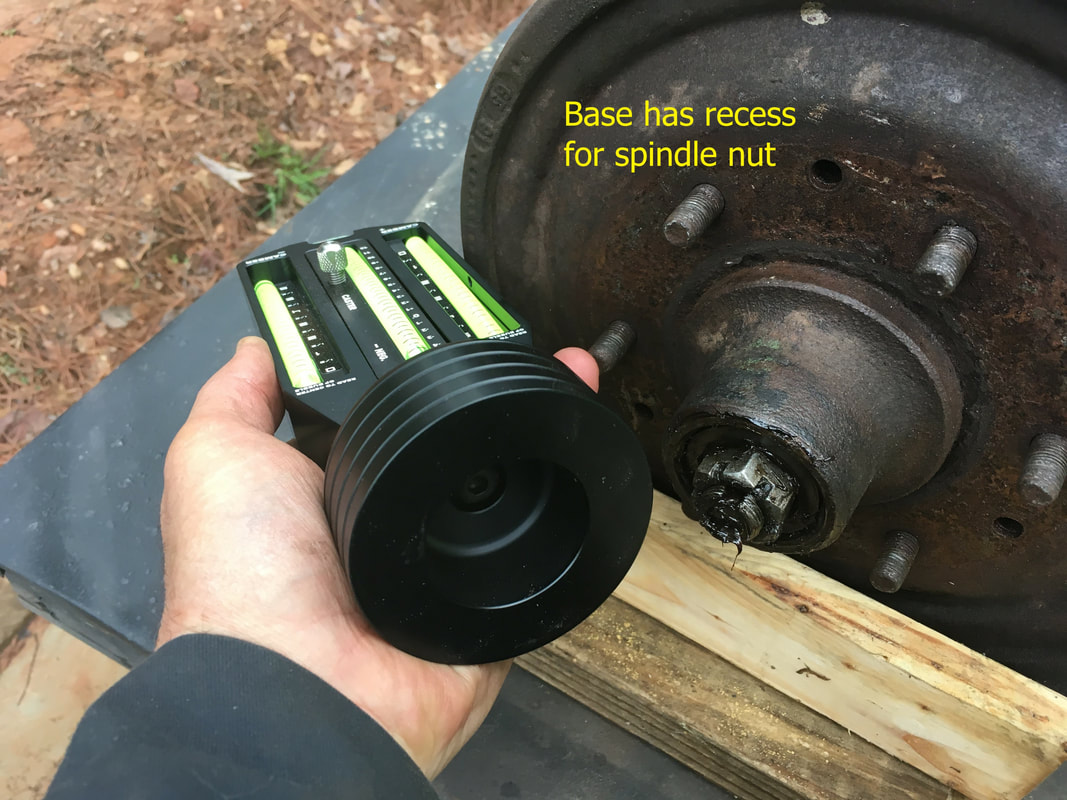
The Longacre Tool base magnetically sticks to the wheel hub and is open in the middle to allow room for the spindle nut.
I downloaded the app to my iPhone for $3. That was easy. Now I want to know if this app is accurate. Otherwise, I just wasted $3.
To check accuracy, I compared Camber readings from my iPhone app to readings from a Longacre Racing Caster/Camber Tool. This assumes that the Longacre Tool was accurately calibrated for accuracy at the factory. Accurate calibration of the iPhone app is dependent on the user.
The Longacre Tool base magnetically sticks to the wheel hub and is open in the middle to allow room for the spindle nut.
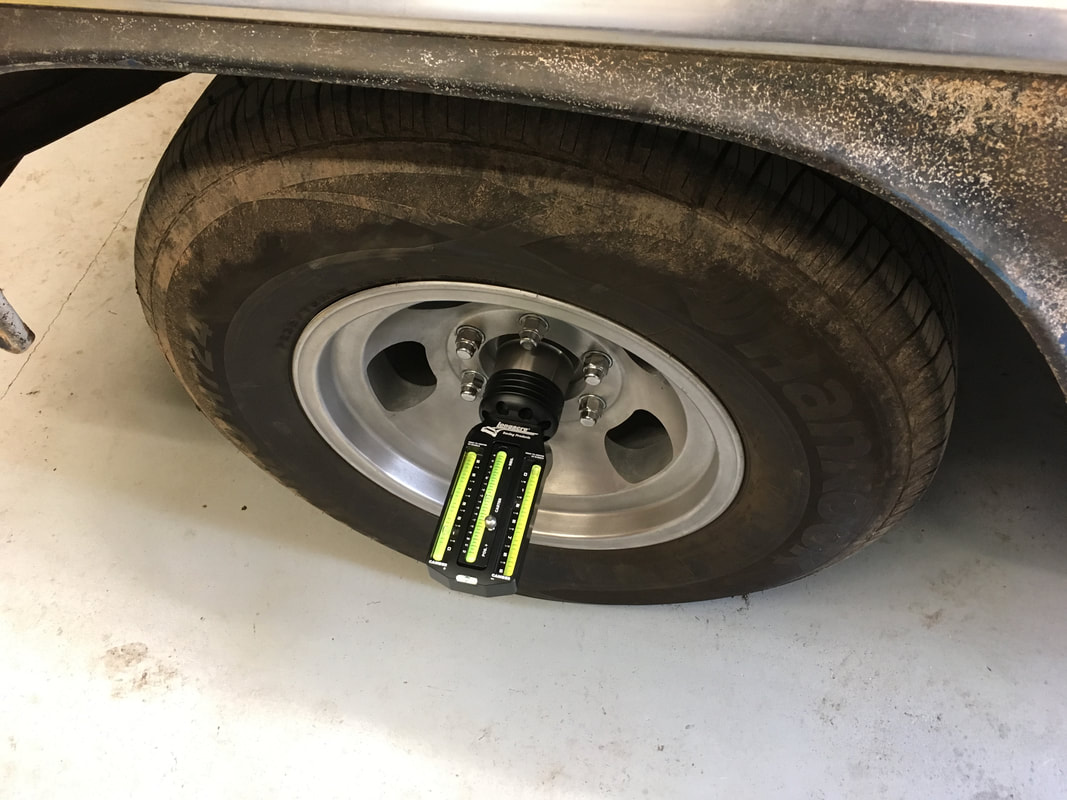
If the front suspension has been off the ground recently, drive the vehicle a short distance to allow the suspension to return to normal.
Make sure the front wheels are on a level surface and pointing straight ahead.
Remove the grease cap and check the end of the hub for any uneven areas or burrs.
Place the Longacre Tool on the hub and twist the tool until the bubble level at the very end shows it is level.
Make sure the front wheels are on a level surface and pointing straight ahead.
Remove the grease cap and check the end of the hub for any uneven areas or burrs.
Place the Longacre Tool on the hub and twist the tool until the bubble level at the very end shows it is level.

If there is positive Camber, read the left column. Read the center of the bubble. This wheel has 1.125 degrees of positive Camber. If there is negative Camber, the bubble on the right side of the tool is used.
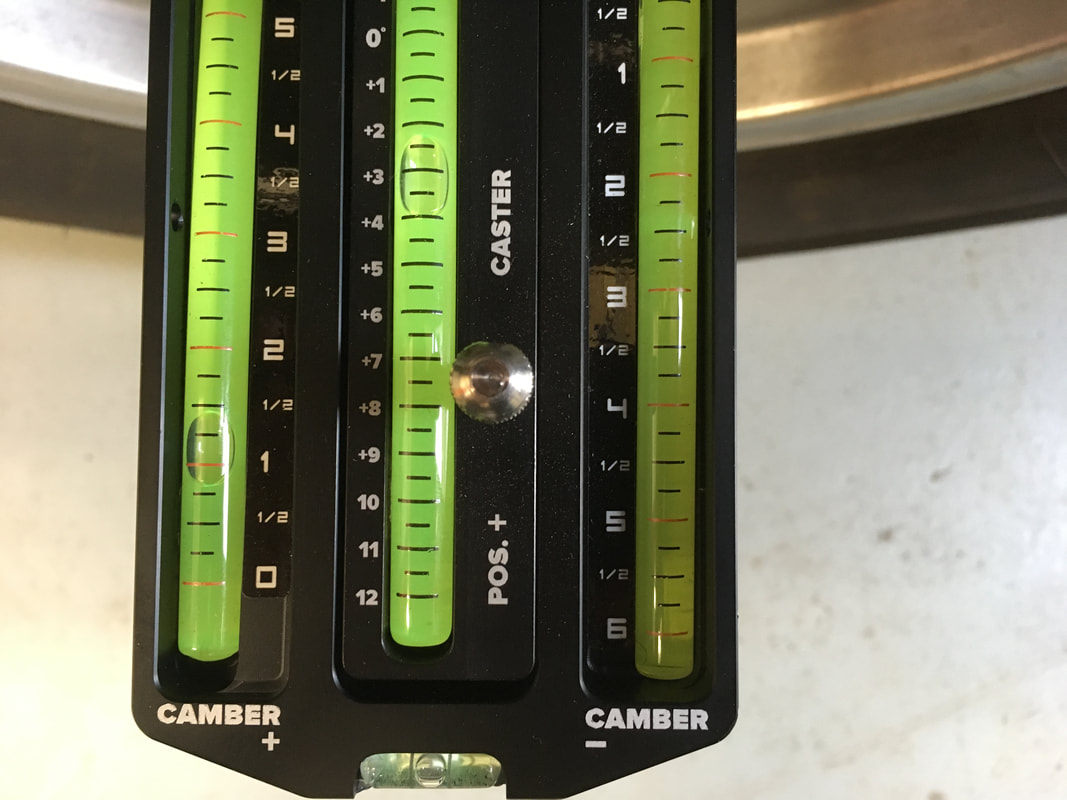
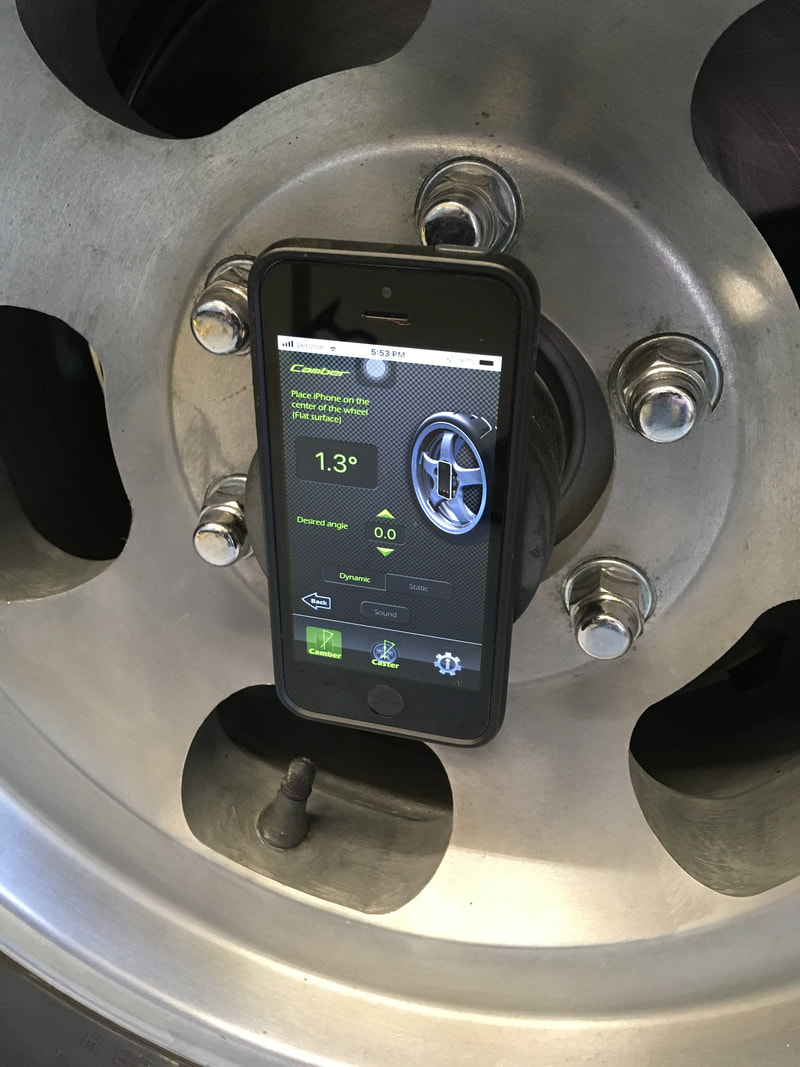
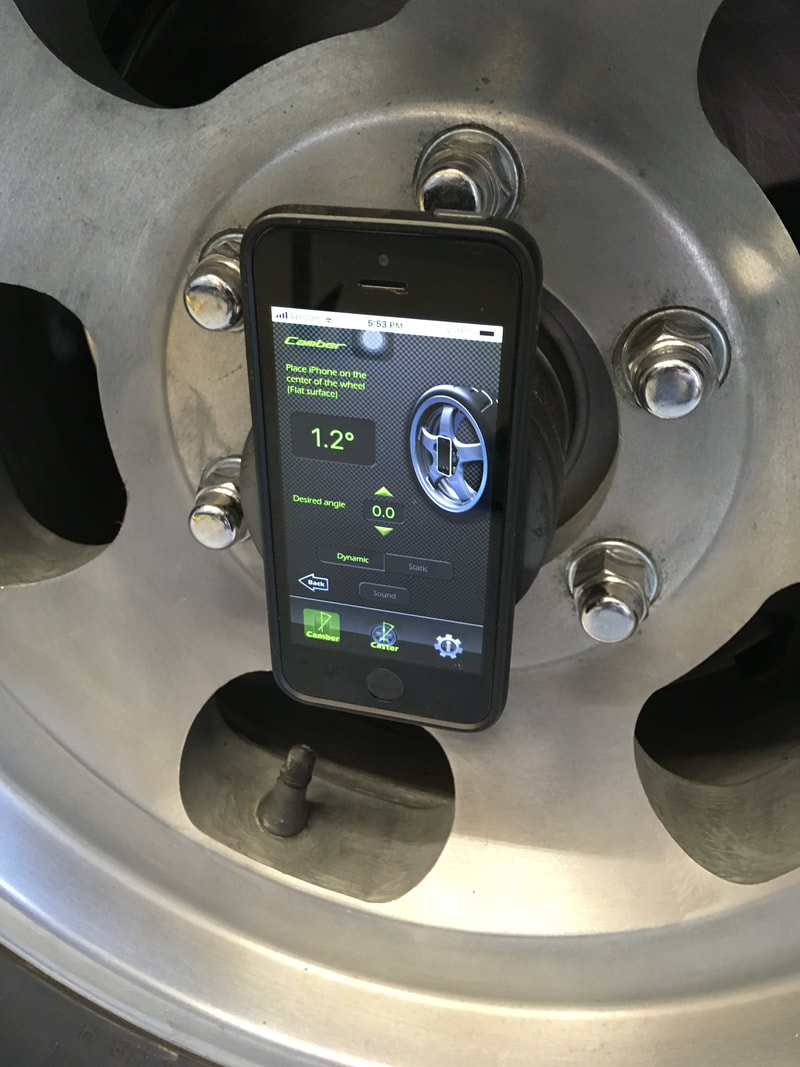
The iPhone app measured 1.1 degrees of positive Camber. That's what I got with the Longacre Racing tool!

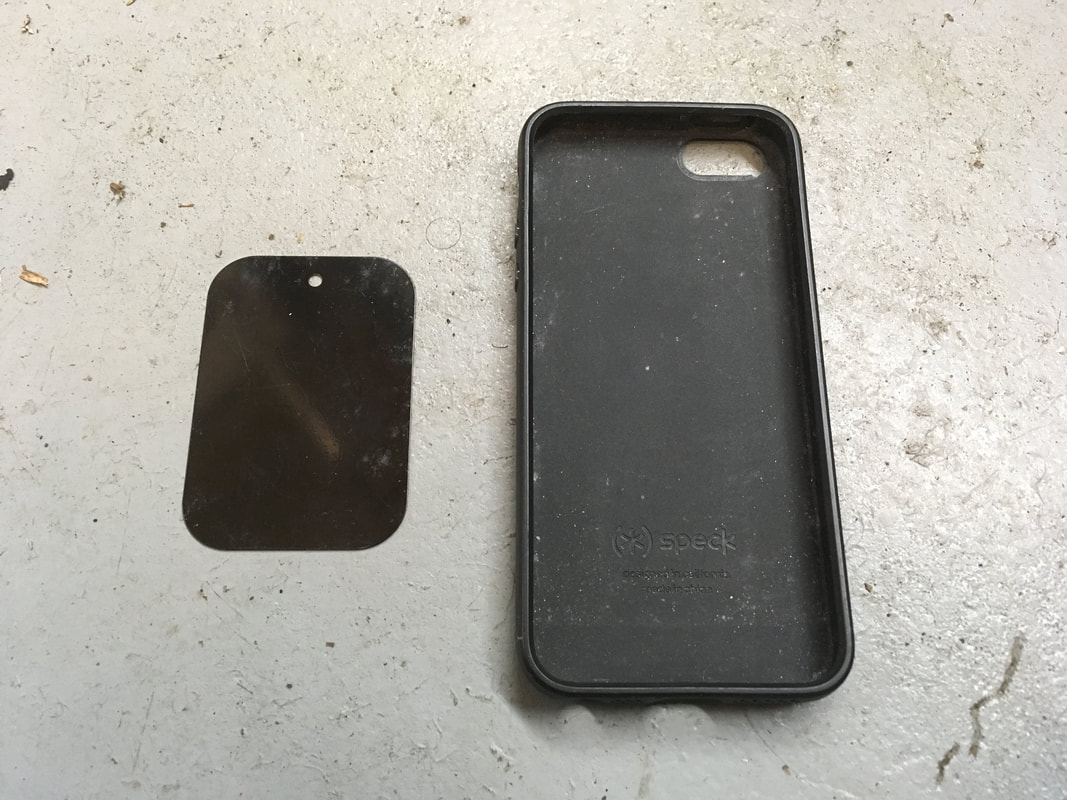
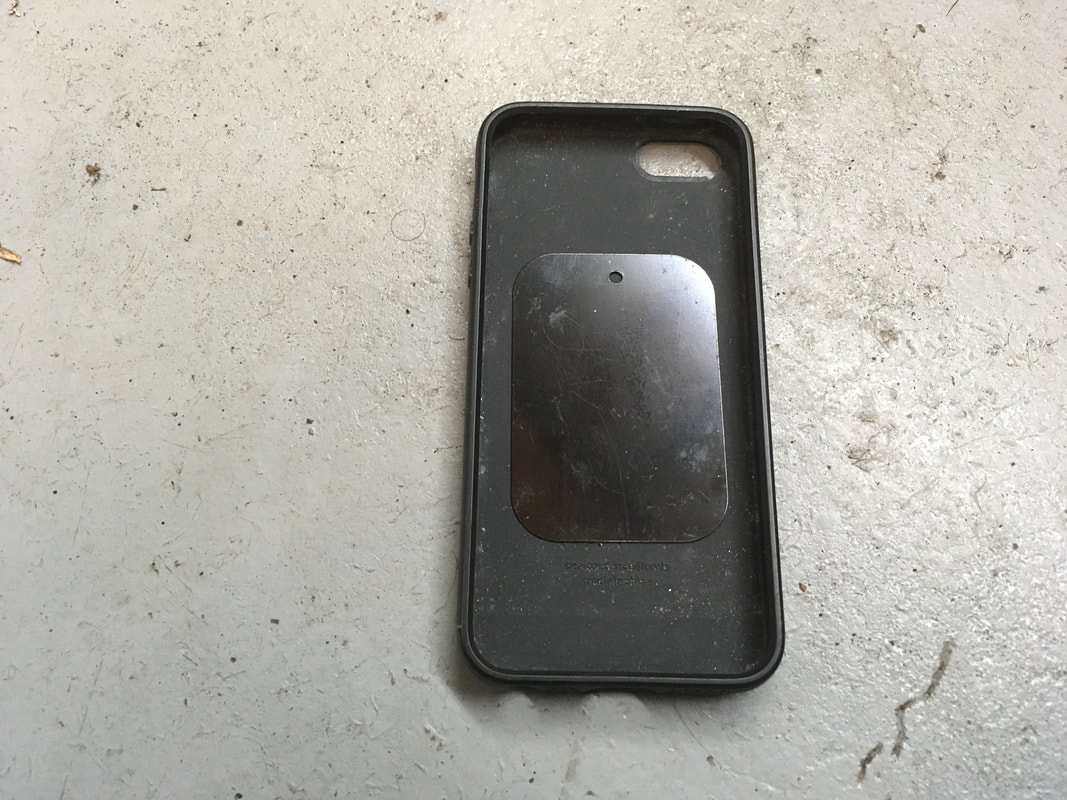
My iPhone has a thin plastic case that I bought for a few dollars on eBay. A thin metal shim is then placed between the phone and plastic case.
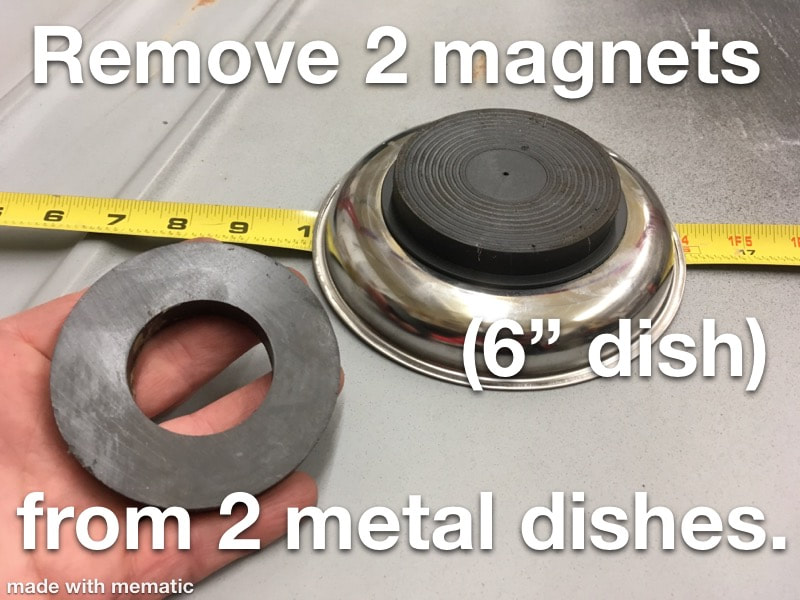
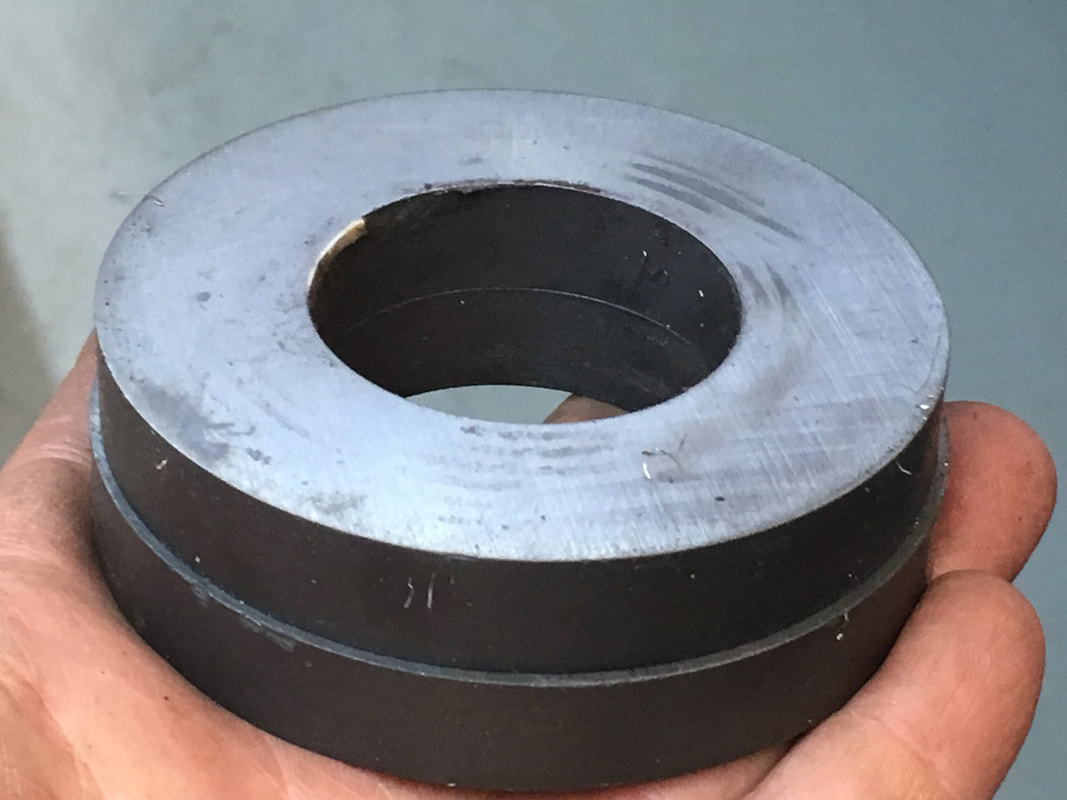
Next, remove two magnets from 2 Harbor Freight 6" Parts Dishes. The 4" dish magnets won't fit over the spindle nut. Stack 2 magnets together and use a digital caliper or similar tool to confirm the thickness of the stacked magnets is uniform.
Next, remove two magnets from 2 Harbor Freight 6" Parts Dishes. The 4" dish magnets won't fit over the spindle nut. Stack 2 magnets together and use a digital caliper or similar tool to confirm the thickness of the stacked magnets is uniform.
|
|

|
|
|
|
The metal shim inside the case will allow the iPhone to stick to the magnets.

The iPhone can be used for several tasks. It has a free app that works like a level in two planes simultaneously.
|
The "level app" seen here simultaneously confirms my phone is perfectly vertical and is not tilted left or right. You can also use it to verify a level floor.
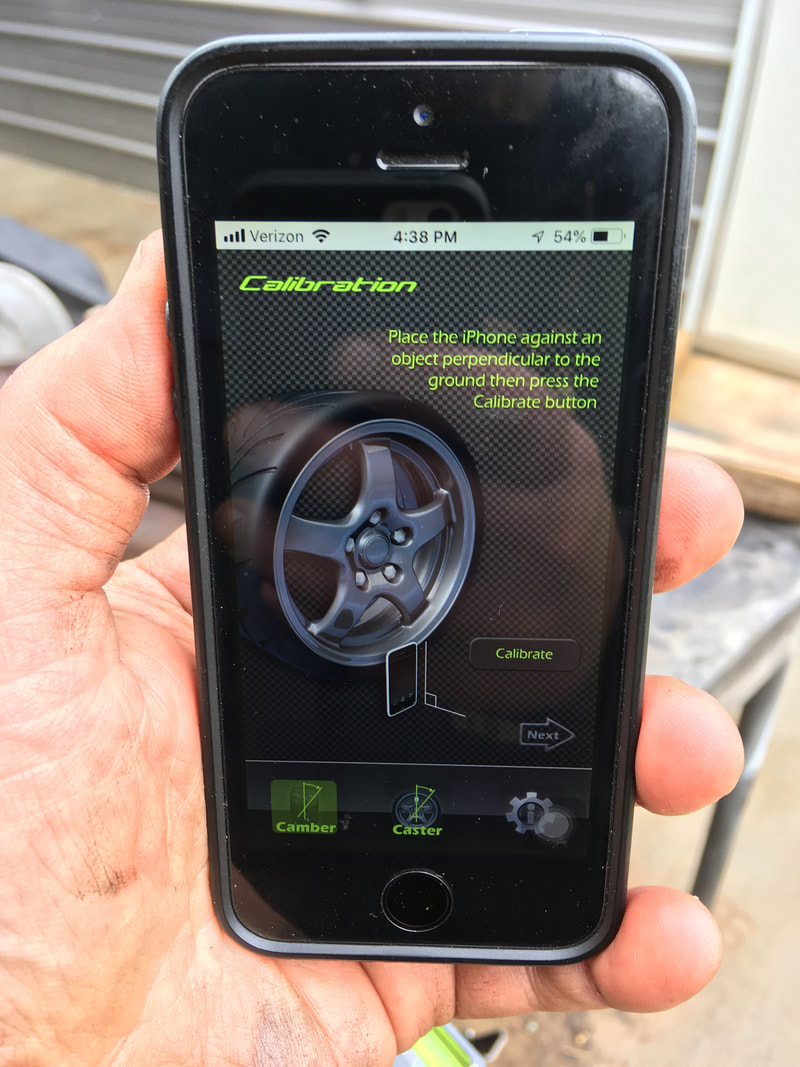
Without moving the position of the phone, switch to the Camber calibration screen and calibrate the Camber app. 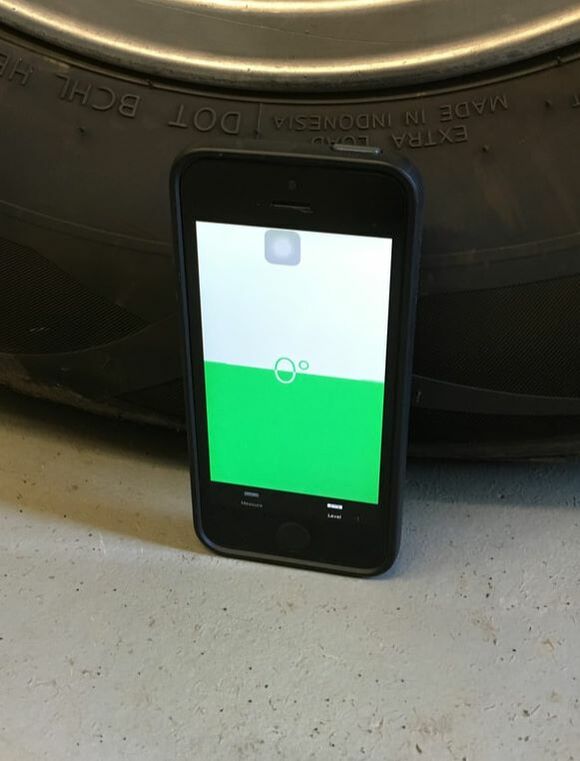
|
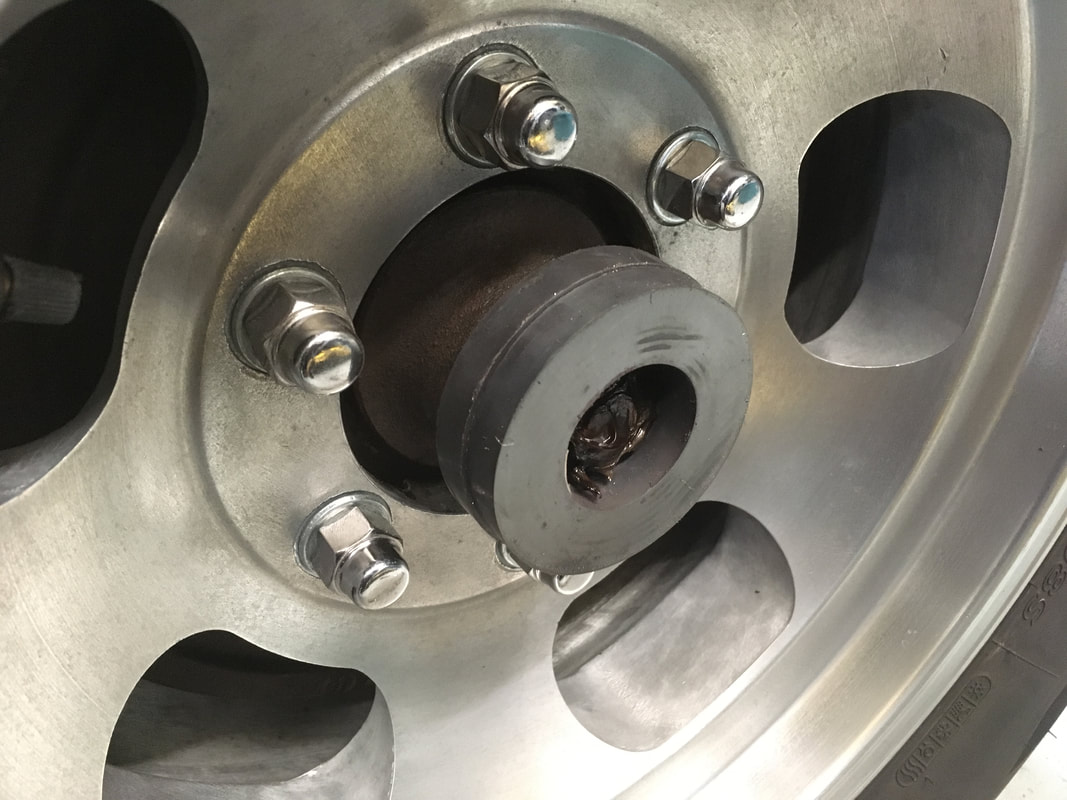
Here's a close up view of the Camber calibration screen. The phone would of course remain on the floor during calibration. Next, stick it to the Harbor Freight magnets already on the hub.
|
Proper calibration of the iPhone app is essential. If the calibration is done properly, Camber readings will be accurate and reproducible. It may not be better than other tools, but it is accurate and economical.
|
|

