DIY Wiring Tips
Here are ideas to help you get the results you want when installing your own wiring kit. I learned most of this by trial and error.
A quality kit will have excellent instructions and diagrams that show you each step. However, the instructions usually do not warn you how to avoid making some common mistakes.
A quality kit will have excellent instructions and diagrams that show you each step. However, the instructions usually do not warn you how to avoid making some common mistakes.
I'm not a pro at this. I've rewired 3 classic Chevrolet trucks. I'm very happy with the results in my 3rd truck because I learned things from the first two. So, I thought I'd pass along some helpful tips to make your life easier and give you some extra confidence.
I'll cover 6 simple rules
Rule #1. Buy a quality kit.
Rule #2. Use a good quality CRIMPING TOOL.
Rule #3. Use quality terminals and connection blocks.
Rule #4. Group wires together to form a cable whenever possible.
Rule #5. Anchor wires properly.
Rule #6. Protect the wires with a quality loom after completion of the wiring project.
Rule #1. Buy a quality kit.
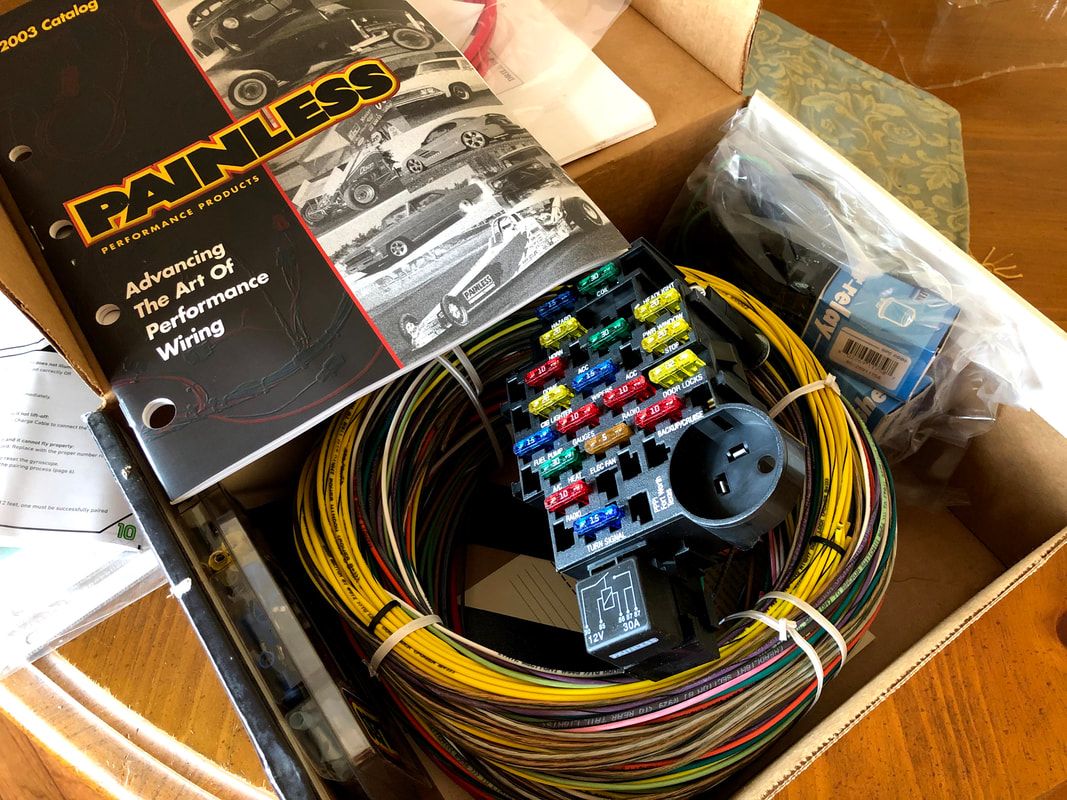
A quality kit usually has everything you need and plenty of extra wire. There will be fewer additional items to buy to get the job done, and that means fewer delays.
This Painless kit is a universal kit. Much of the wiring was already connected to the fuse box. I needed to disconnect unwanted circuits from the fuse box BEFORE I started the installation.
|
|
This American Autowire Classic Update kit (shown below) was also pre-connected to the fuse box.
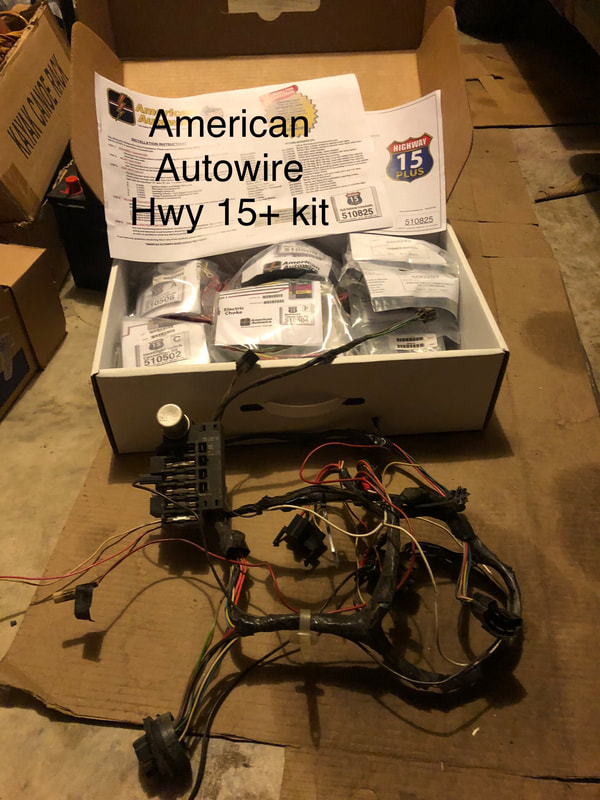
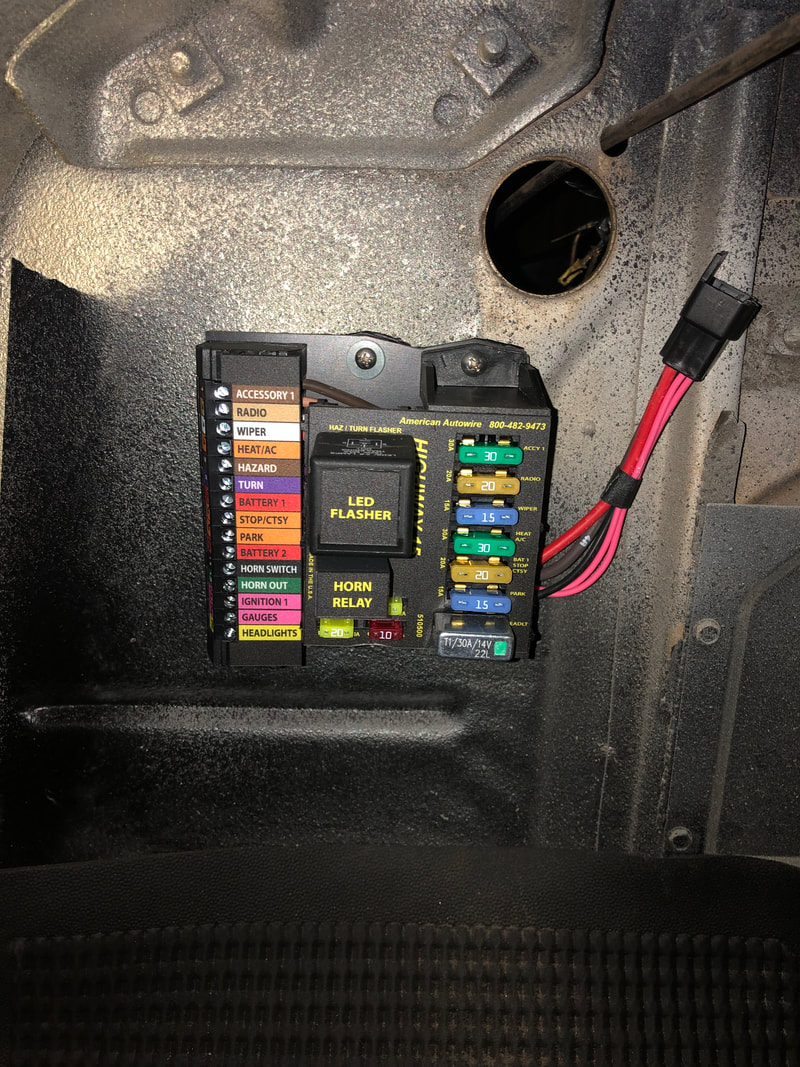
This American Autowire Highway 15+ kit is also a universal kit. The fuse box had only a few wires pre-connected. This was my favorite kit so far.
|
My original 1963 fuse box with under dash harness is pictured below the kit.
|
The AAW Highway 15+ kit fuse box looks just like this right out of the box. I get to decide what circuits to use.
|
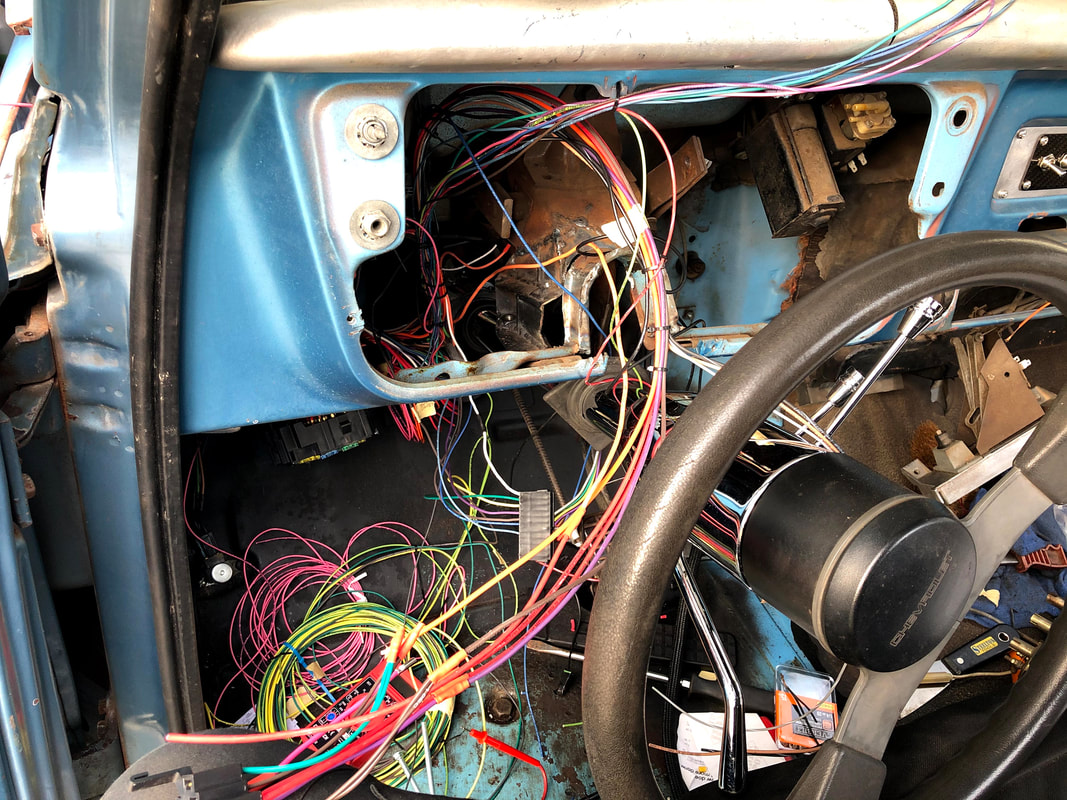
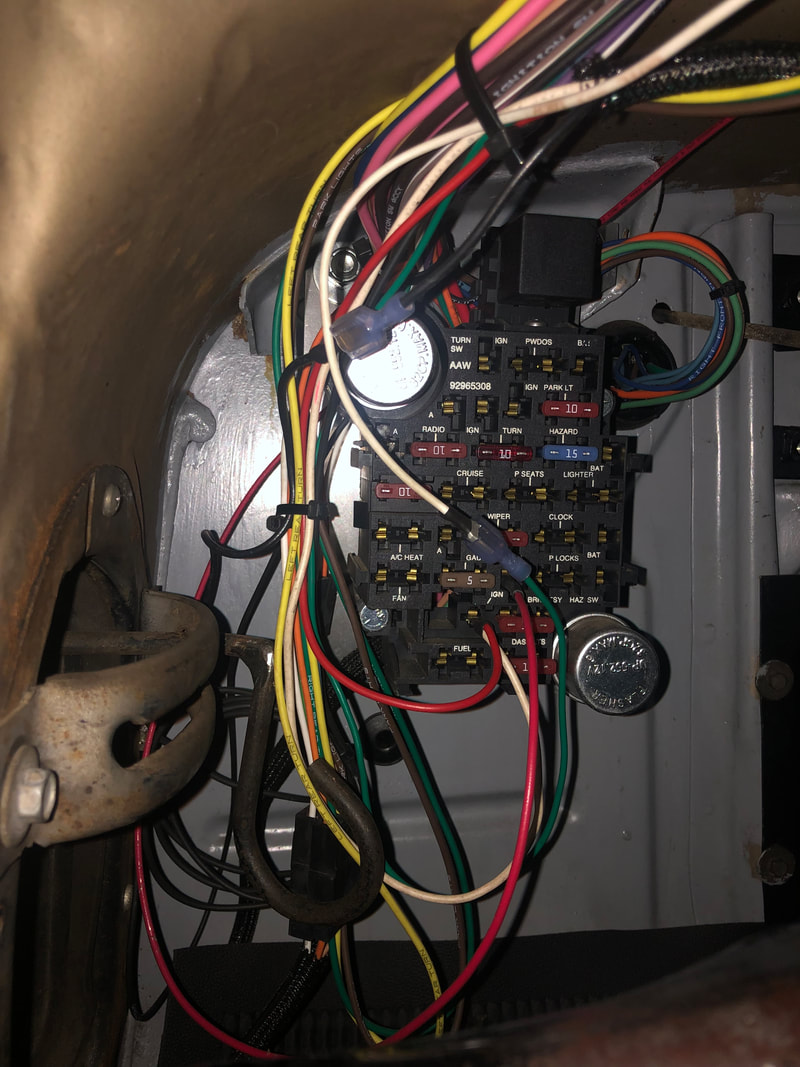
Here's an example of the situation MOST people are afraid of. What goes where? I hope my tips will help you avoid this problem.
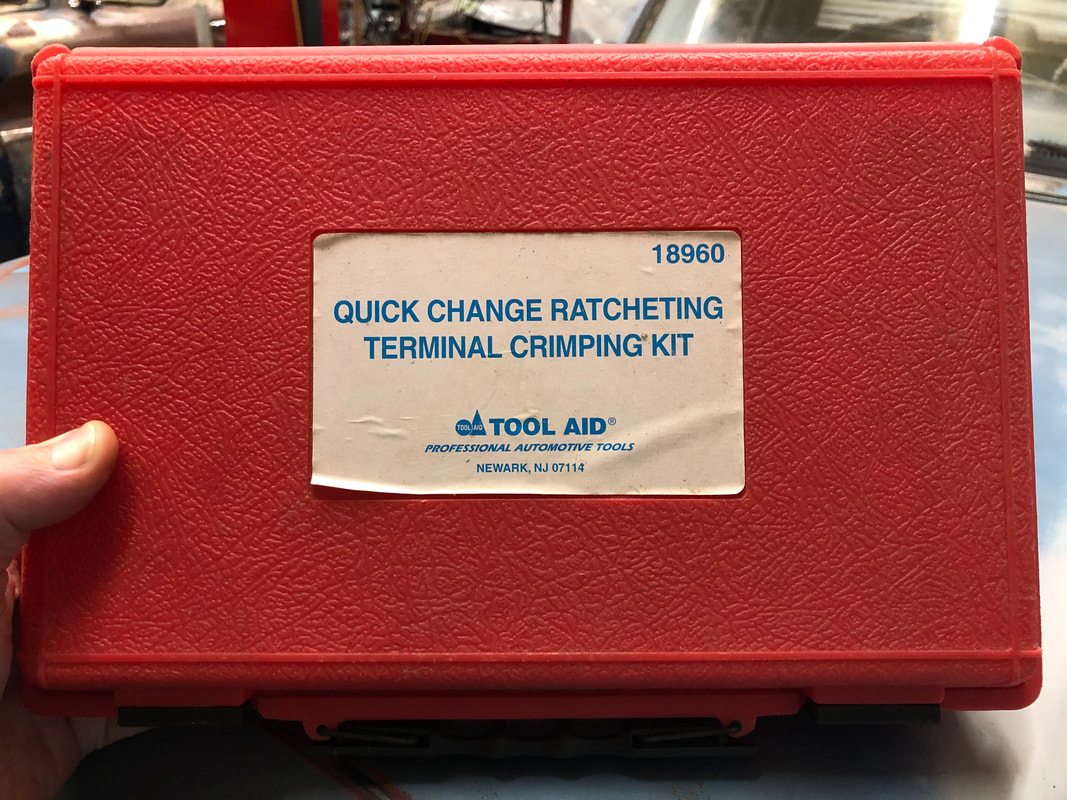
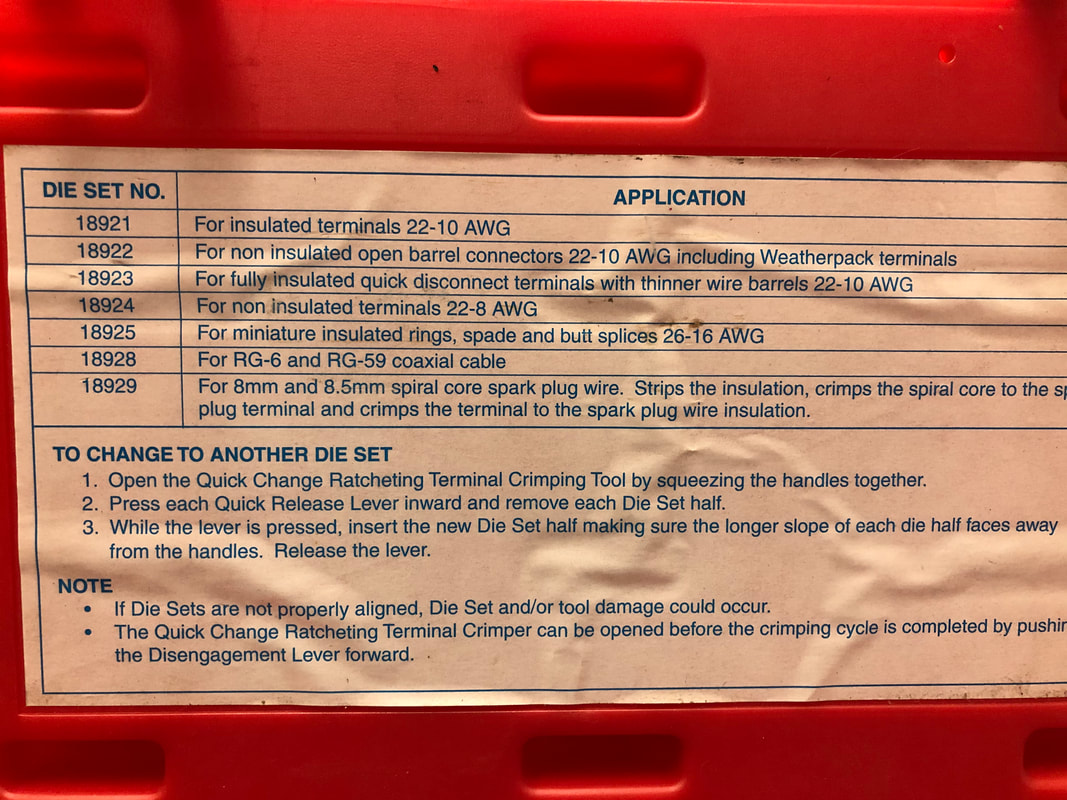
Rule #2. Use a quality crimper.
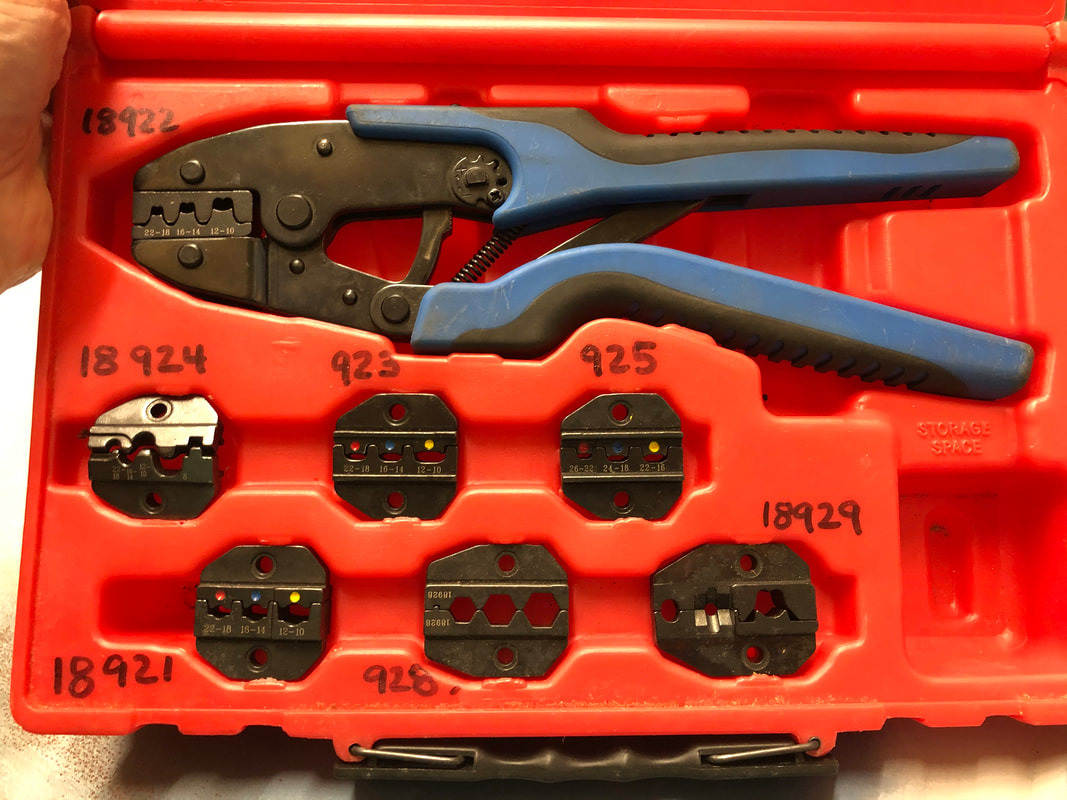
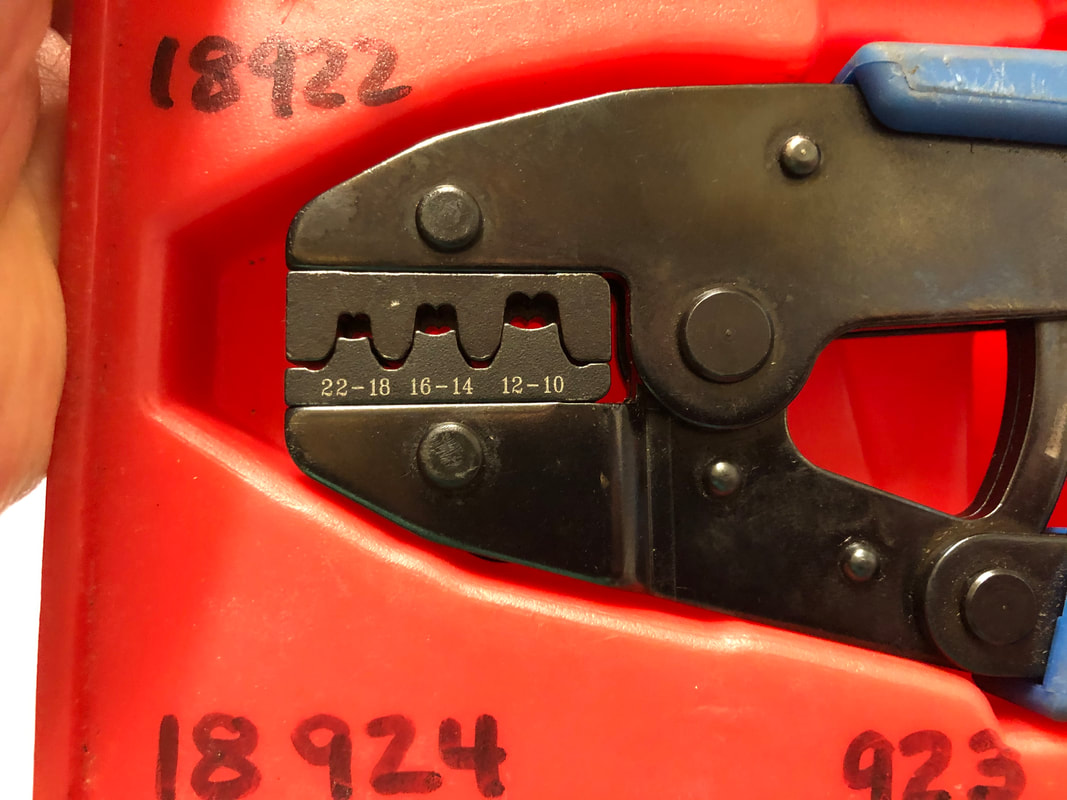
Here's the terminal crimper I use. I'm sure other crimpers work well too. Each die performs a different crimp. Getting a nice crimp takes a little practice but a properly made crimp will make you look like a pro.
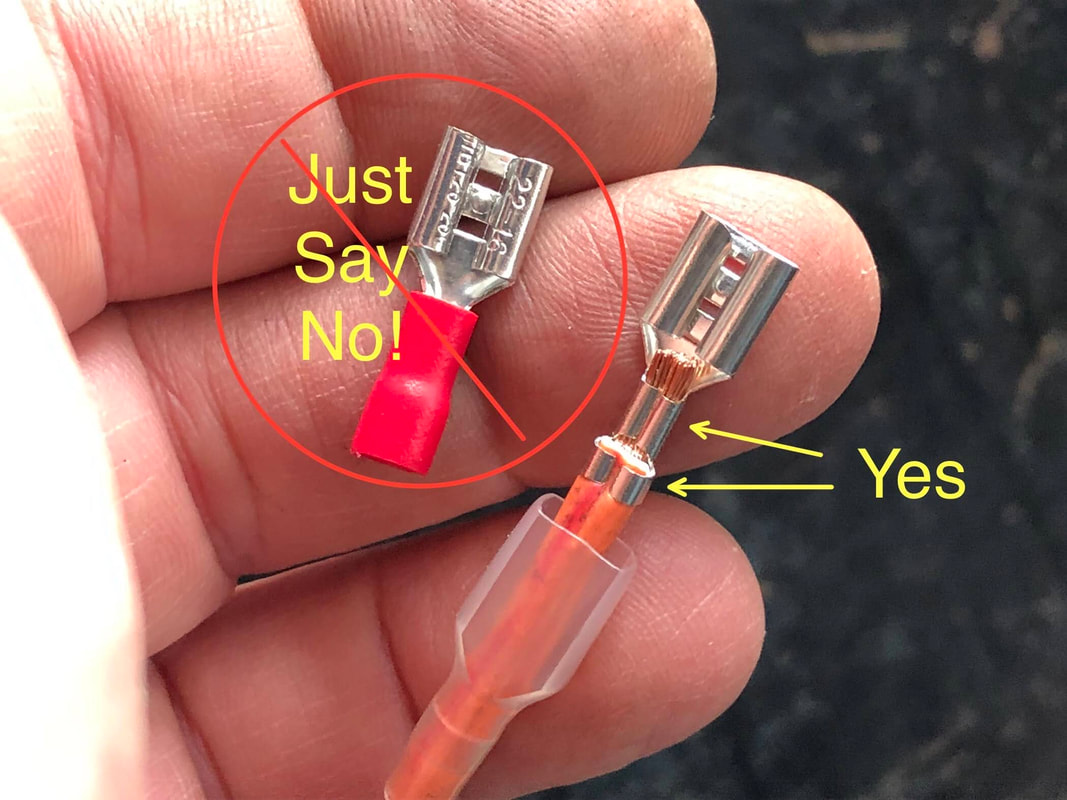
Adding a small piece of adhesive lined shrink wrap to the wire BEFORE you crimp the terminal is a good idea BUT . . . if the terminal will slide INSIDE a connection block, then the shrink wrap usually gets in the way and isn't needed.
Adding a small piece of adhesive lined shrink wrap to the wire BEFORE you crimp the terminal is a good idea BUT . . . if the terminal will slide INSIDE a connection block, then the shrink wrap usually gets in the way and isn't needed.
|
|
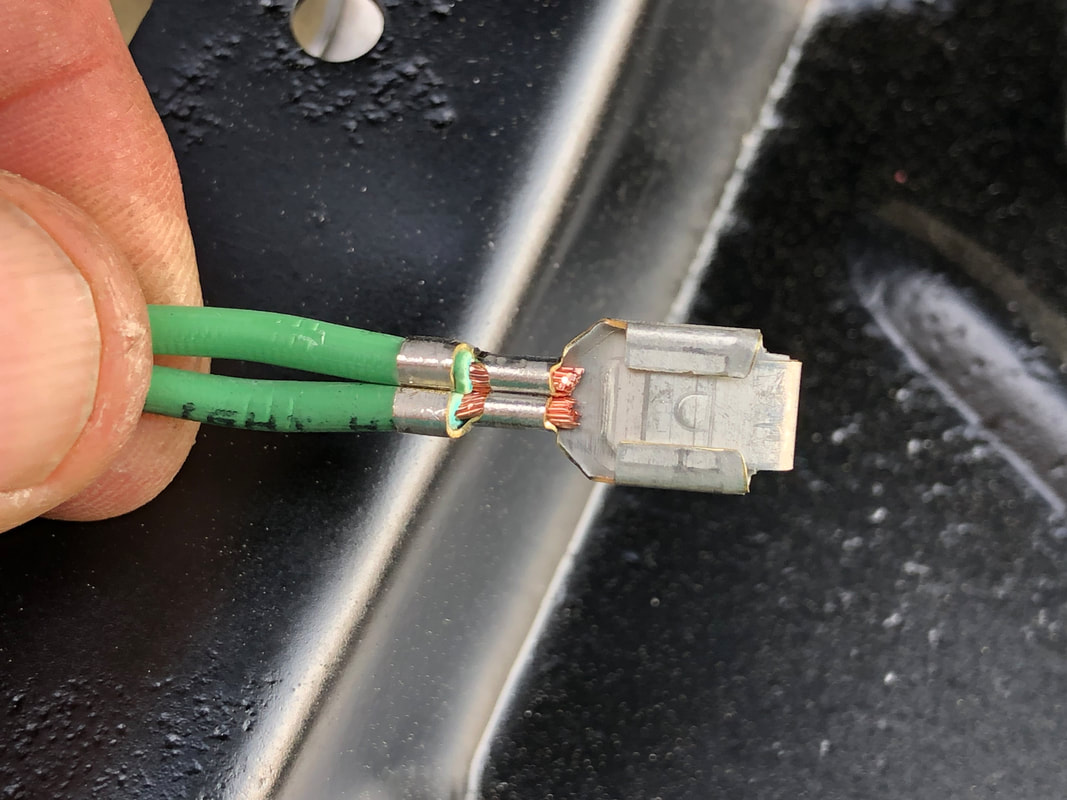
I usually pre-bend the terminal tabs a little and then finish the job with the crimper.
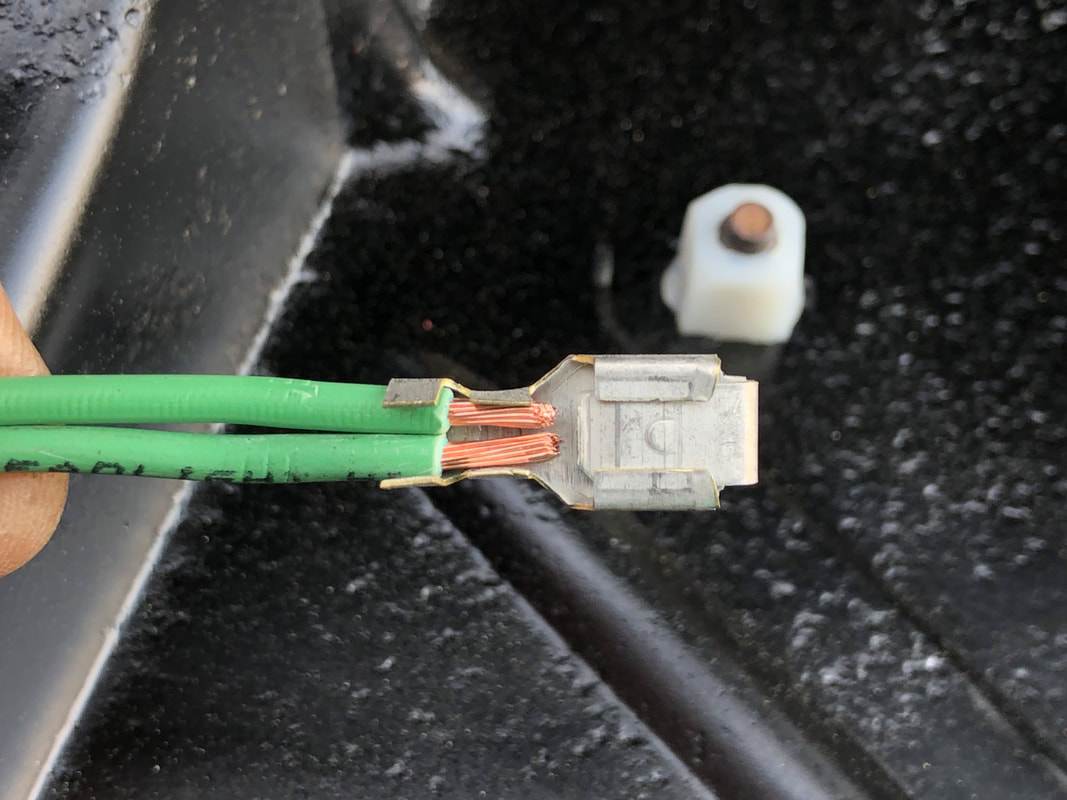
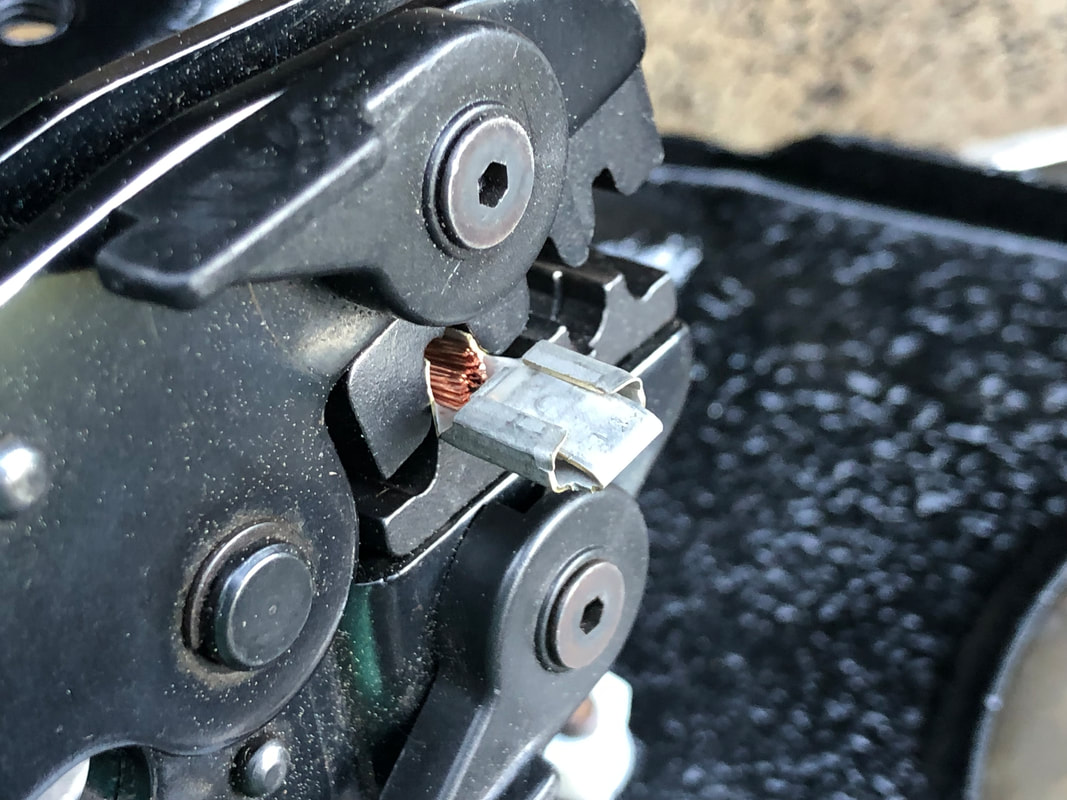
The copper wire and the insulation are both properly crimped. A satisfying result.
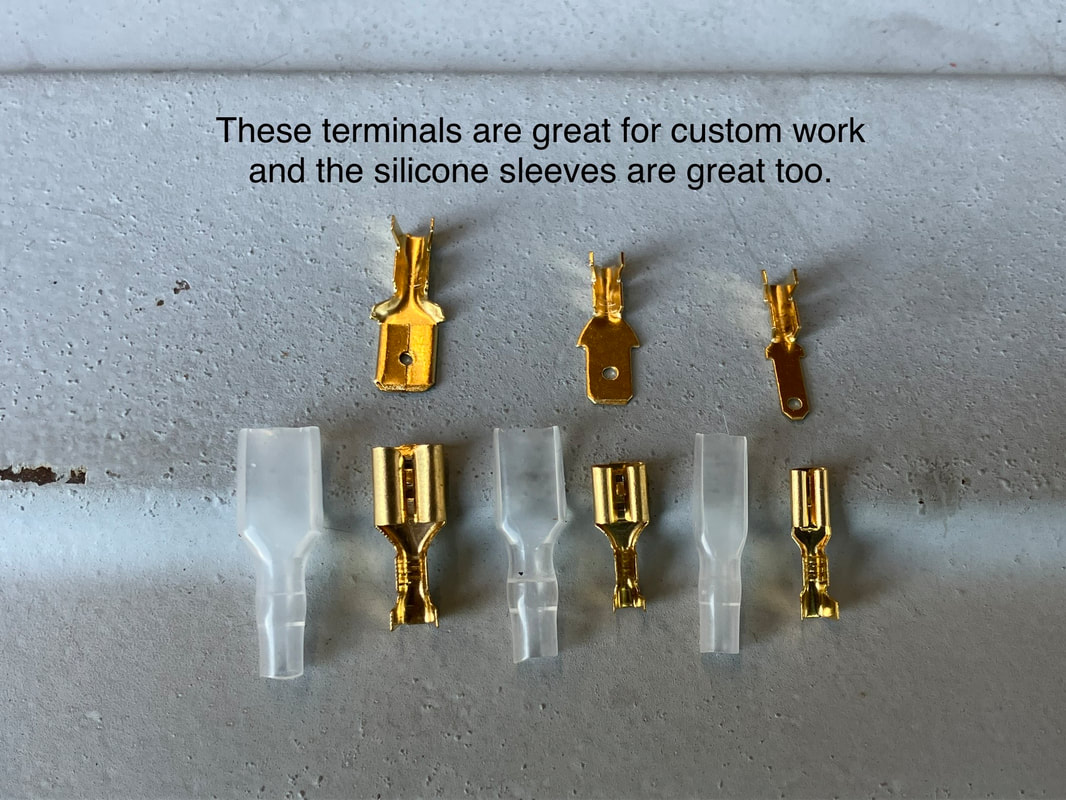
Rule #3. Use quality terminals and connection blocks.
A quality wiring kit will include all the terminals and connection blocks you need. It might include extra terminals to allow you to practice your crimps.
A universal kit might NOT have all the terminals and connection blocks you need for all of your original firewall and dash connections. Save and reuse your original connection blocks if they are in good shape.
Some of the more common connection blocks are reproduced and available from vendors, but that's beyond the scope of this DIY.
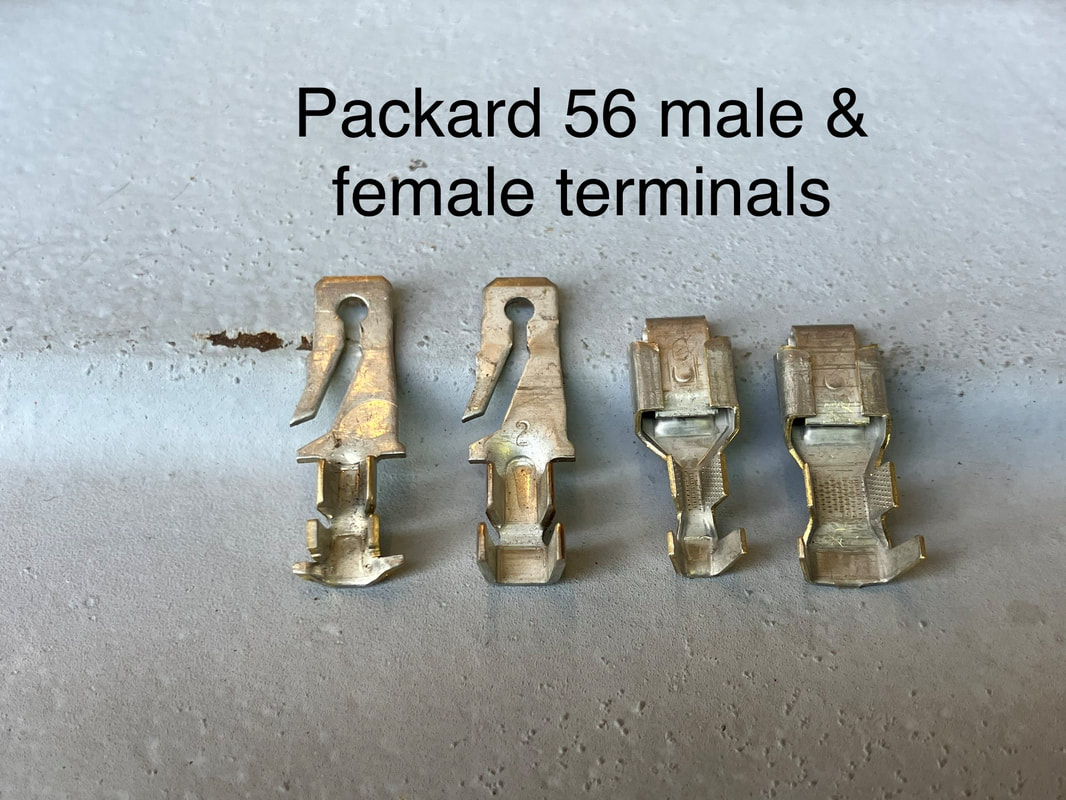
Clipsandfasteners.com sells OEM Packard style terminals. LINK HERE

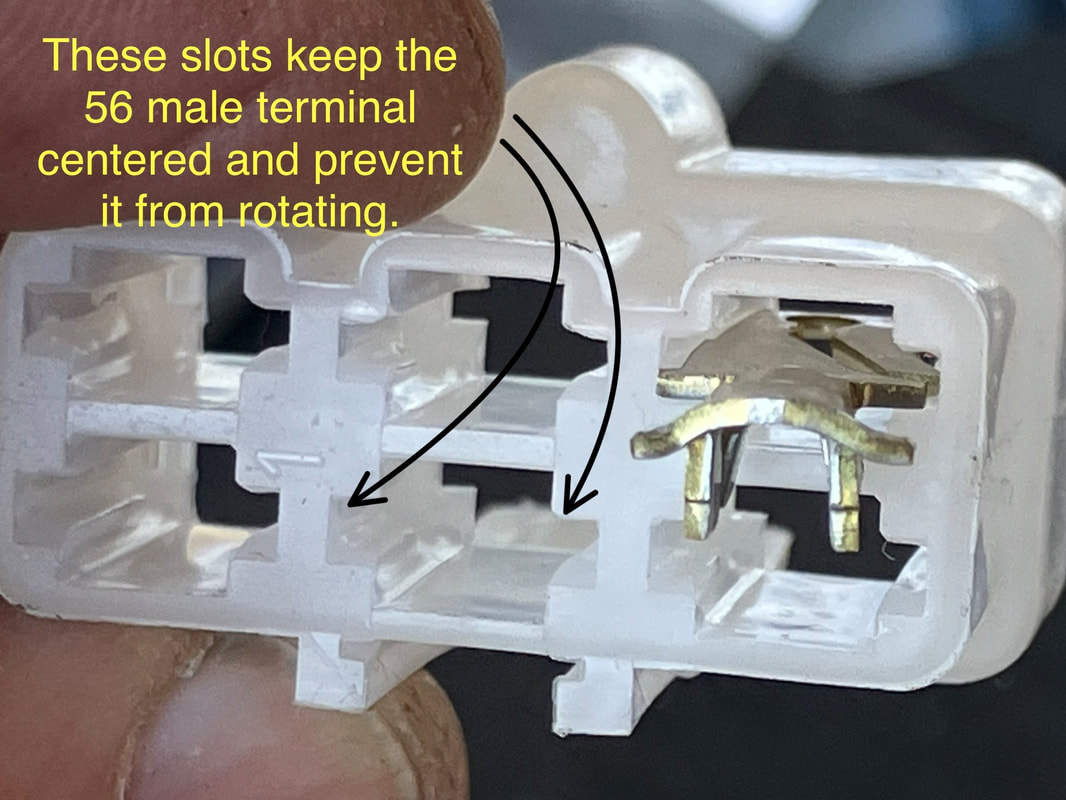
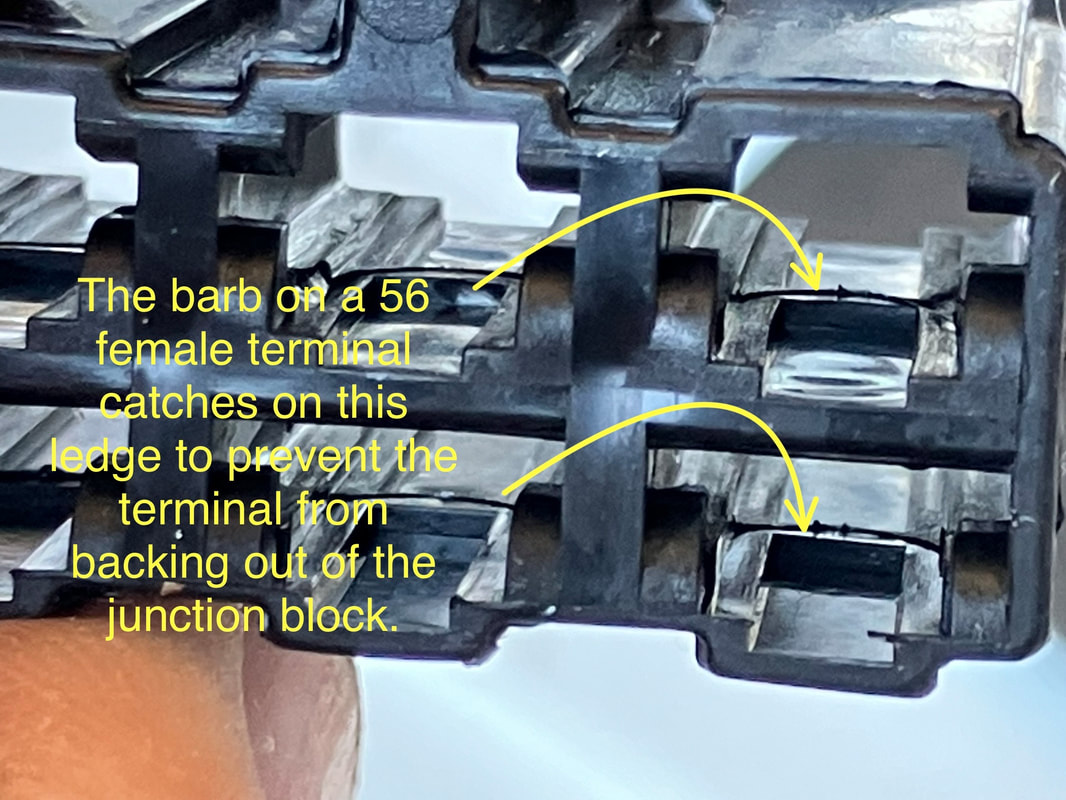
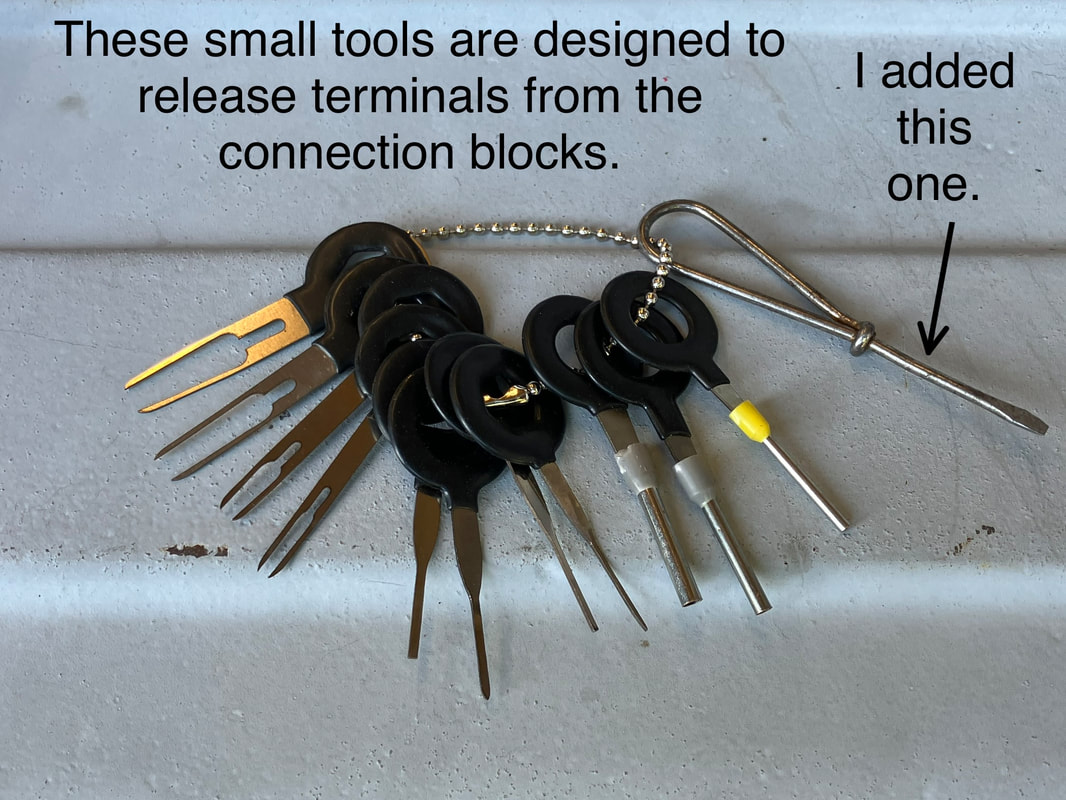
Connection blocks hold multiple terminals securely but still allow you to disconnect the wires later if needed. They are usually found at the firewall, the instrument cluster and light harnesses. A special tool can be used to release a terminal from inside the connection block.
|
|
|
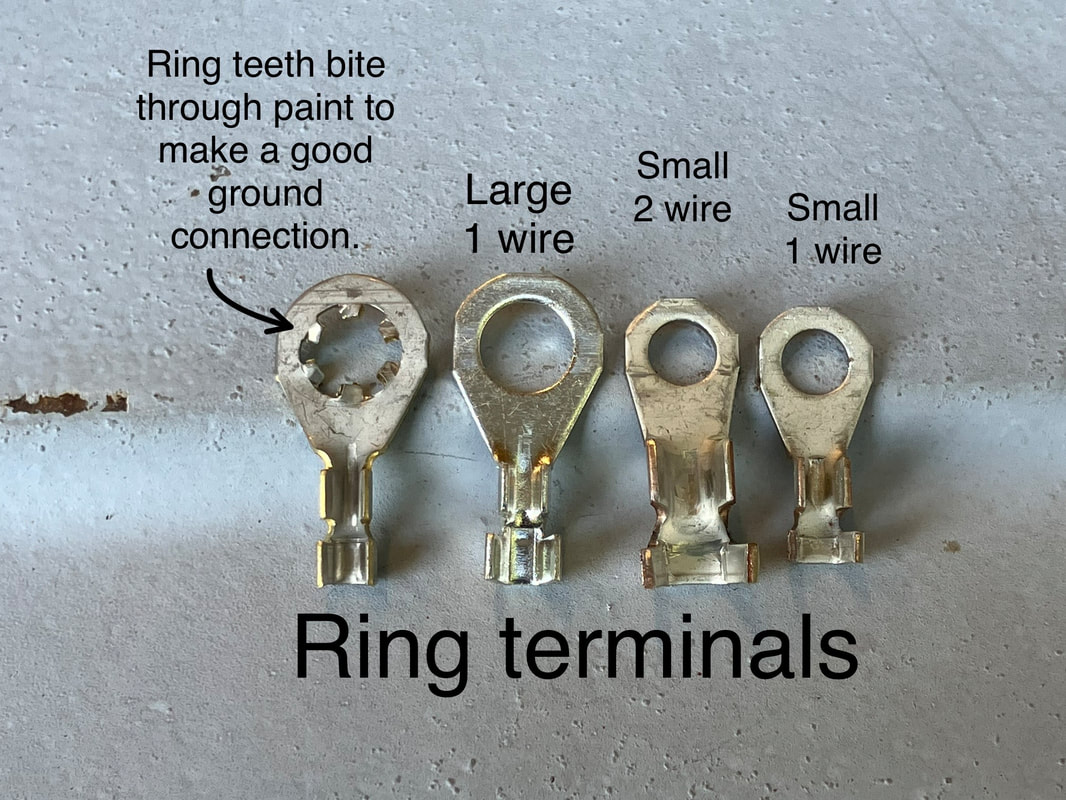
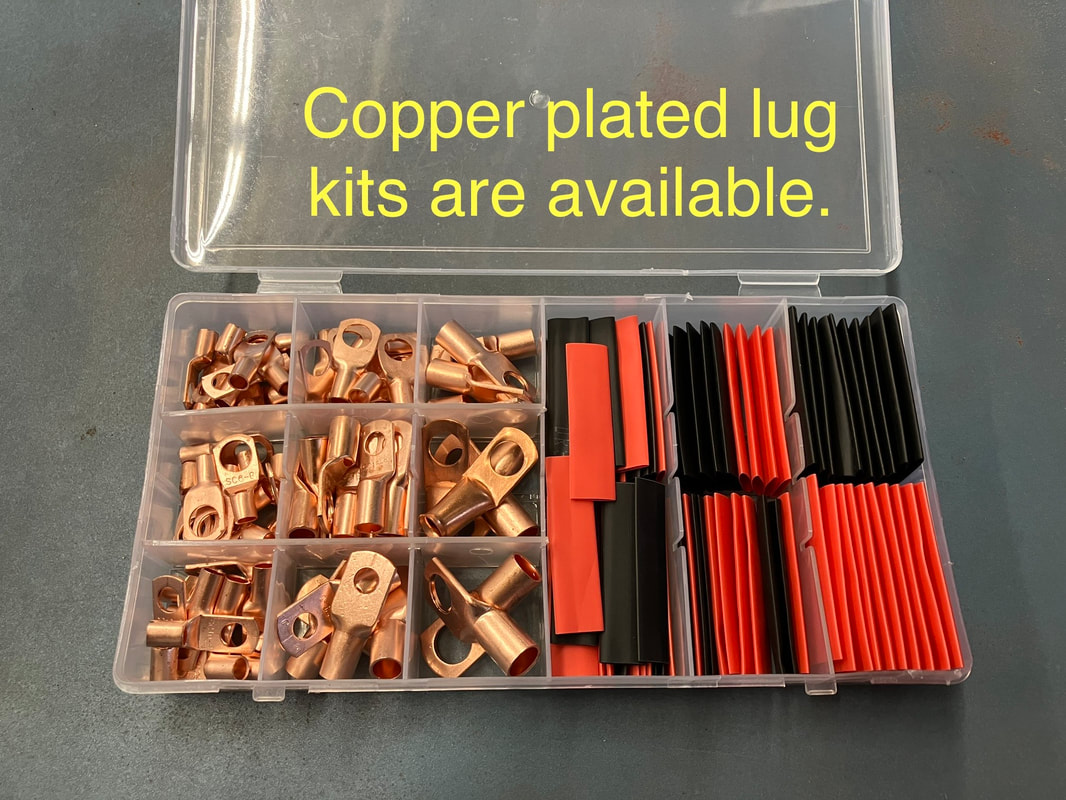
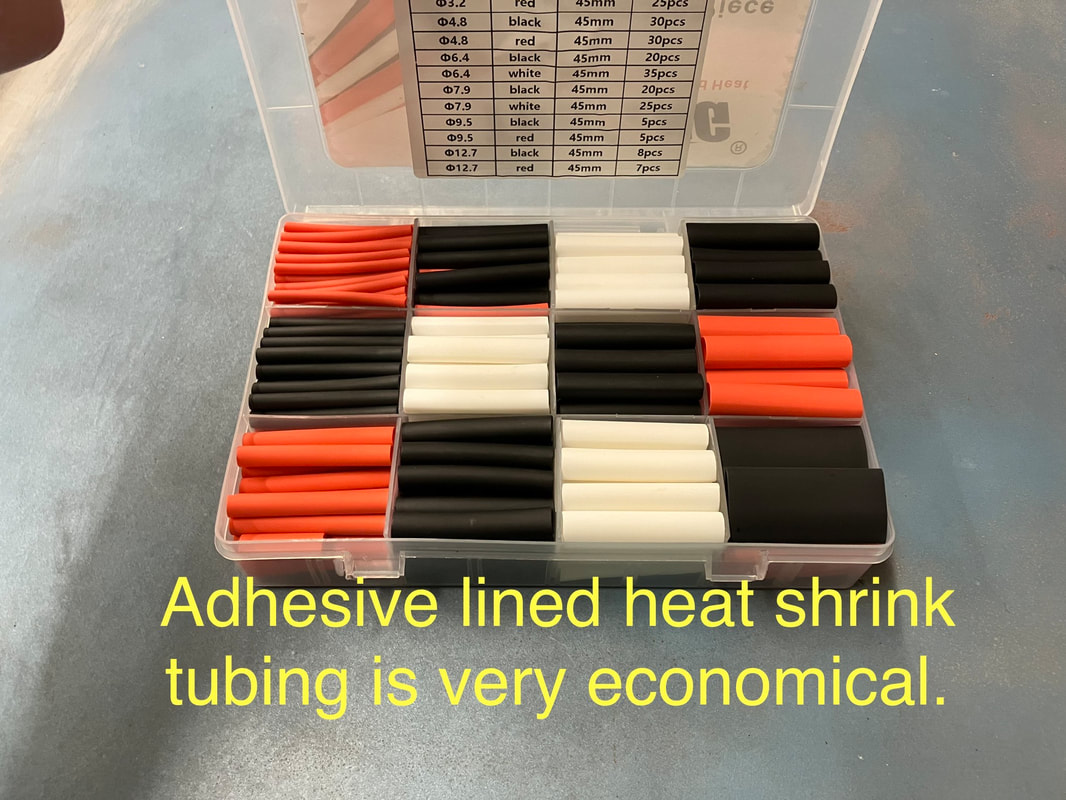
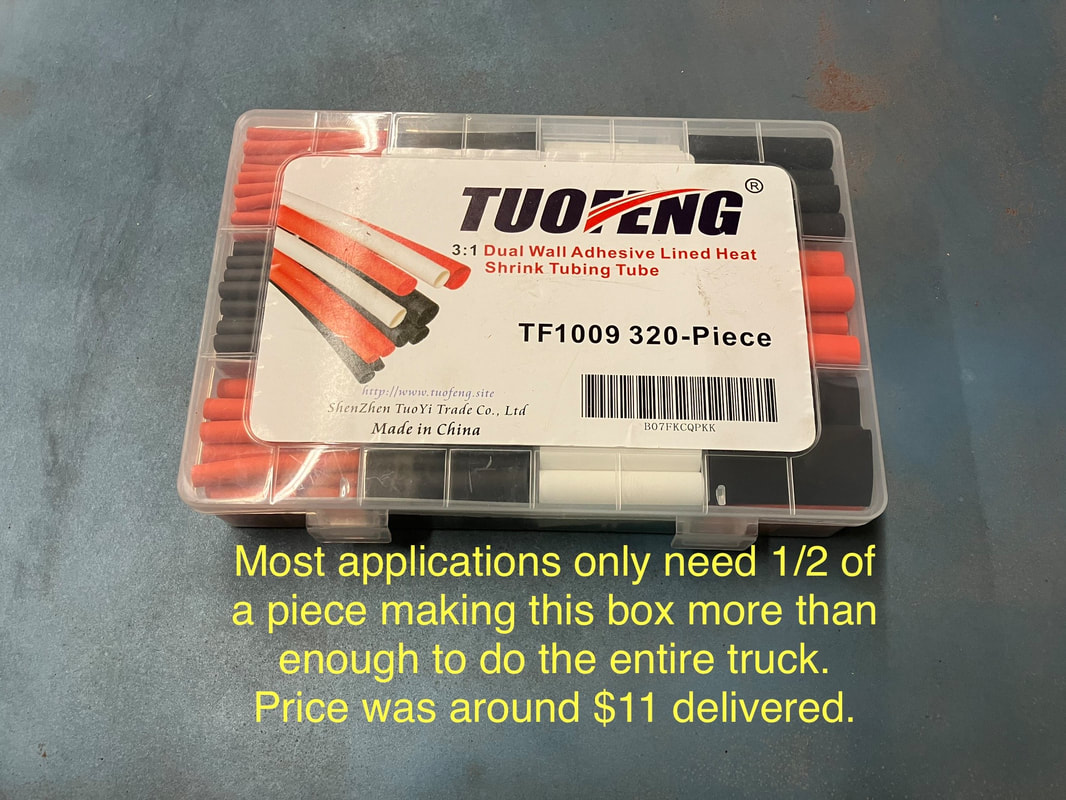
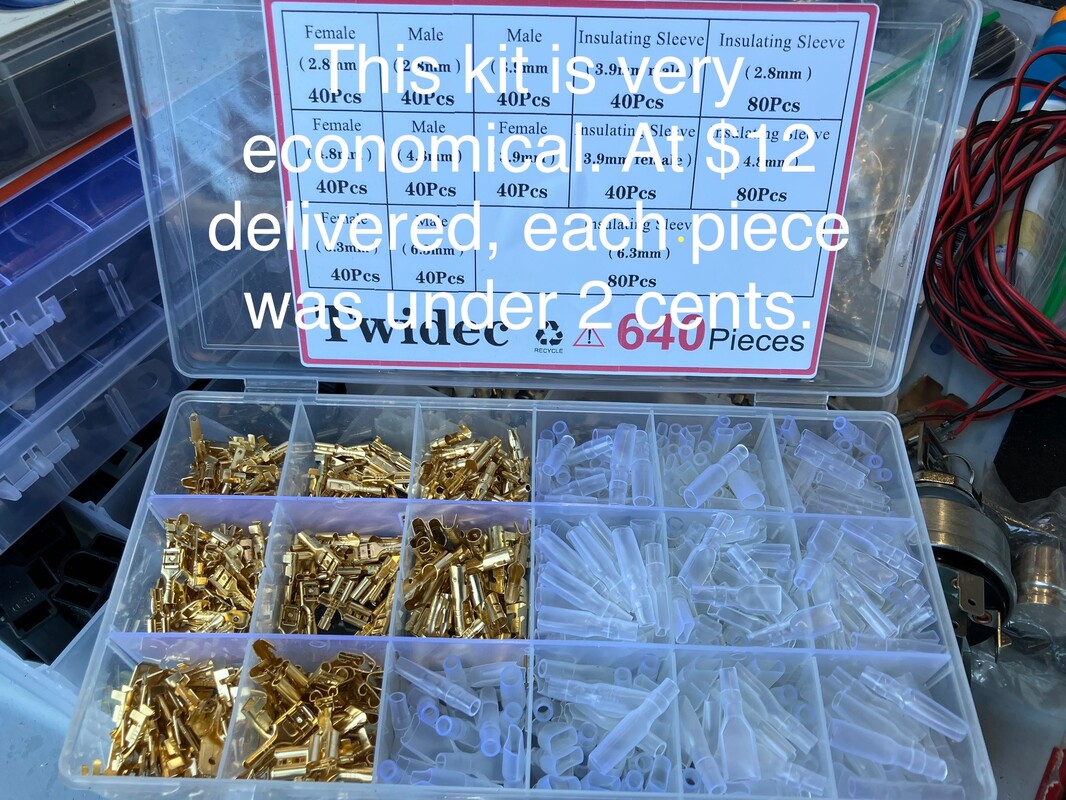
Good quality copper lug kits and shrink tubing kits are available from online vendors. Very affordable.
|
|
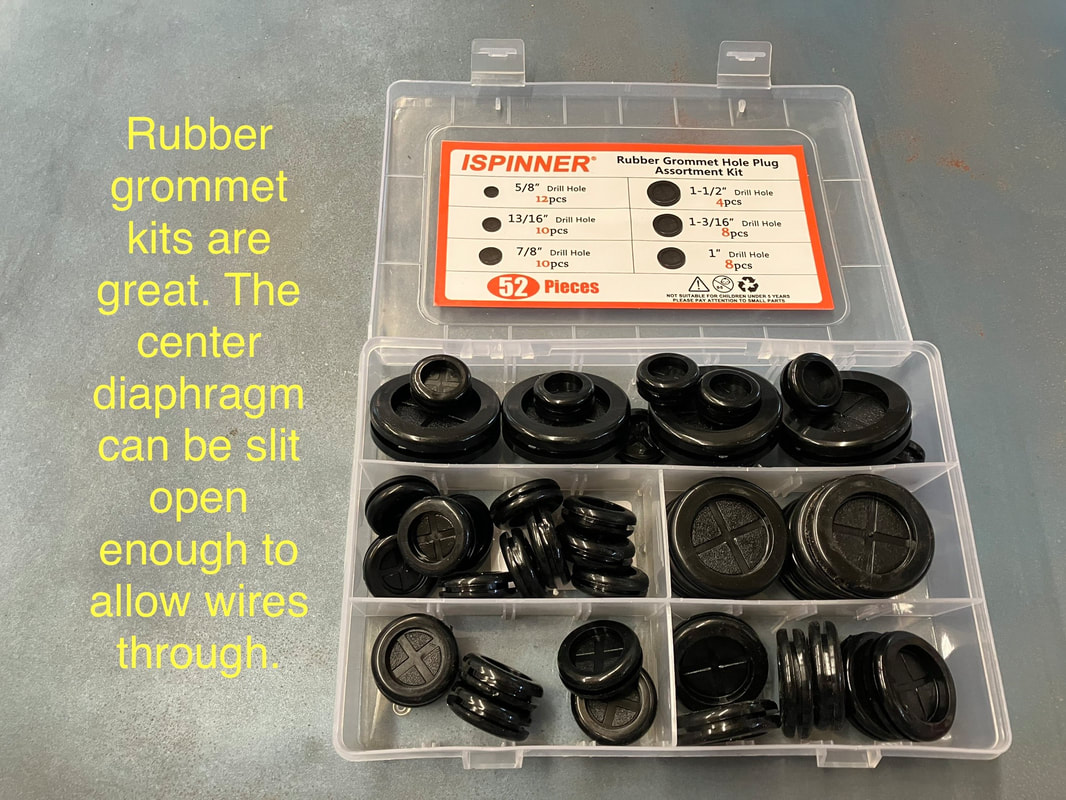
A new grommet should be used to protect wires that pass through a hole in the sheet metal.

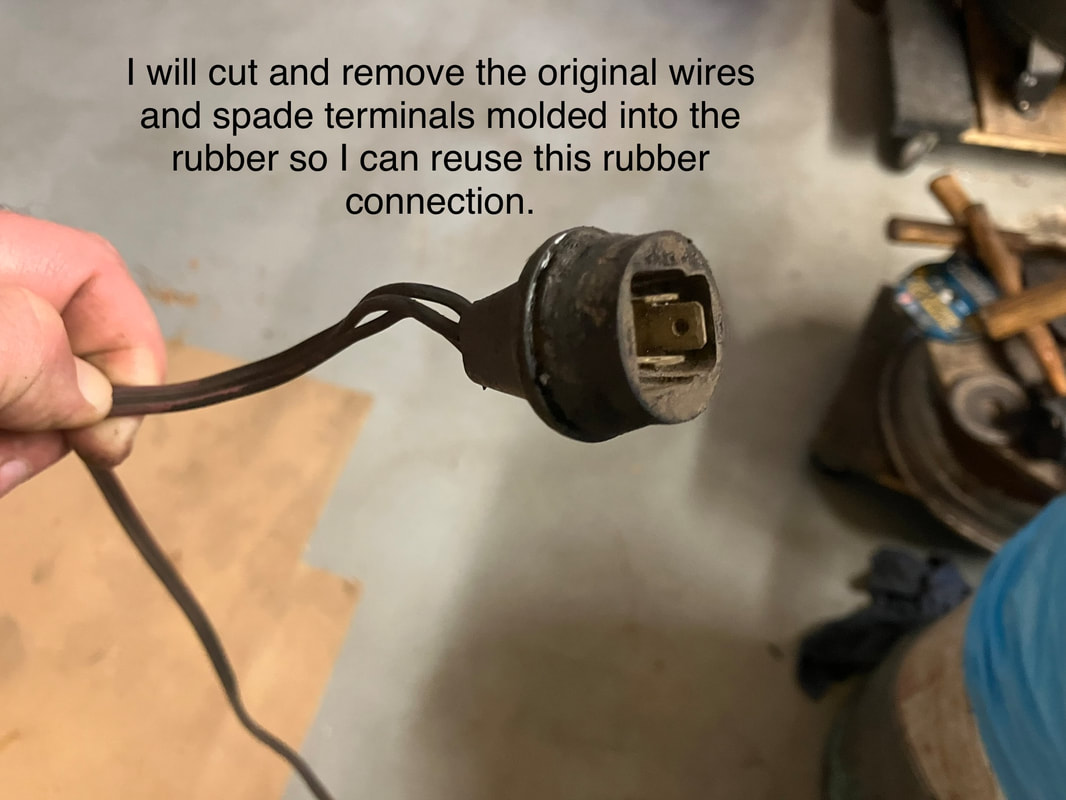
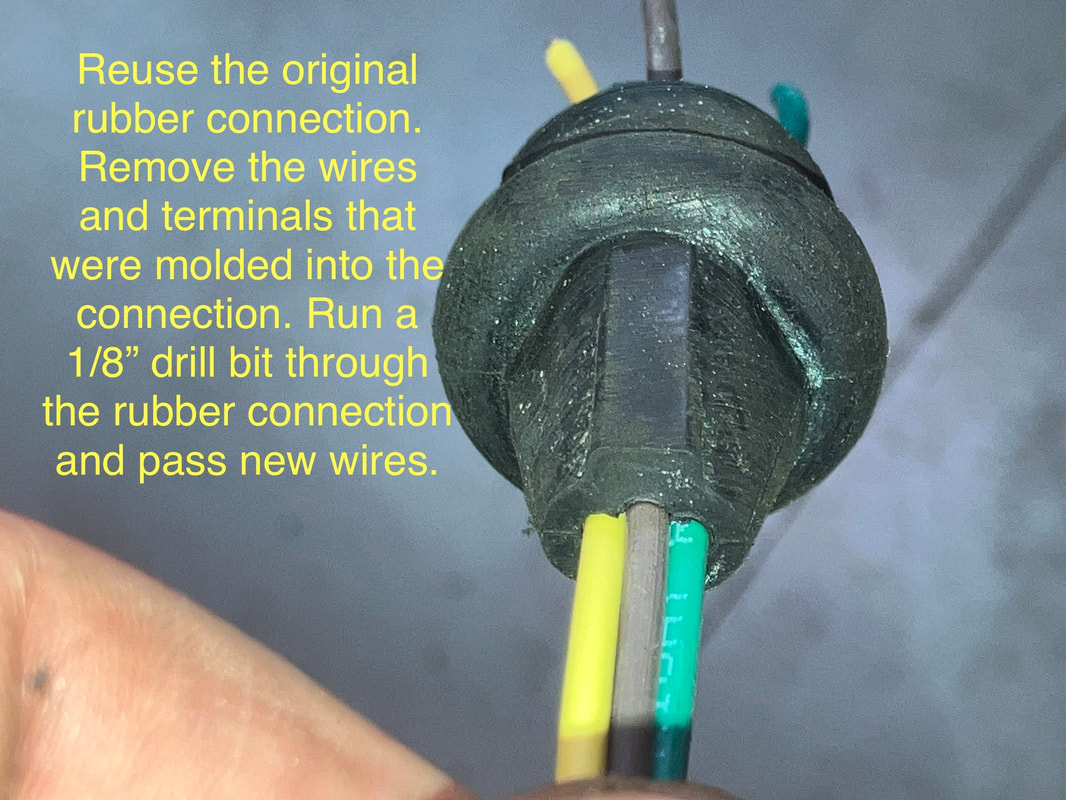
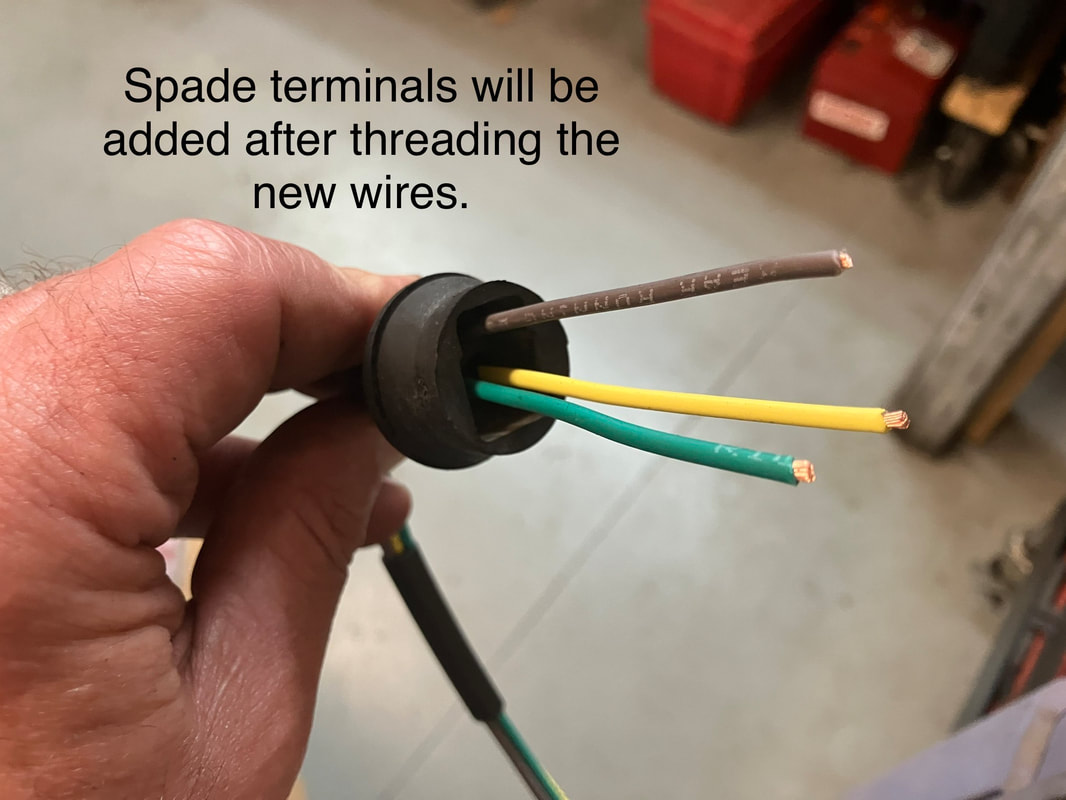
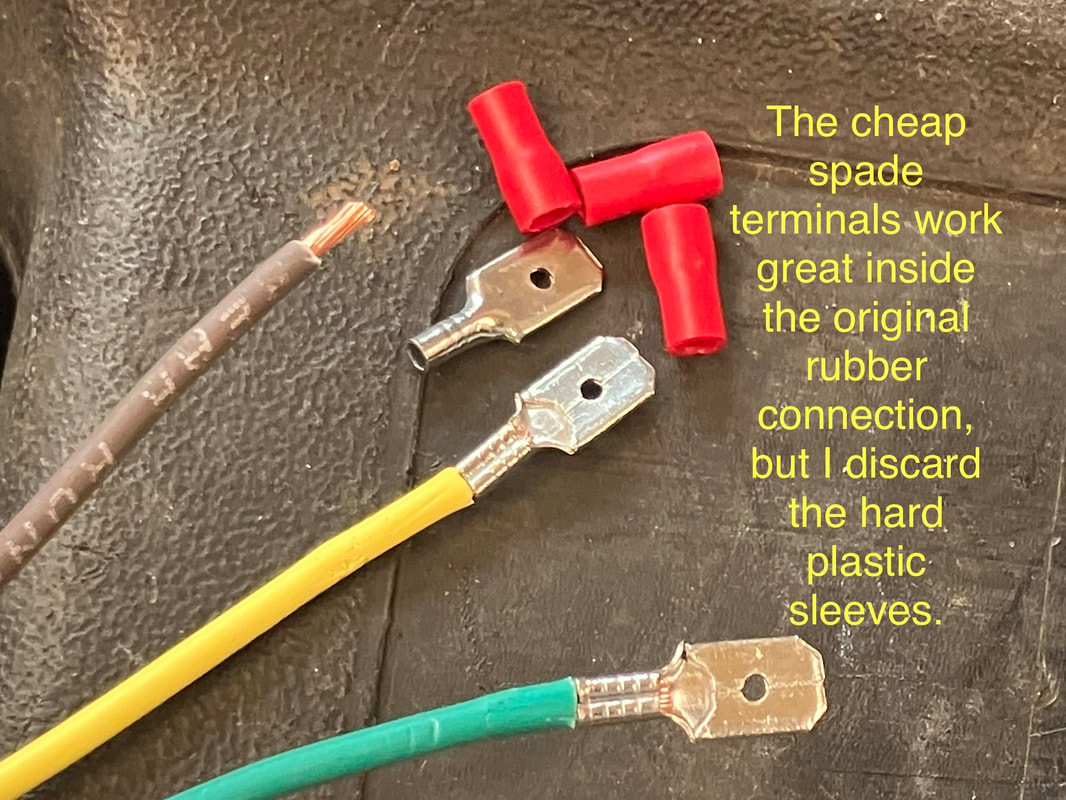
An original molded rubber connection might be in good enough shape to reuse. Carefully remove the old wires and terminals and install new wires and terminals. Here's what I did.
|
|
|
|
|
|
Rule #4. Group wires to form cables.
This tip will make all the difference in the world as far as appearance. It may sound obvious, but this one simple rule helped me get results I was proud of.
Do NOT cut and then install one wire at a time!
There is a strong temptation to run a single wire (or group of wires) from the fuse box to the destination, then crimp the terminal and finally connect the wire. One wire done, and then on to the next wire! Easy, right? Do NOT do it this way!
A BETTER WAY
A simple analogy is a tree. A tree trunk becomes limbs which then become branches etc. A factory wrapped wire harness resembles a tree.
Why do I want you to form cables of wires?
Factory workers years ago assembled wiring harnesses at large tables with a supply of pre-cut wires with terminals already crimped on the ends.
Notice the order in which things were done at the factory.
Rewiring a vehicle using a kit requires accomplishing those same steps, but in a VERY DIFFERENT order.
Do NOT cut and then install one wire at a time!
There is a strong temptation to run a single wire (or group of wires) from the fuse box to the destination, then crimp the terminal and finally connect the wire. One wire done, and then on to the next wire! Easy, right? Do NOT do it this way!
A BETTER WAY
- Run one wire from the fuse box to the destination. Do NOT cut anything!
- Tag the end of the wire with a label naming the final destination. (i.e. left headlight, horn, starter, etc.) A label on the end of each wire will help because small printing on the wire insulation is difficult to read.
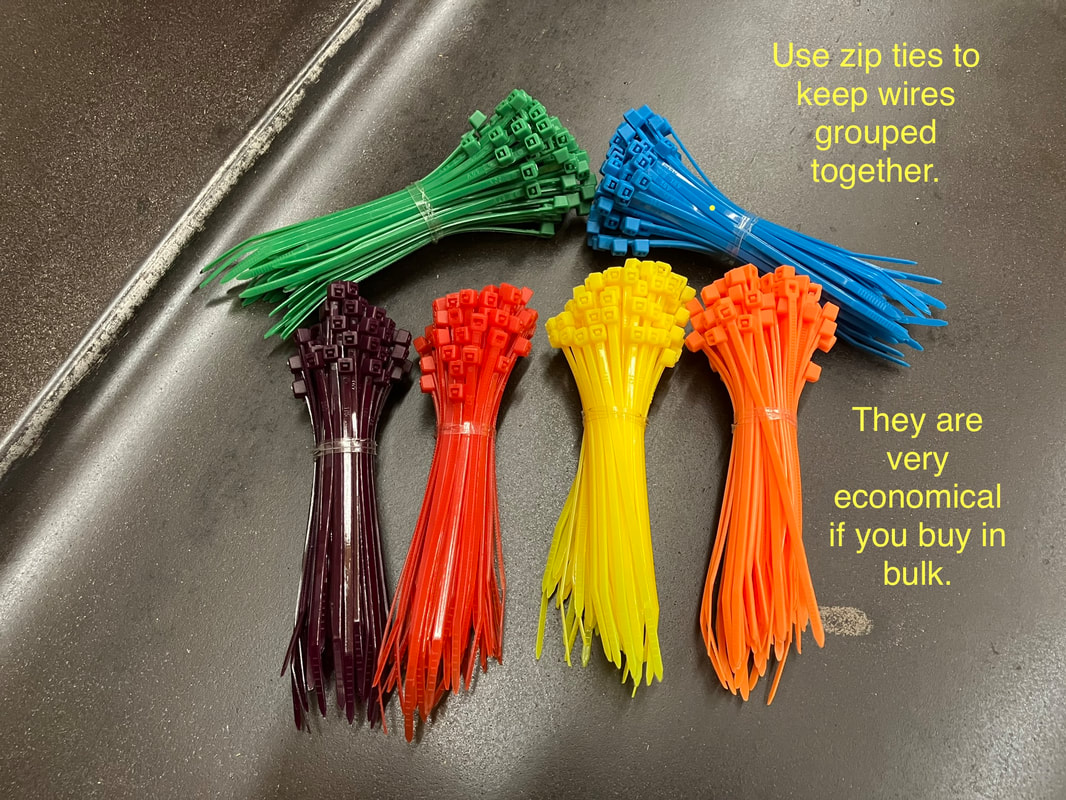
- After you have several wires following the same path, use very small zip ties to hold the wires together. I will refer to this as a "cable". If more wires need to be added to this cable, just use more zip ties. Cut off unwanted zip ties later. Make the zip ties loose enough so the wires can slide a little bit if needed.
- If two or more cables are in close proximity and will comfortably follow the same path, then zip tie them together to make an even larger "cable". Eventually some of "cable" wires will branch off in a different direction. Fine. You are creating a wire harness by grouping cables together whenever possible. You want to create a wire harness BEFORE you cut any wires. The end result will look professional.
A simple analogy is a tree. A tree trunk becomes limbs which then become branches etc. A factory wrapped wire harness resembles a tree.
Why do I want you to form cables of wires?
Factory workers years ago assembled wiring harnesses at large tables with a supply of pre-cut wires with terminals already crimped on the ends.
Notice the order in which things were done at the factory.
- Each wire was pre-cut to the proper length with terminals already crimped.
- Wires were bundled together.
- Bundled wires were wrapped with vinyl tape to form a wire harness with anchors.
- The wire harness was then positioned inside the vehicle.
- The wire harness anchors were connected to the body sheet metal.
- Wire terminals were then connected to the proper accessories.
Rewiring a vehicle using a kit requires accomplishing those same steps, but in a VERY DIFFERENT order.
- Position the wires inside the vehicle in the best path according to function and destination.
- Bundle wires together with zip ties. This is a time consuming step where you determine the best path for the cables of wires to travel and also determine the best location for the cable anchors.
- Anchor the cables of wires to the sheet metal.
- Cut wires to the proper length.
- Crimp terminals to the ends of the wires.
- Connect wires to the proper accessories.
- Wrap wires with loom to protect them.
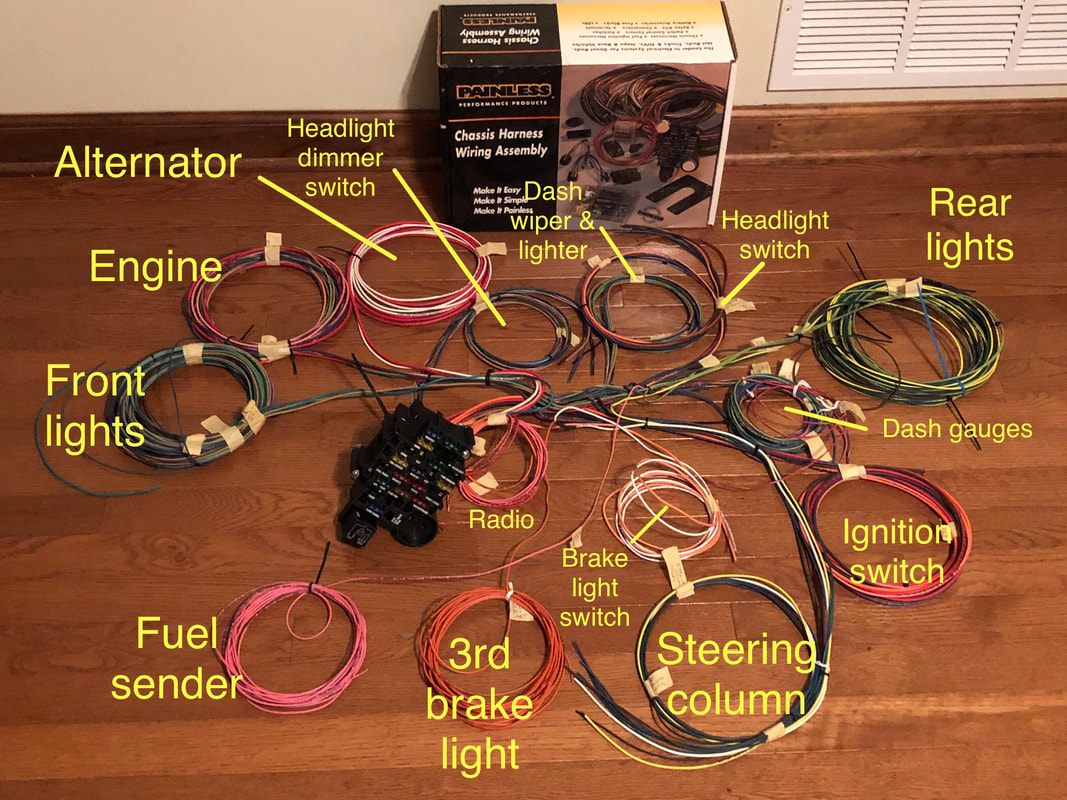
Wiring kit diagrams are printed in color on large sheets of paper. A careful study of a wiring diagram will teach you how different circuits are interrelated but it will not show you how to bundle wires to form cables or where to anchor the cables.
The AAW kit shown below has groups of wires already held together with zip ties. Unfortunately, if you cut the zip ties to remove unwanted circuit wires, the original organization can be lost.
The AAW kit shown below has groups of wires already held together with zip ties. Unfortunately, if you cut the zip ties to remove unwanted circuit wires, the original organization can be lost.

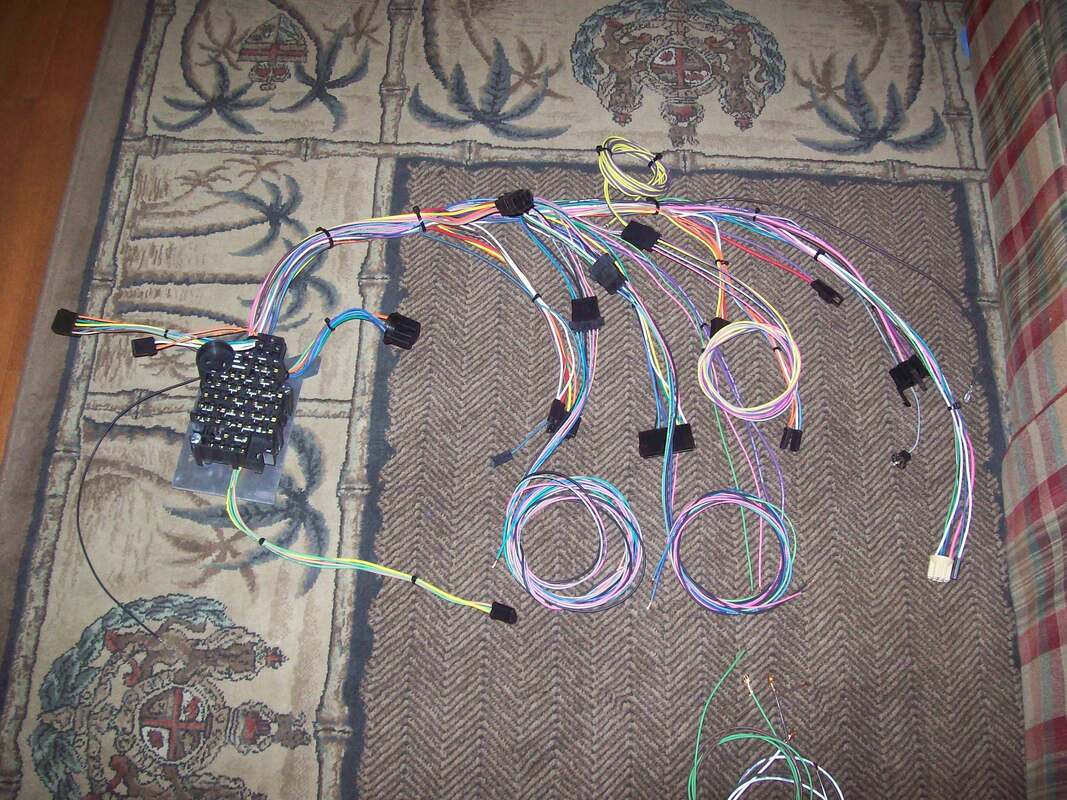
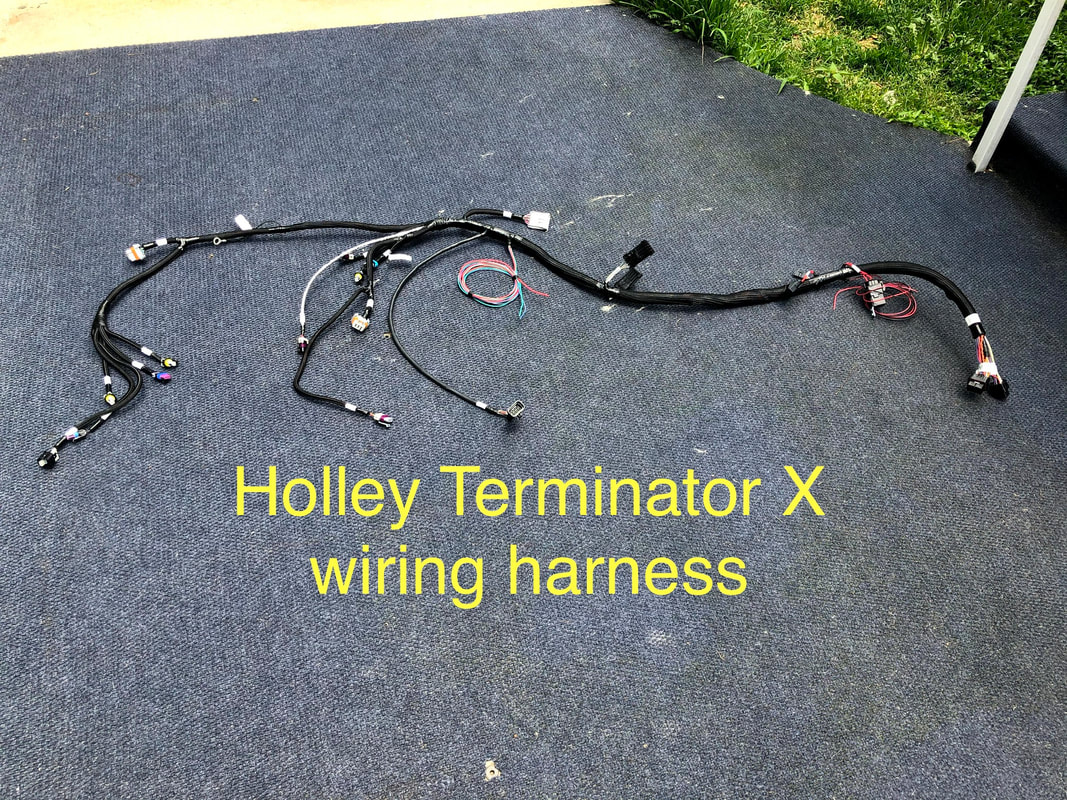
The engine wiring harness shown below connects to the Holley ECU.
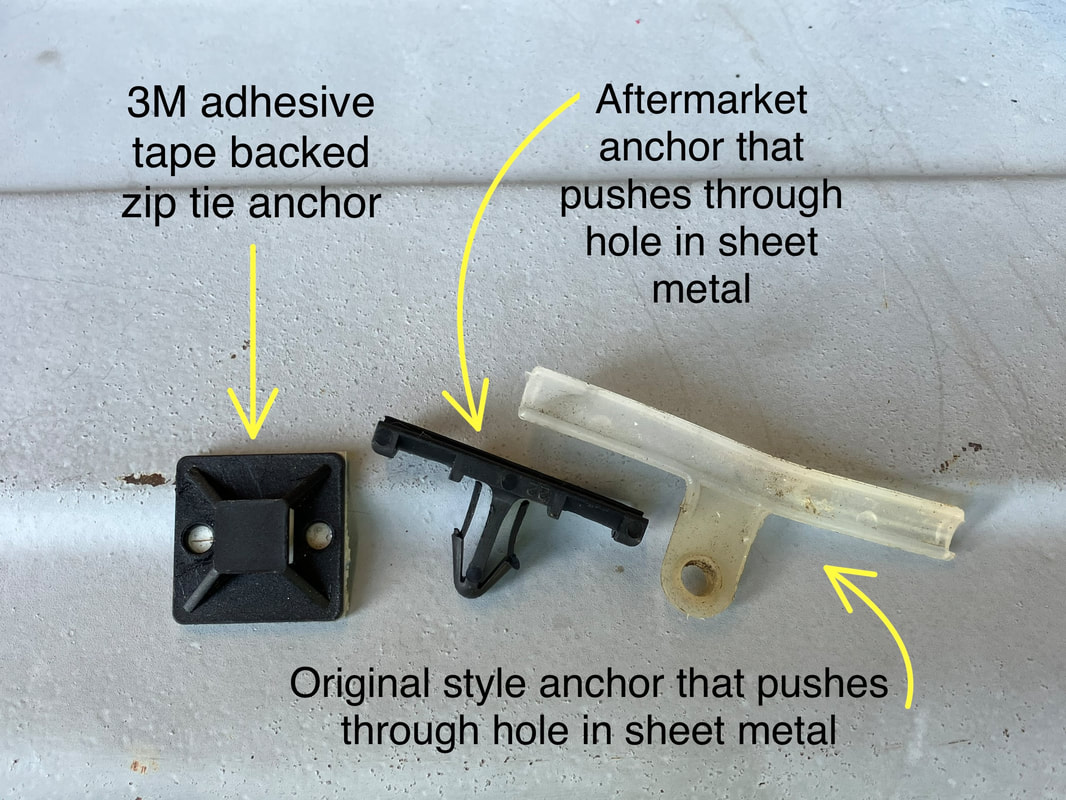
5. Anchor the cables to the sheet metal.
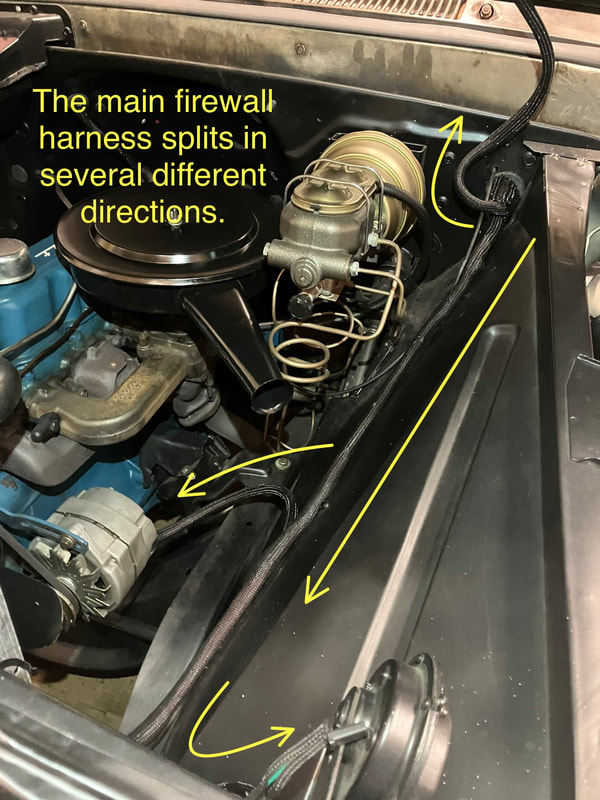
- Choose the BEST path for each cable to travel.
- The BEST path to the destination is NOT necessarily the shortest path.
- Anchor each cable to the sheet metal to prevent the cable from sagging.
- Adhesive backed zip tie anchors will stick to clean flat surfaces. Adding epoxy glue is optional. No need to drill holes.

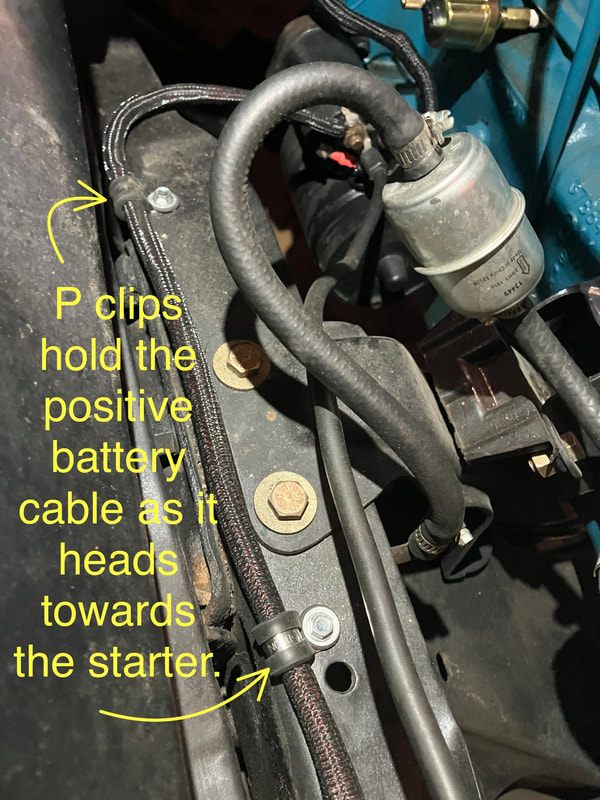
I used P clips to anchor the battery cable to the frame along the path to the starter.
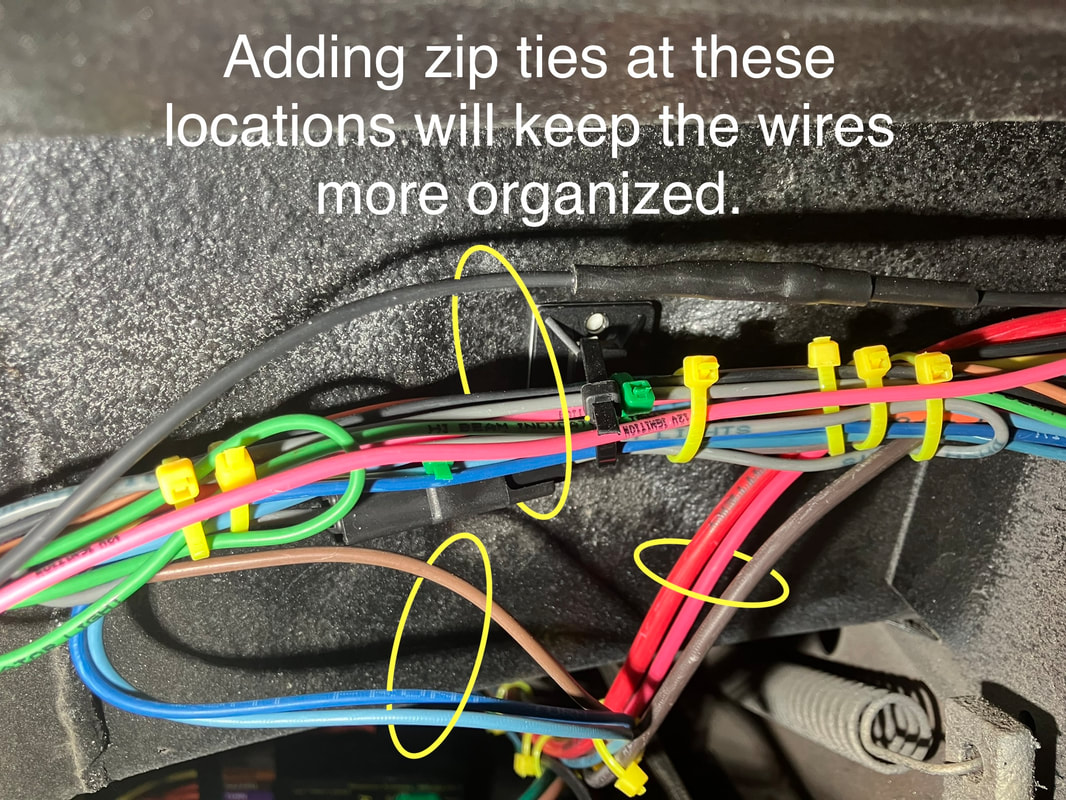
Finalize cable placement and anchors. Zip ties should remain loose to allow final wire adjustment even AFTER the cables have been anchored. Tighten the zip ties after everything is adjusted. Cut wires and crimp terminals AFTER everything is neatly organized and anchored.
This under dash harness is almost done. I'll tidy things up with a few more zip ties.
Wires can be cut and connected AFTER you are happy with the final position of the entire harness.
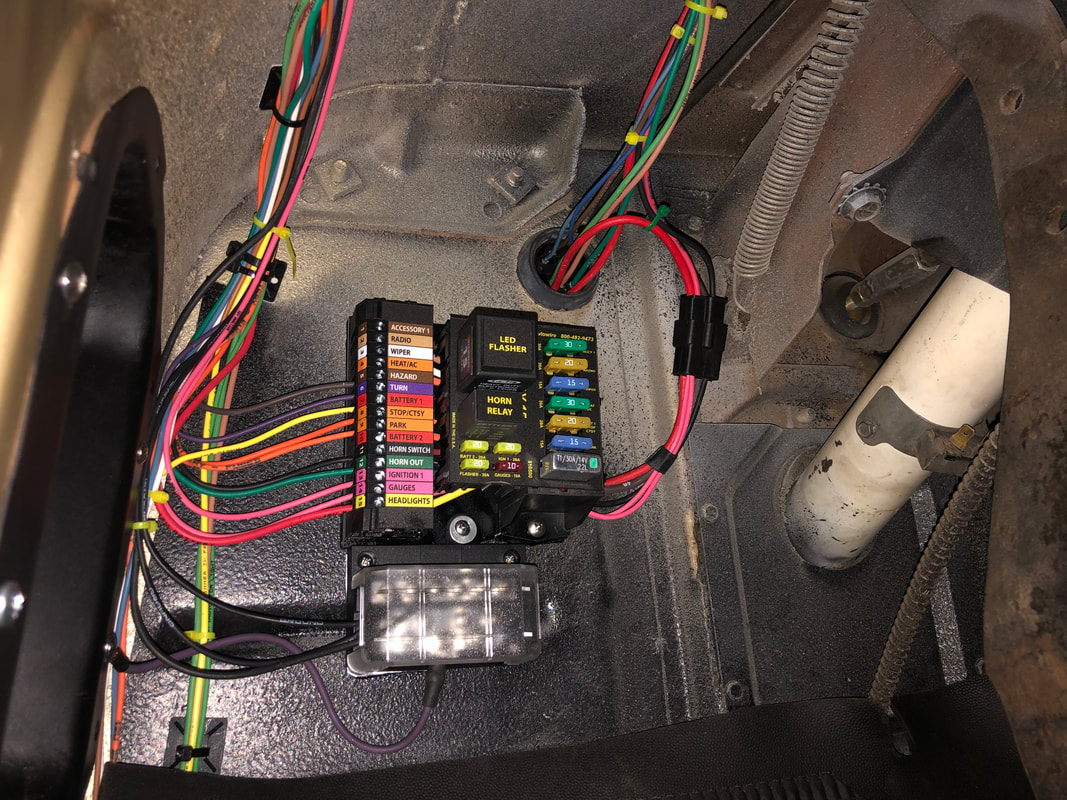
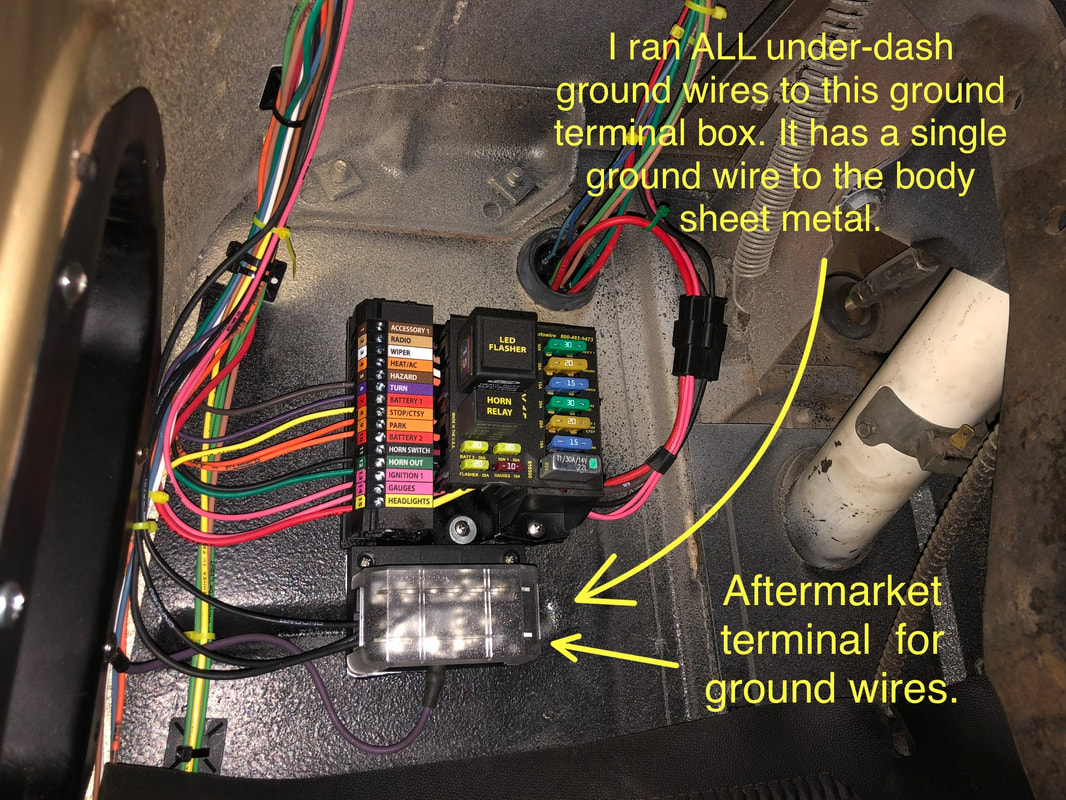
An aftermarket ground wire terminal box can be added to keep ground wires organized.
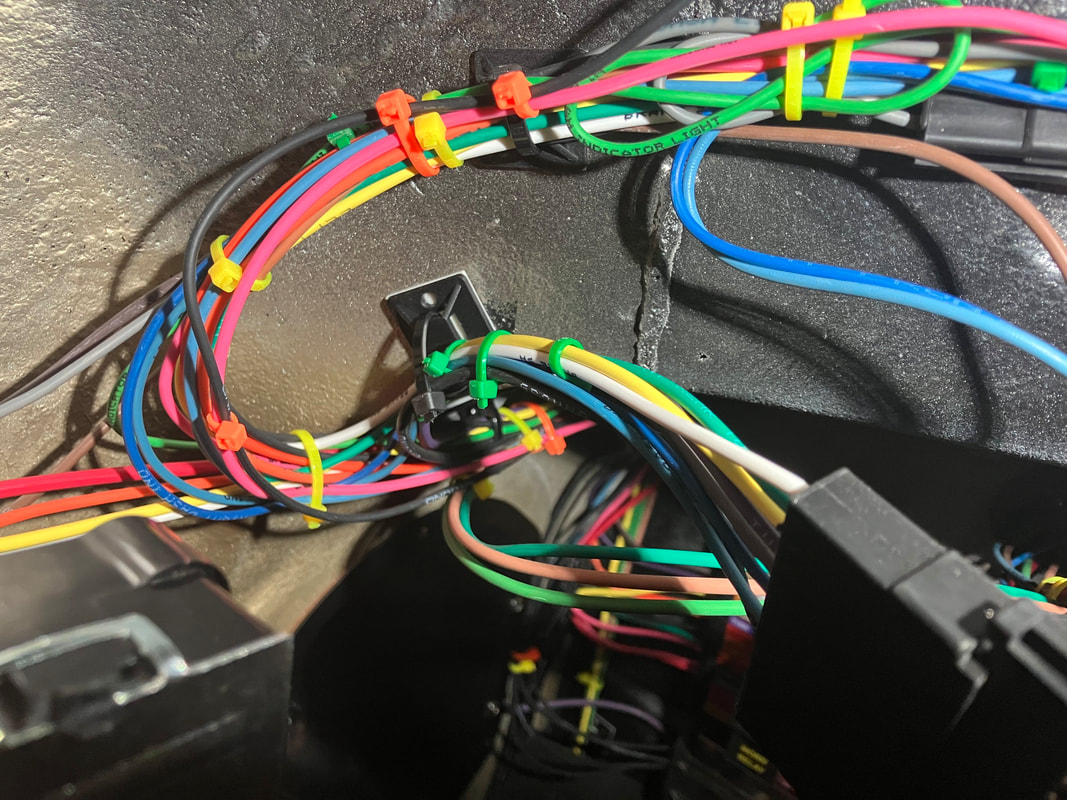
The wiring pictured below would look more professional if the steps outlined in this DIY had been followed.
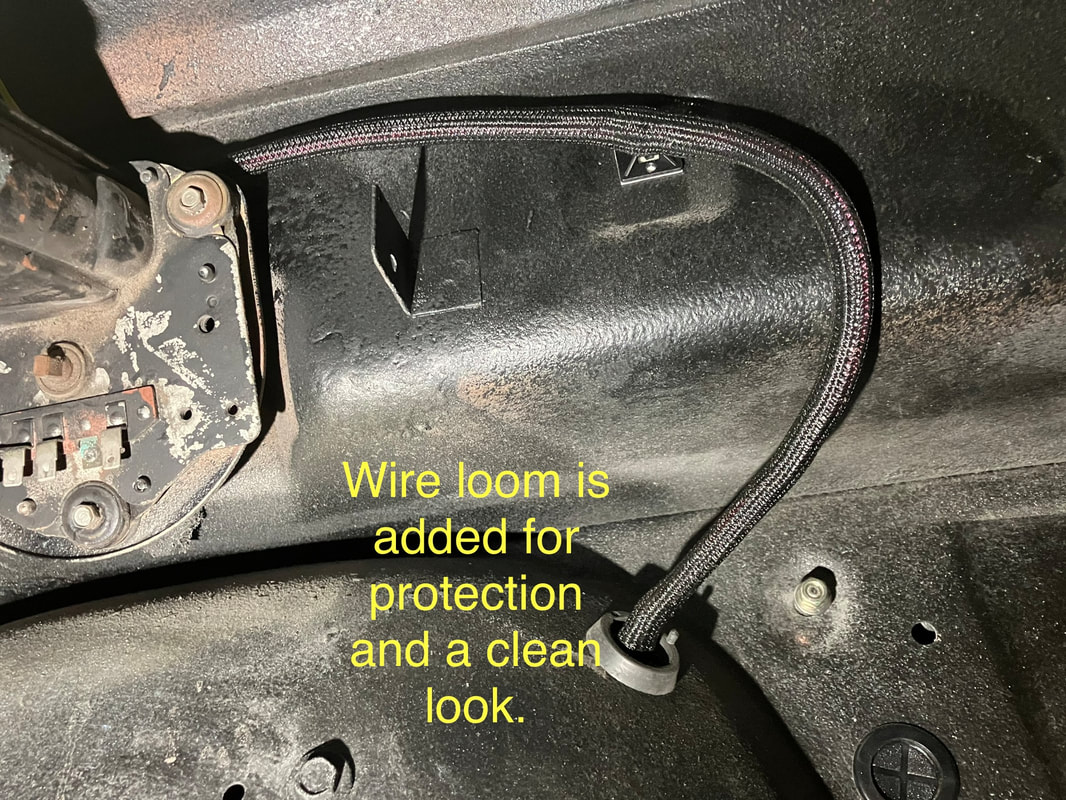
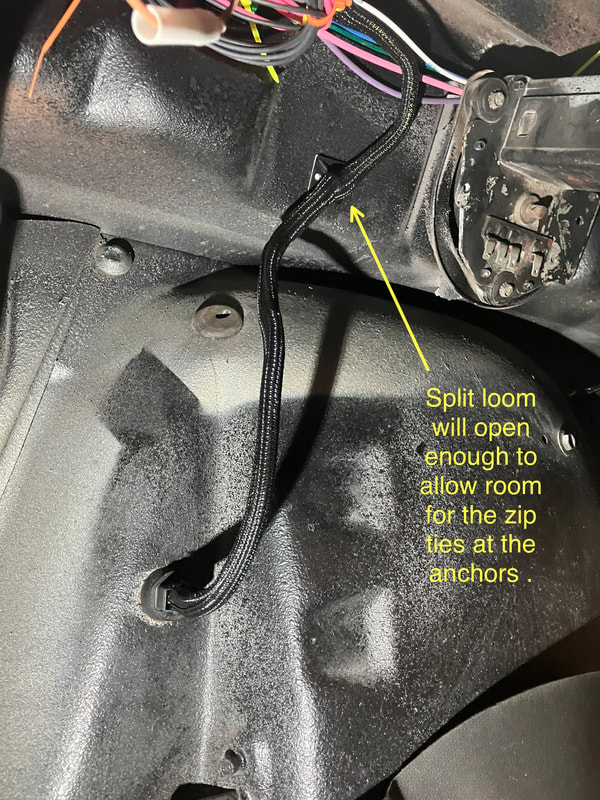
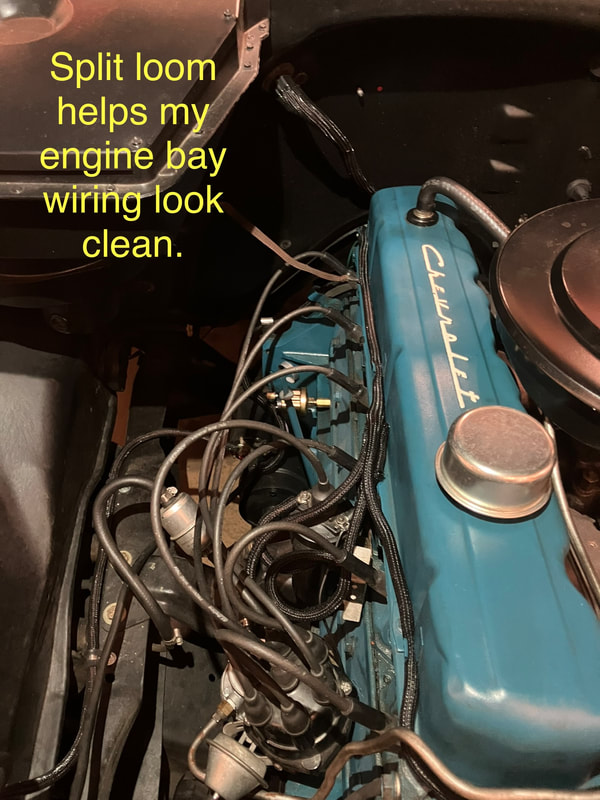
Wiring should be protected with wire loom whenever possible.

Have fun wiring your classic!
I hope this DIY was helpful.
Search the internet for these supplies that don't usually come with a wiring kit.
Wire terminal crimping tool
Small zip ties in bulk
Rubber grommet kit
Wire terminal kit (Male and female terminals)
Wire or cable lug kit
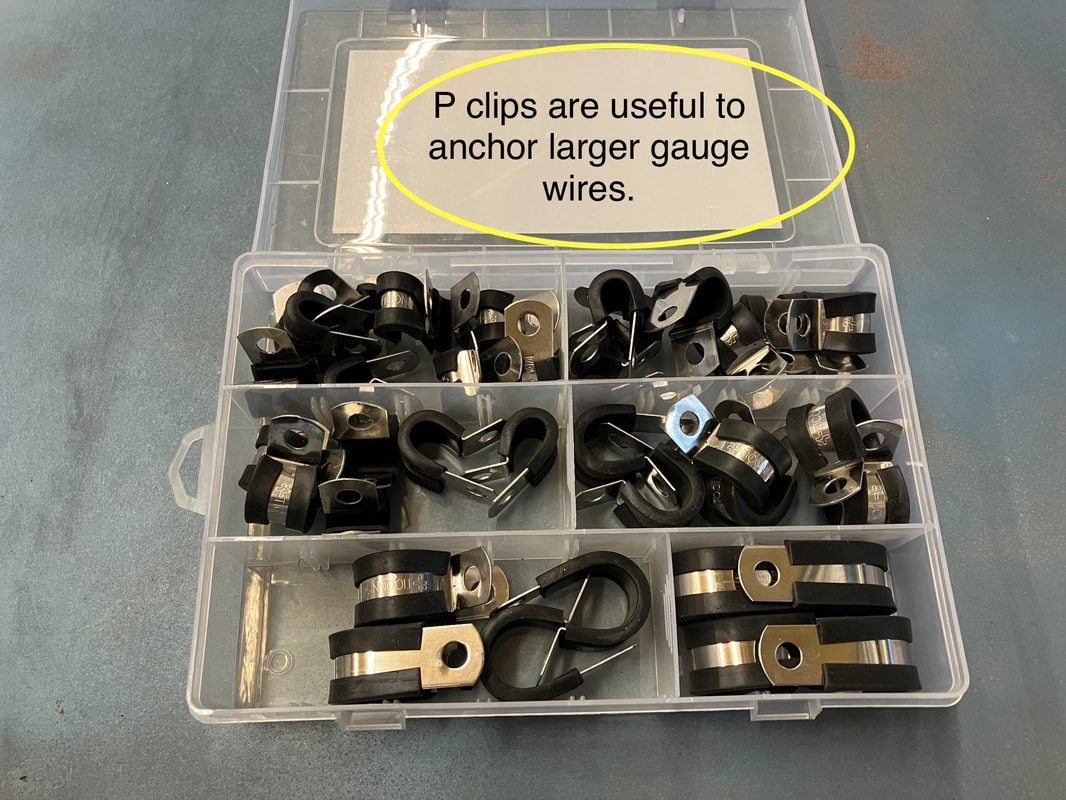
P clip kit
Adhesive lined shrink tubing kit (You'll need a heat gun.)
Bulk bag of 3M zip tie anchors with adhesive backing
Wire terminal removing tool (multiple tools on a small chain)
Negative wire terminal junction block
Weatherpack connectors (Waterproof connection blocks that might be useful for some applications.)
OEM Packard 56 wire terminals - Clipsandfasteners.com sells OEM Packard style terminals. LINK HERE
Split wire loom
I hope this DIY was helpful.
Search the internet for these supplies that don't usually come with a wiring kit.
Wire terminal crimping tool
Small zip ties in bulk
Rubber grommet kit
Wire terminal kit (Male and female terminals)
Wire or cable lug kit
P clip kit
Adhesive lined shrink tubing kit (You'll need a heat gun.)
Bulk bag of 3M zip tie anchors with adhesive backing
Wire terminal removing tool (multiple tools on a small chain)
Negative wire terminal junction block
Weatherpack connectors (Waterproof connection blocks that might be useful for some applications.)
OEM Packard 56 wire terminals - Clipsandfasteners.com sells OEM Packard style terminals. LINK HERE
Split wire loom

