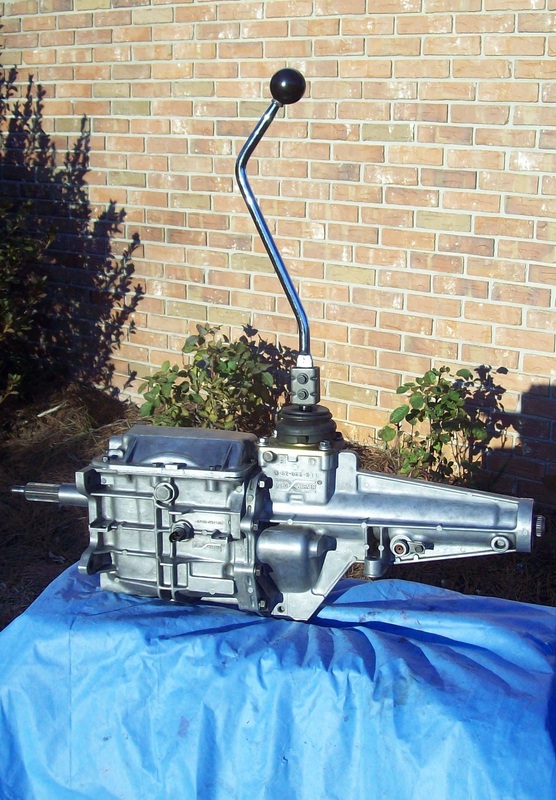
V8 Camaro non-world class T5 Transmission Rebuild
**Disclaimer** - These photos describe the method I used to rebuild my transmission. They are NOT intended to be an instructional guide. I studied professional literature and videos before rebuilding my T5 transmission. I recommend that you do the same.
Introduction
This is a non-world class V8 Camaro T5 rebuild. It was not difficult but I did a lot of preparation and watched an instructional video prior to beginning the rebuild.
I carefully disassembled a 1984 V8 Camaro T5 transmission. The gears were all in pretty decent shape. I cleaned all of the parts so they would be ready once the rebuild kit arrived.
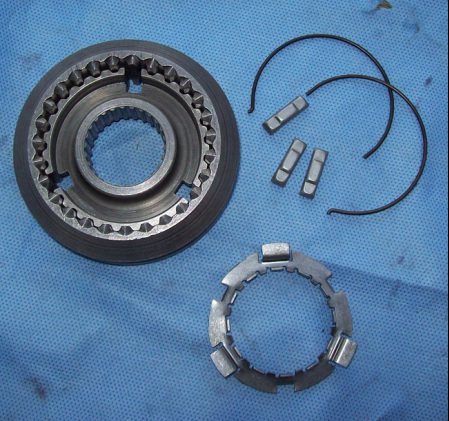
The rebuild kit contained new bearings and races, slider springs and inserts, new seals, brass blocker rings, C-clips and a few washers.

Very Important Preliminary Steps
These preliminary steps will help avoid serious problems later.
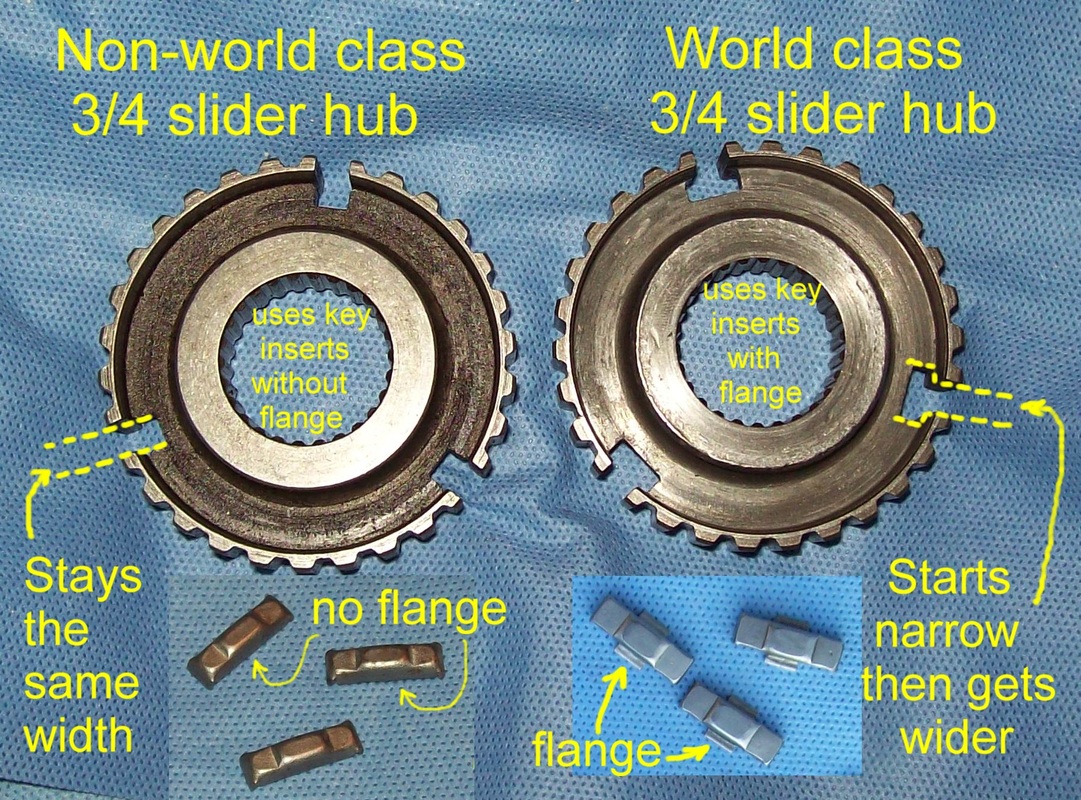
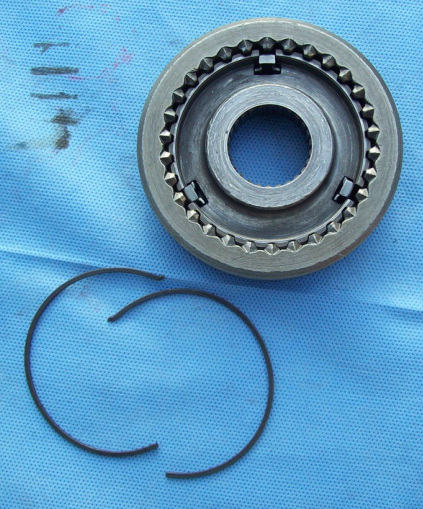
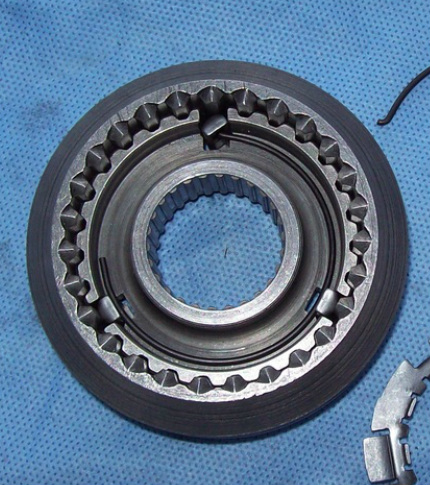
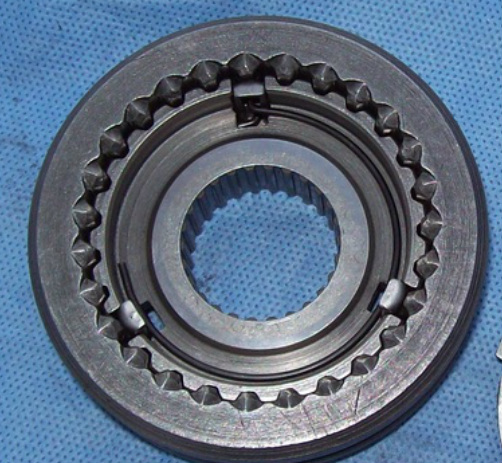
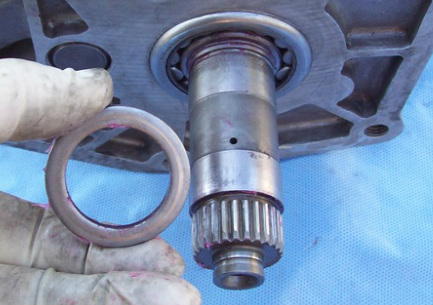
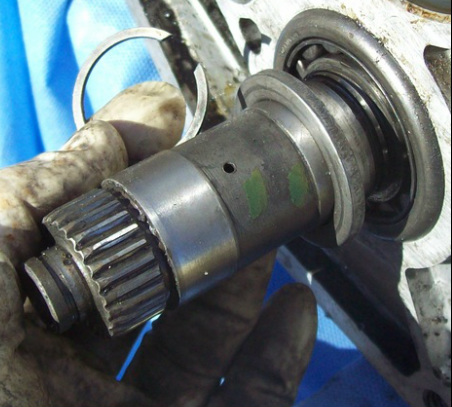
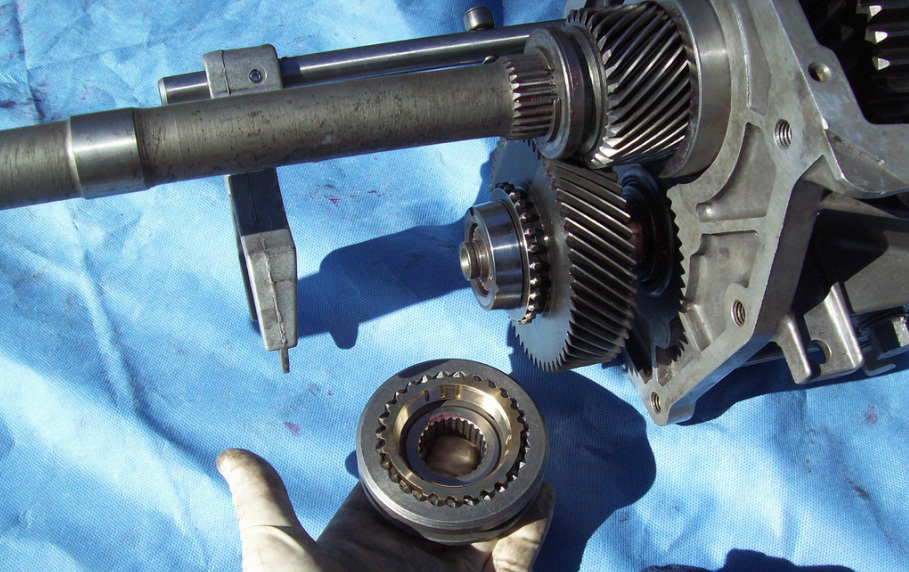
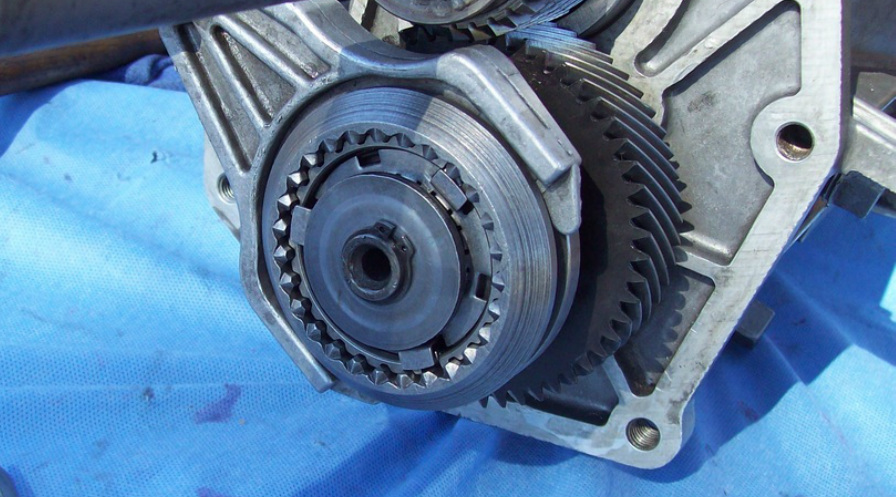
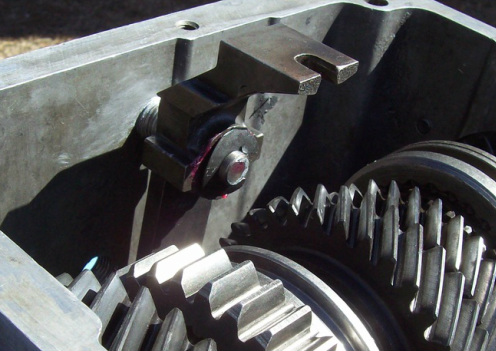
It's important to install the correct type key inserts in your 3/4 slider assembly. Check your 3/4 slider hub to see if it is a world class or non-world class. My non-world class transmission actually has a world class style 3/4 slider hub. Therefore, I needed to use the world class style key inserts that have a flange. I'm not sure why it had a world class style hub. Perhaps the factory was in the midst of a design and production change, or perhaps a previous owner replaced a damaged 3/4 hub with a world class hub. I can't be sure. See photo below.
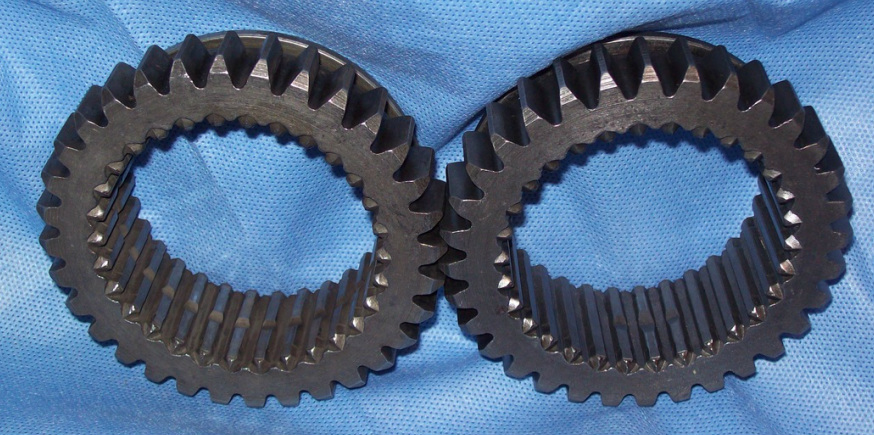
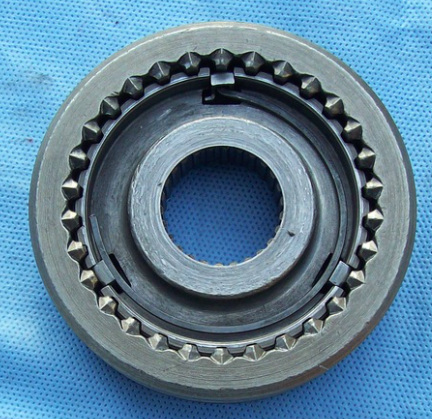
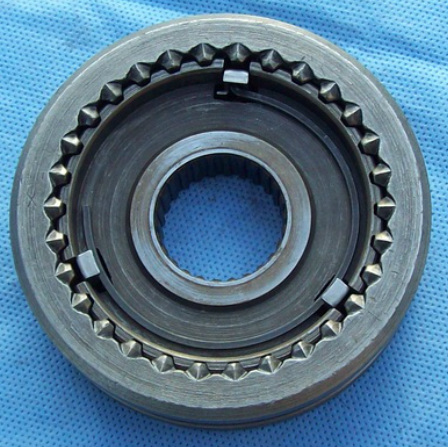
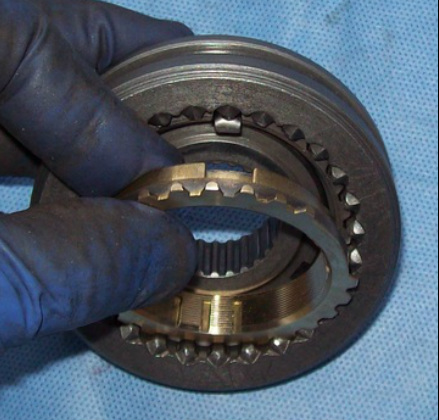
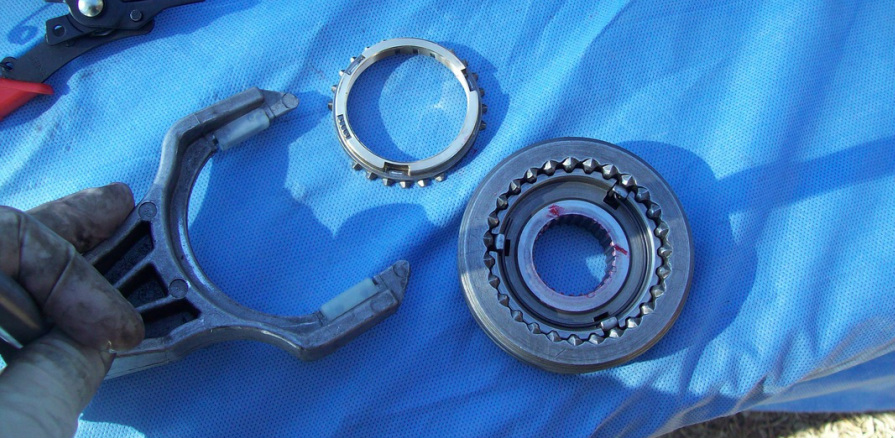
Not all slider rings are machined the same. The rings on the left have machining on all the splines. The rings on the right only have machining on 9 splines (3 sets of 3 splines).

Non-world Class V8 Camaro T5 Transmission Rebuild
Step 1: Assembly of the Countershaft and Thrust Washers
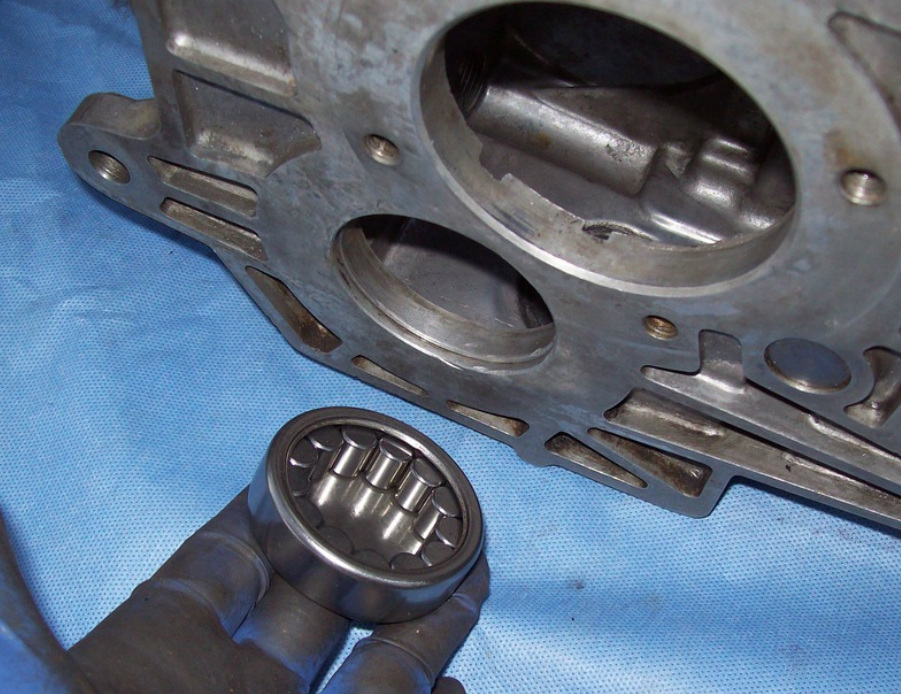
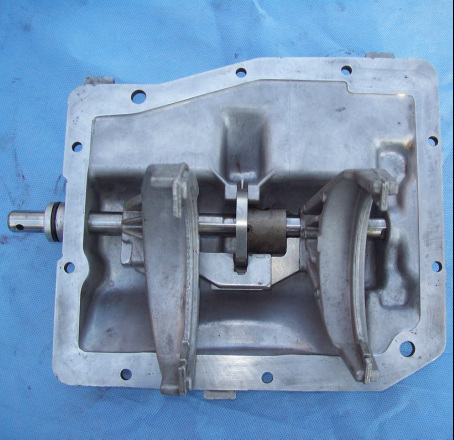
I started with a clean 1984 Camaro T5 case.
This front countershaft bearing needs to be pressed into the case.
|
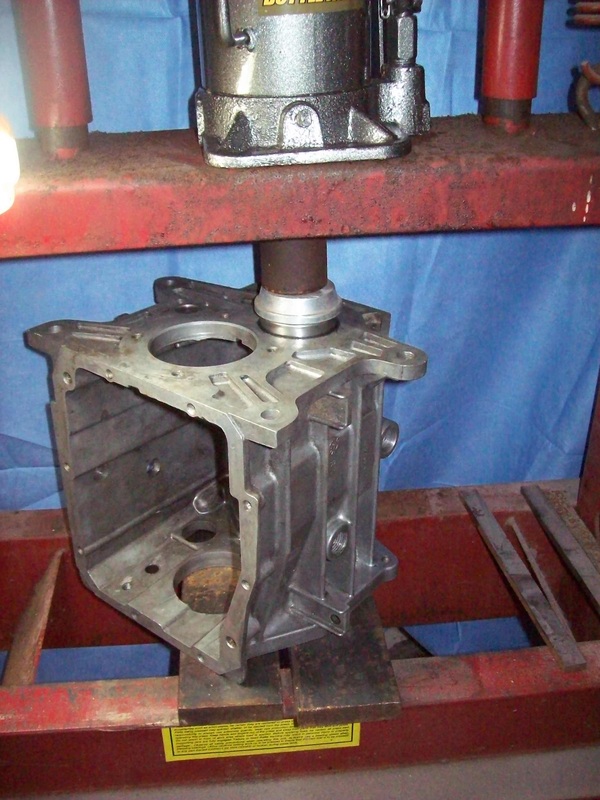
Press it in until flush with the outside of the case.
|
It will not be flush on the inside of the case.

|
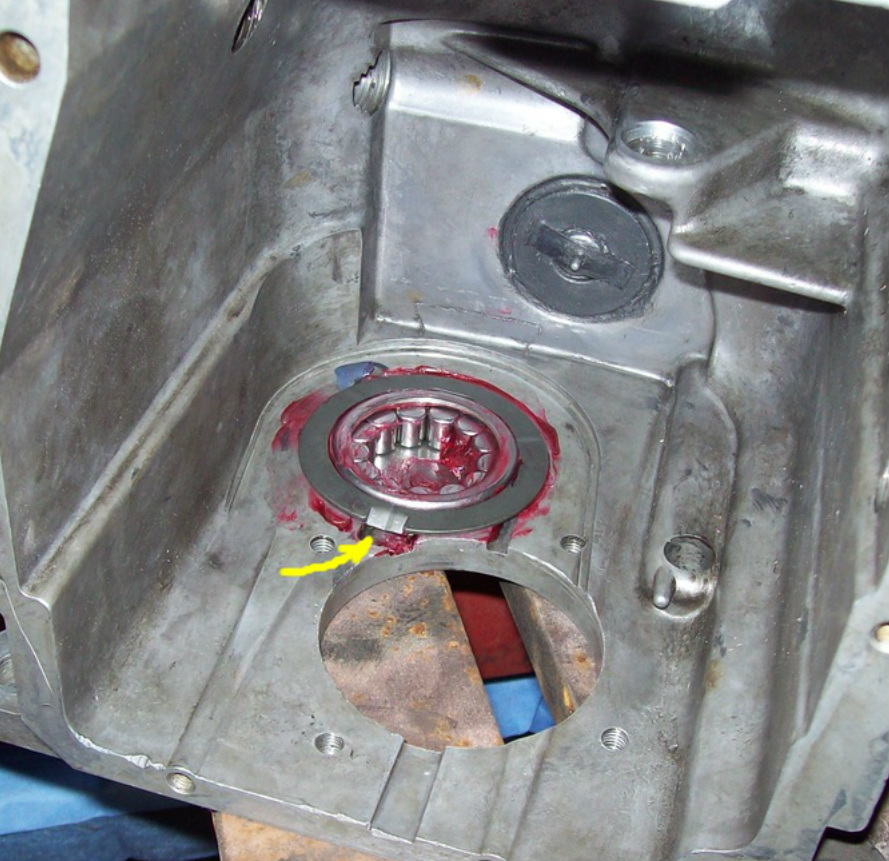
Add plenty of transmission assembly lube. Install the thrust washer. It must fit around the bearing case. The bent tab goes towards the case and inside the hole. See yellow arrow.
|
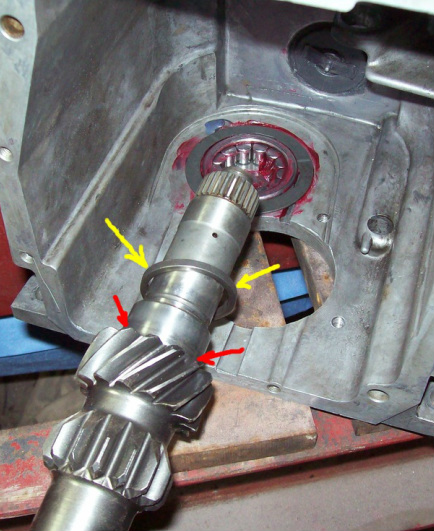
The countershaft rear thrust washer (yellow arrows) goes on next. It slides up against the rear-most gear (red arrows).
|
Set the countershaft into place and press on the rear bearing. It does NOT press flush with the case. Press on until you feel almost zero endplay.
|
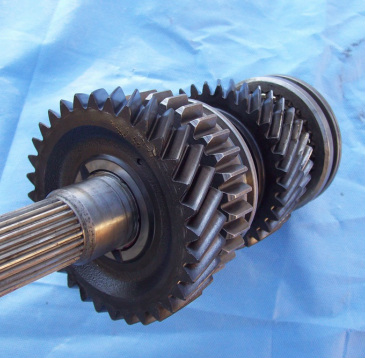
Step 2: Assembly of the Main Shaft
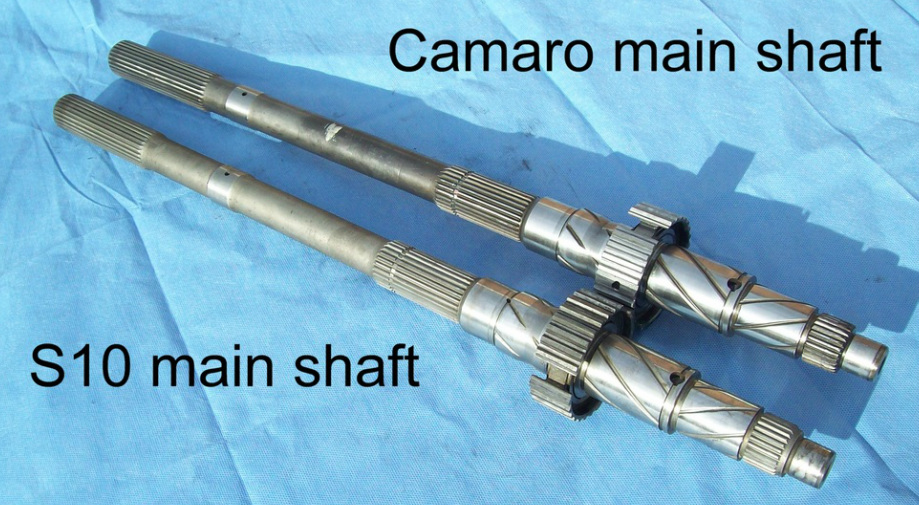
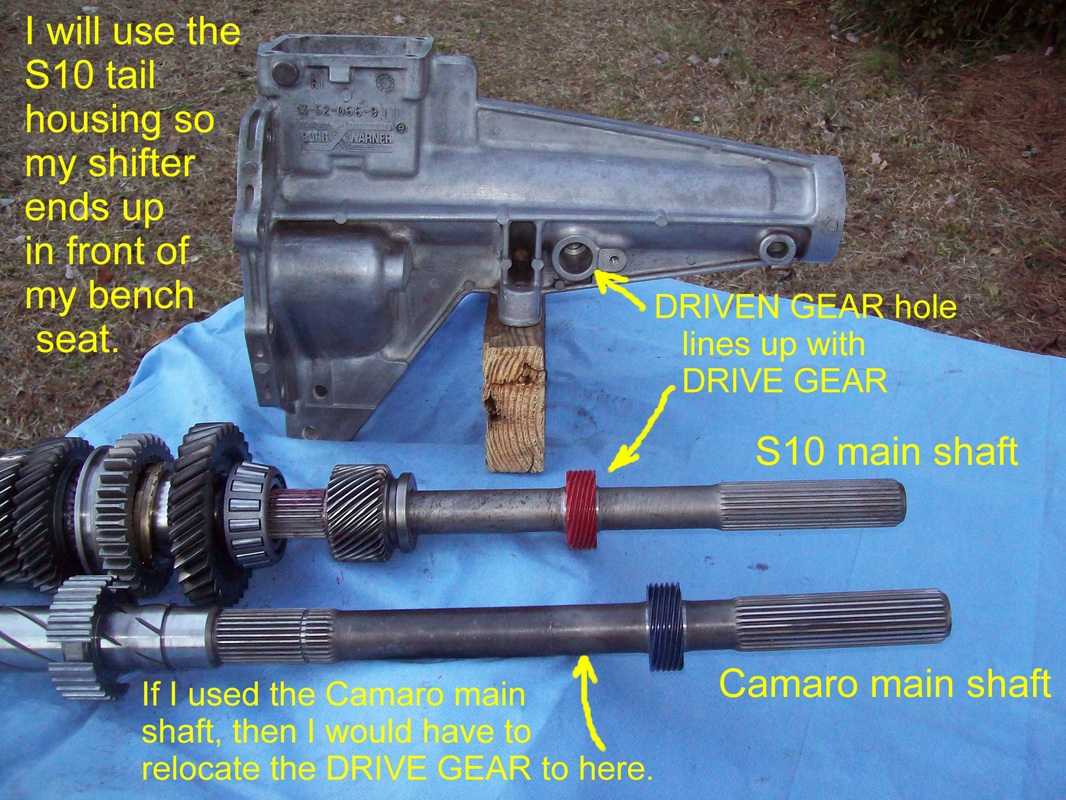
Since I'm going to use an S10 tail housing on my T5, I will also use an S10 main shaft. That way the drive gear will be located in the right position.
Here's the 1/2 slider with new springs and key inserts.

|
|
|
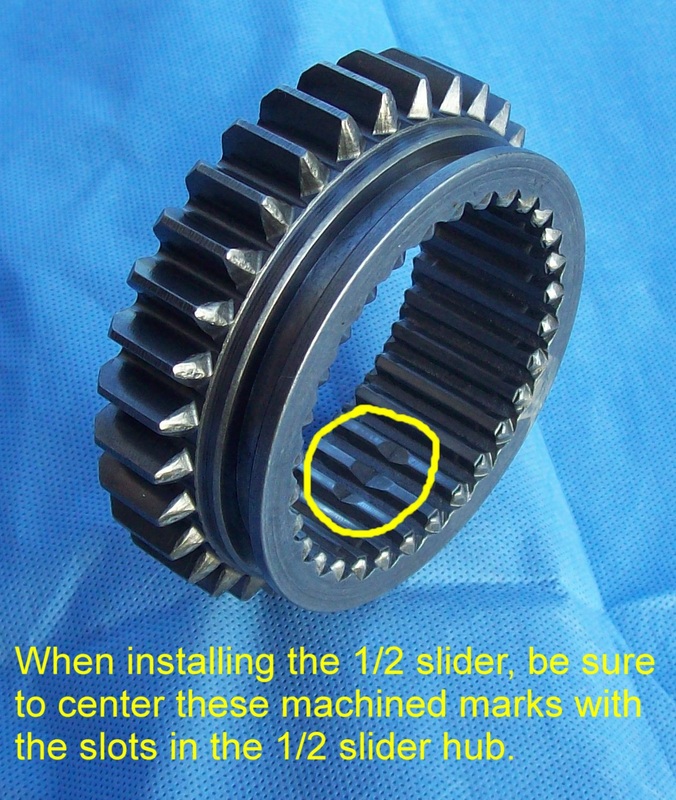
Line up the slots on the 1/2 hub with the machined marks on the inside of the slider and install the 1/2 slider onto the main shaft. Use transmission lube and test to make sure it slides freely.
|
Place the hook end of the spring into the back of one of the key inserts and install the spring in a clockwise fashion to hold the 3 key inserts in place. Flip it over and starting with the same key, install the second spring in a clockwise direction. The little hook end of each spring should be in the center of the same key.
|
|
Install a blocker ring with the BIG notch so it aligns with the key insert.
|
Install 2nd gear.
|
|
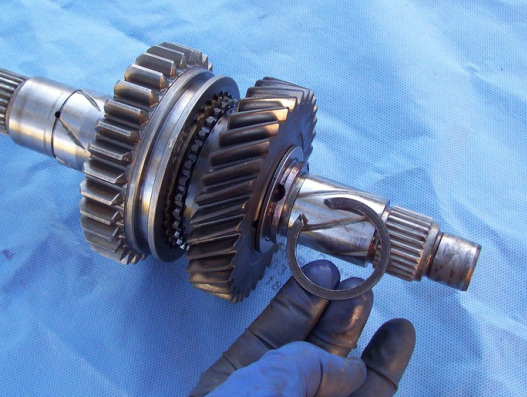
The tab of this special washer fits into the hole in the main shaft next to 2nd gear.
|
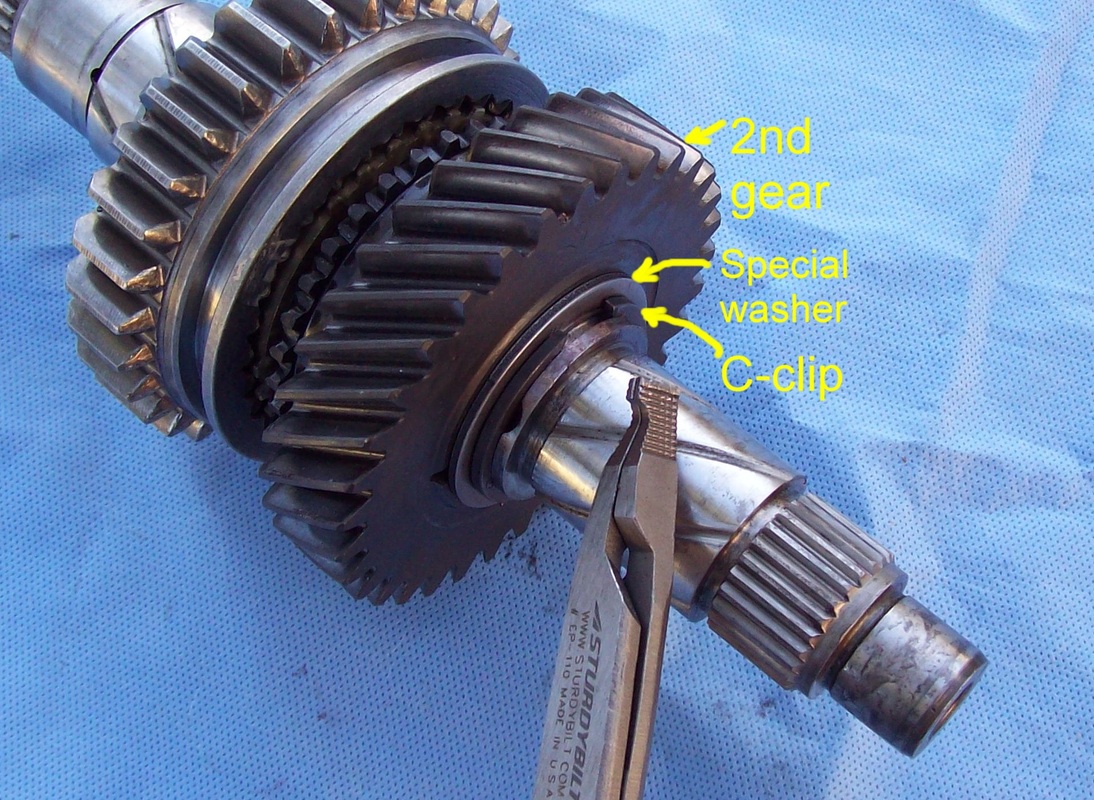
Lock 2nd gear into place with the large C-clip. Use a good quality expanding pliers.
|
2nd gear is locked in place.
|
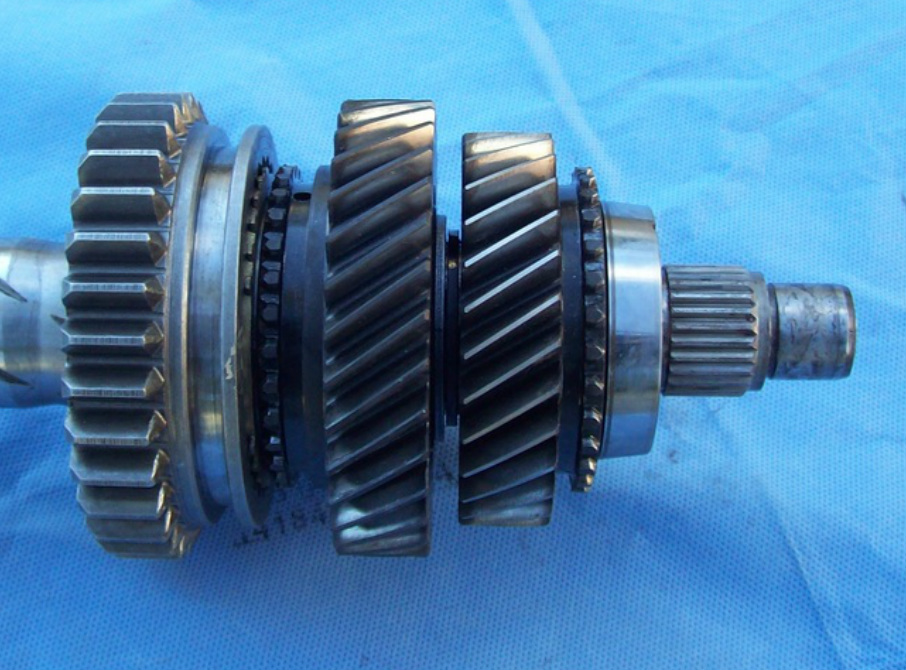
Third gear goes on next.
|
Then a brass blocker with a small notch.
|
Study the next 4 photos carefully. The 3/4 slider MUST be assembled correctly.
|
|
|
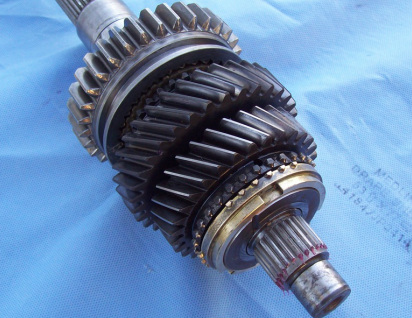
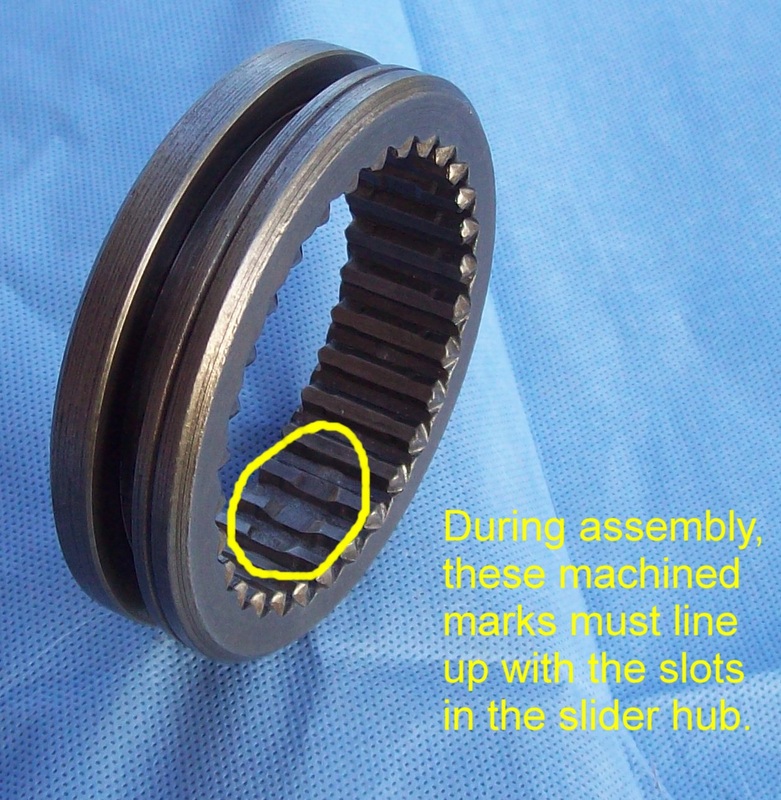
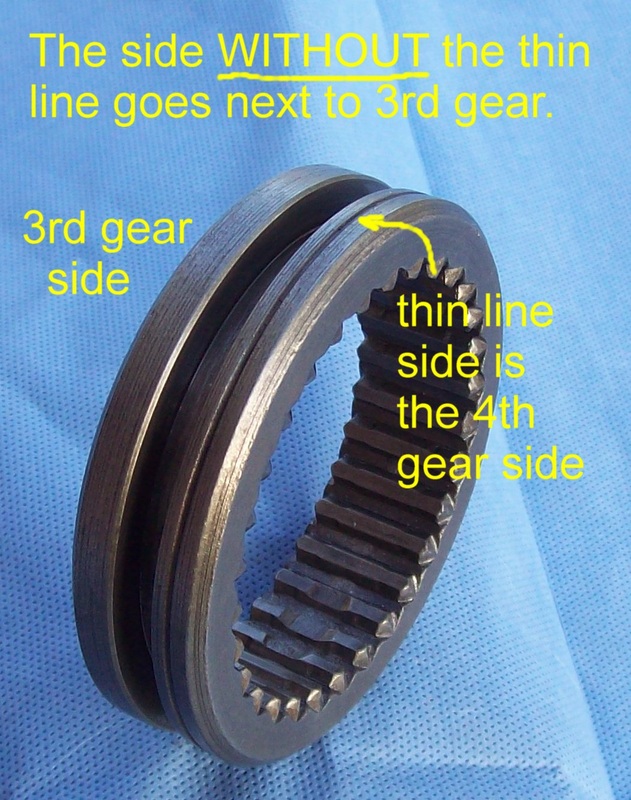
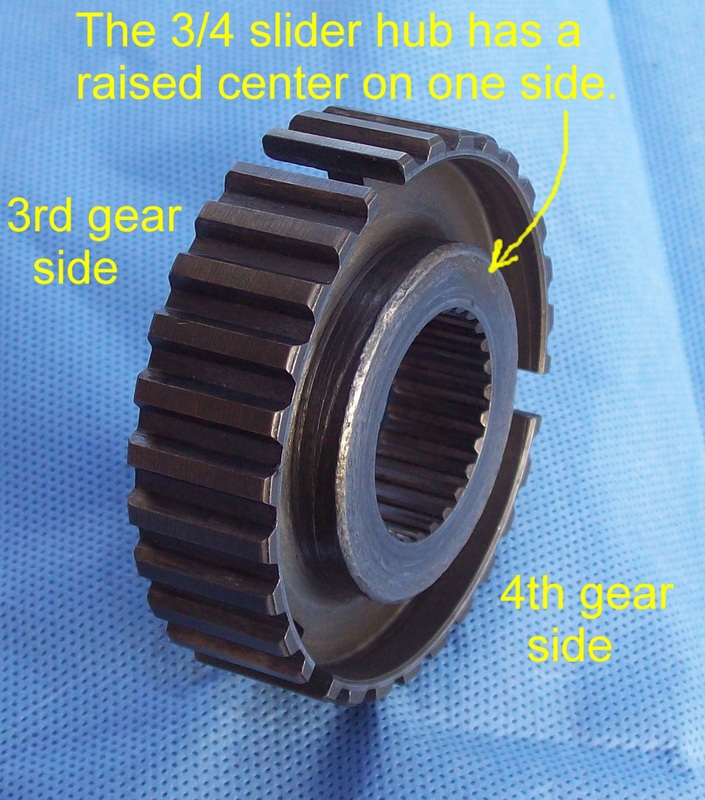
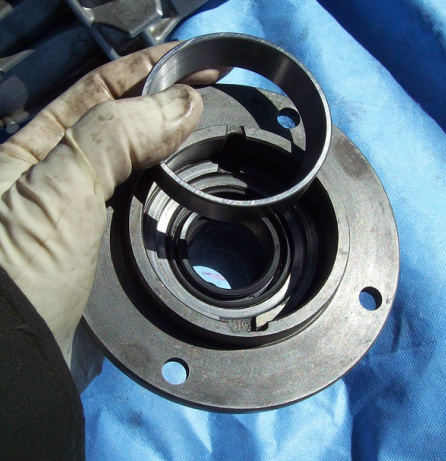
Assemble the 3/4 slider making sure to align the open hub slots with the machined marks inside the outer ring. Also make sure the slider hub and ring are correctly oriented.
|
|
Place the key inserts into the slots.
|
Install the hook of a spring into the key at the top and install it in a clockwise direction.
|
|
Flip the 3/4 slider over and install the 2nd spring exactly the same way, placing the hooked end of the spring into the center of the same key.
|
Be sure to line up the brass blocker notch with one of the key inserts as you slide the 3/4 slider over the splines and into final position.

|
|
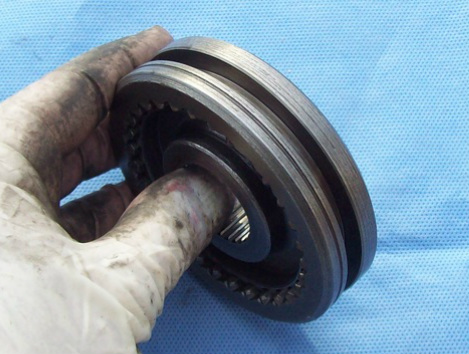
Use a large socket as a mandrel against the 3/4 slider hub to drive the hub into the final position.
|
Now, working on the other side of the 1/2 slider, install a new brass blocker so the large notch lines up with the key insert.
|
|
Slide 1st gear into place.
|
Place this special washer against 1st gear.
|
|
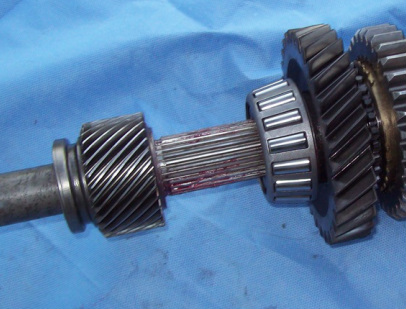
The special washer is on. Next comes the main shaft rear bearing.
|
Slide the rear bearing up next to the washer.

|
|
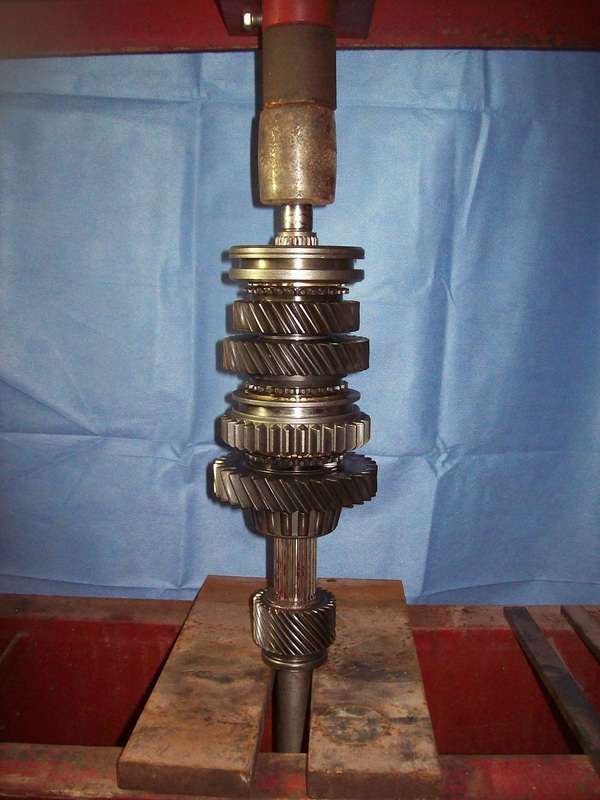
Carefully slide 5th gear along the shaft. Make sure the shaft splines are properly aligned with the gear before placing the assembly into a shop press.
|
Carefully press 5th gear the remainder of the way. It will contact the rear bearing.
|
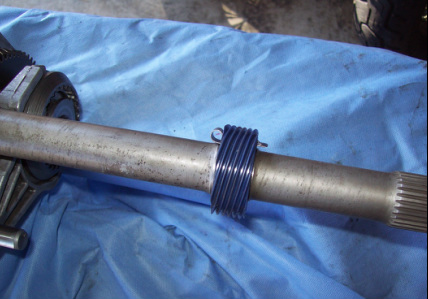
Once 5th gear is properly seated against the bearing, install the medium sized C-clip to lock 5th gear into place. The main shaft assembly is complete for now.
Step 3: Reverse gear
|
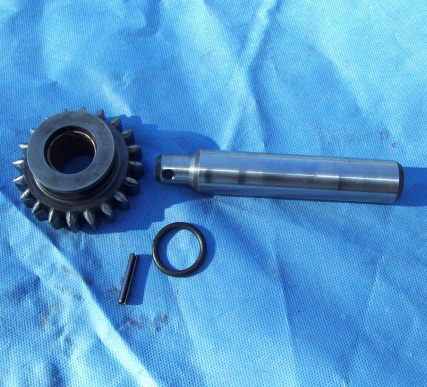
The reverse assembly consists of 4 pieces.
|
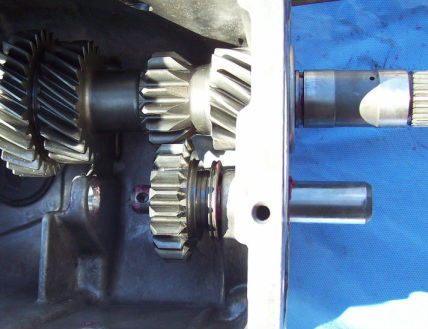
Slide the rod half way through the outside of the case and slide reverse gear over the rod.
|
|
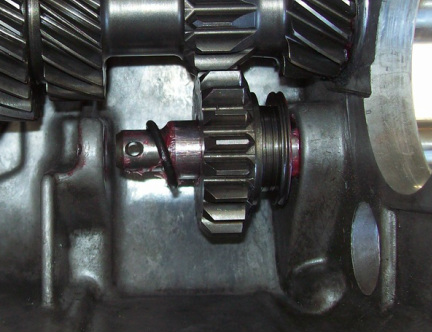
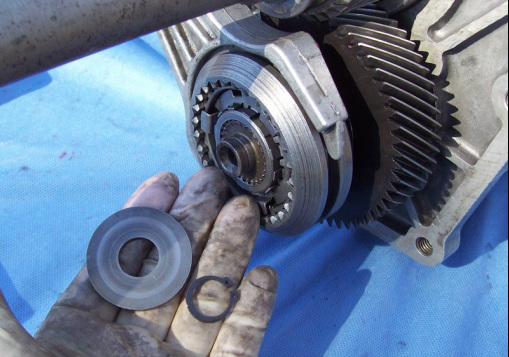
Slide to rubber O-ring into this position. It does NOT slide over the thicker portion of the rod.
|
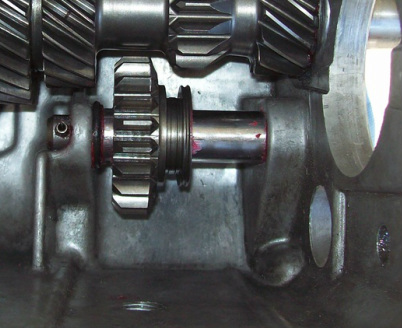
Push the rod completely into position. The outer end will be flush with the outside of the case.
|
|
Drive the roll pin through the hole until you can feel some of the pin on the underside.
|
Generously lubricate the rod. Slide reverse gear back and forth to be sure it moves freely.
|
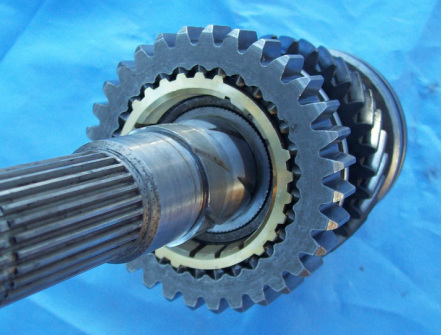
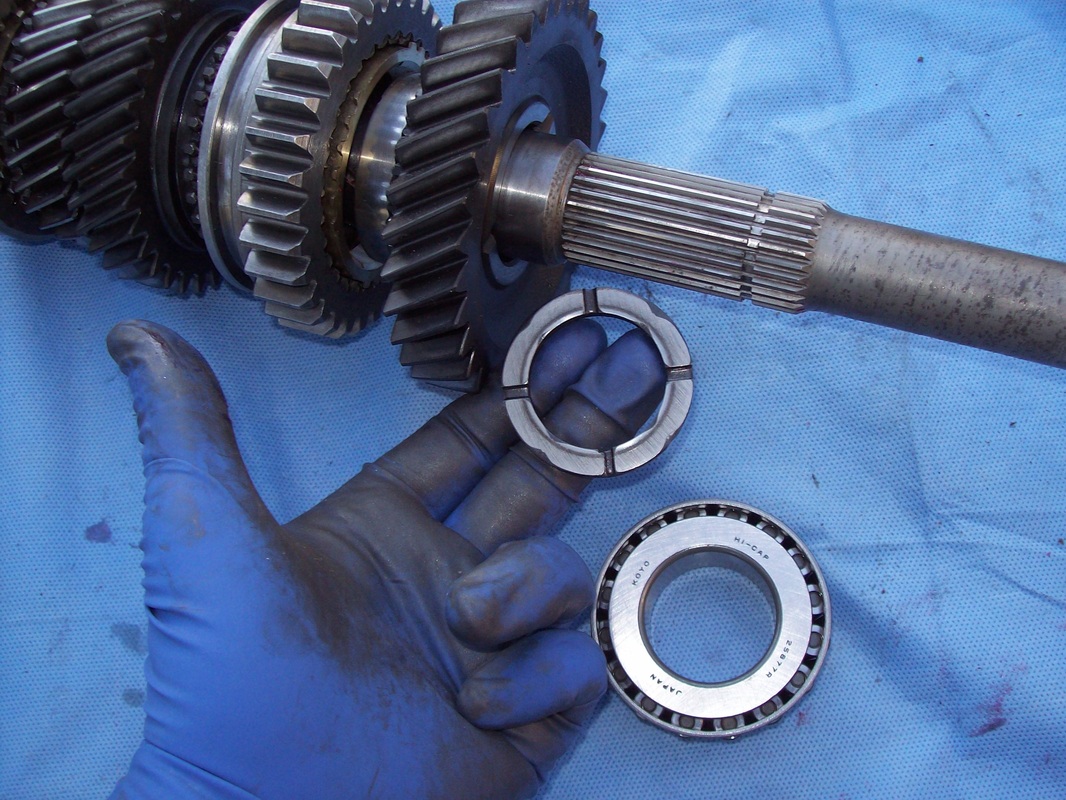
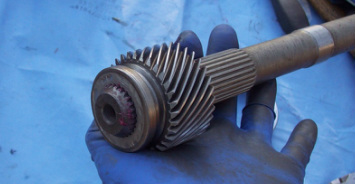
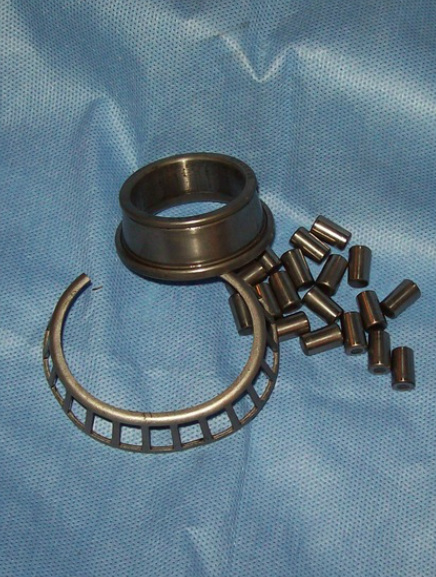
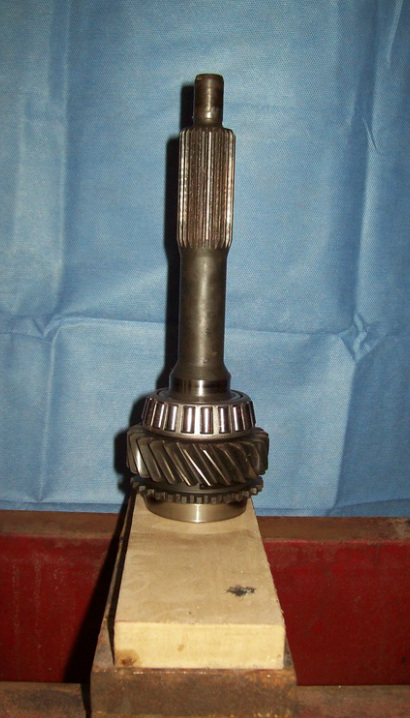
Step 4: The Input Shaft Bearing
|
Cut open and remove the cage from the old input shaft bearing. Save the race. Discard the cage and bearings.
|
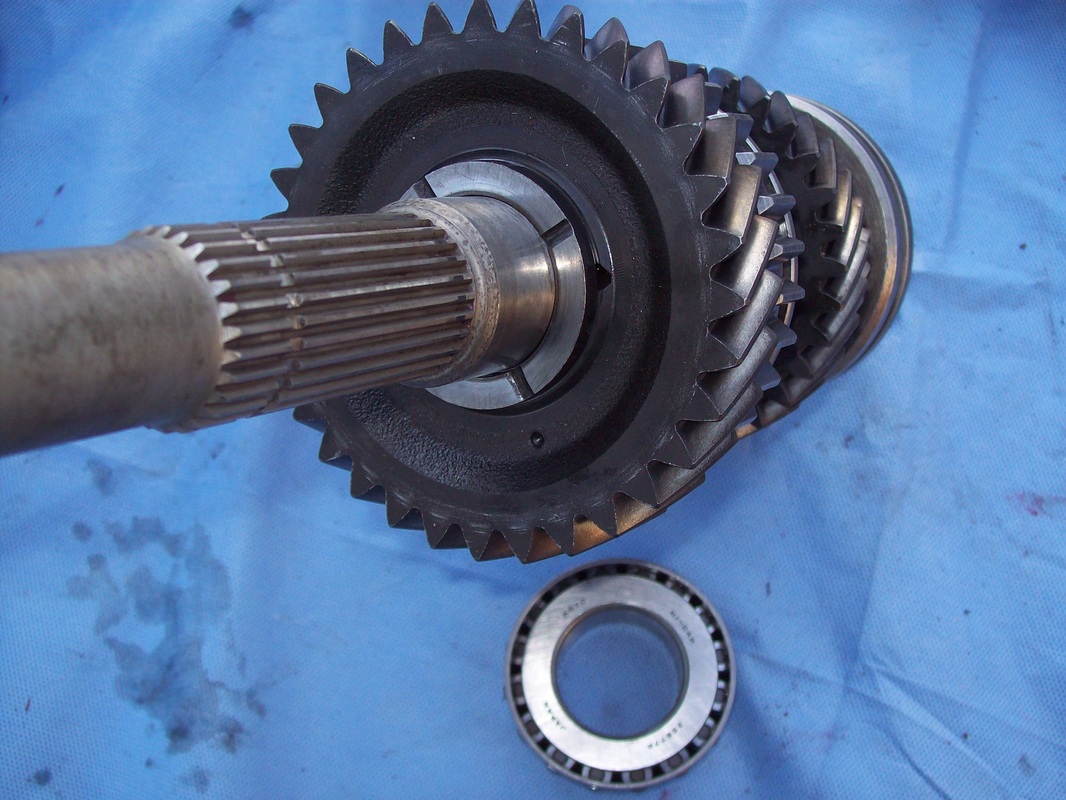
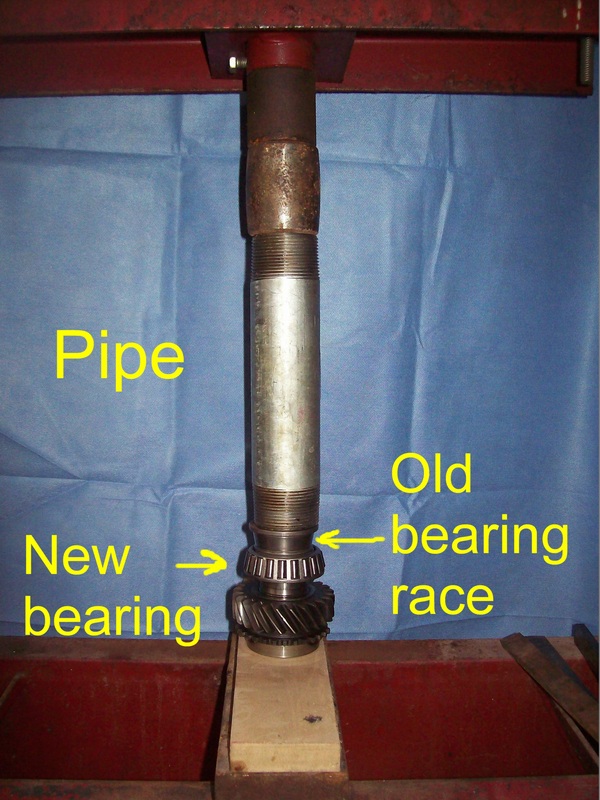
The old race will be used as a pushing tool to press the new race onto the input shaft.

|
|
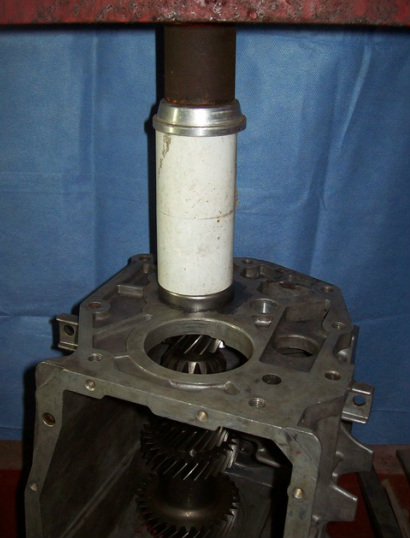
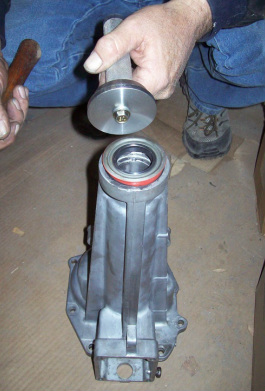
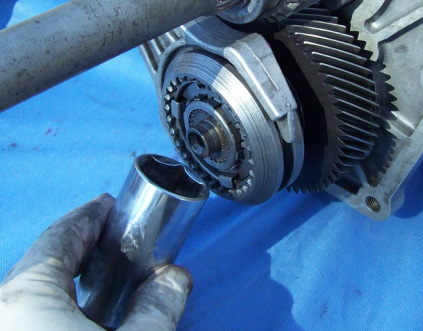
Place a block of wood beneath the input shaft to protect the machined surface. Use a pipe that is longer than the input shaft. The inside diameter of the pipe must be similar to the old bearing race.
|
Press the bearing into place.
|
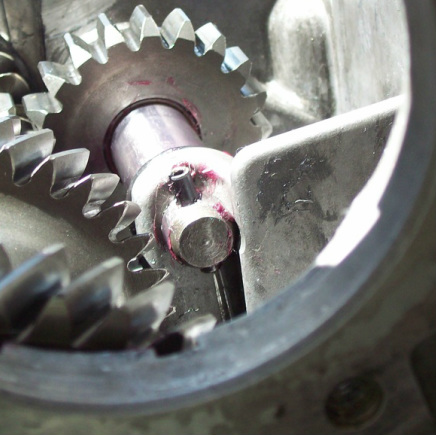
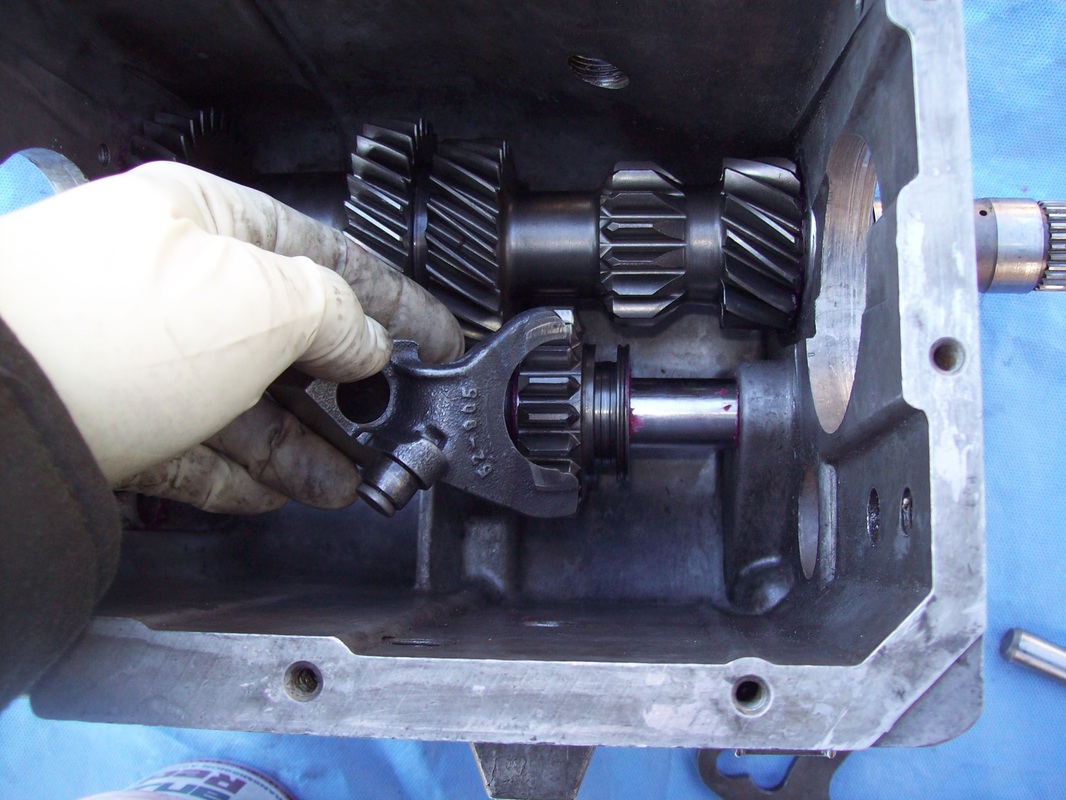
Step 5: Test fit the Reverse/5th Gear Shift Rod
Doing a test fit assembly now will make the final assembly go smoother.
|
Apply lubricant to the shift rod pilot hole and the channel for the reverse shift fork.

|
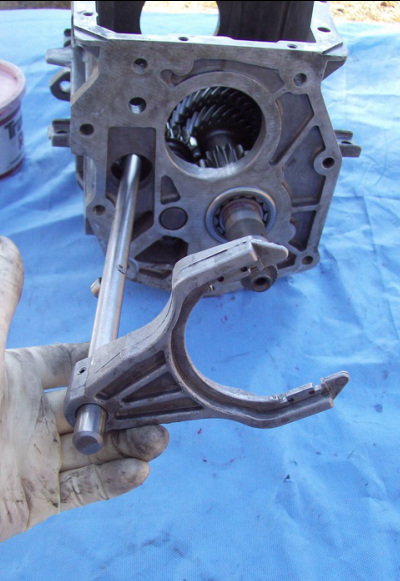
Lubricate all contact surfaces of the reverse shift fork.
|
|
Lay the reverse shift fork into position.
|
Guide the shift fork rod through the case and through the reverse fork.
|
Slip the reverse spring onto the rod. A: Hook the end of the spring onto the boss above the pilot hole before guiding the end of the rod into the pilot hole. B: Finish by hooking the other end of the spring to the reverse fork. The test fit is complete. Now disassemble in reverse order and set the pieces aside for now.
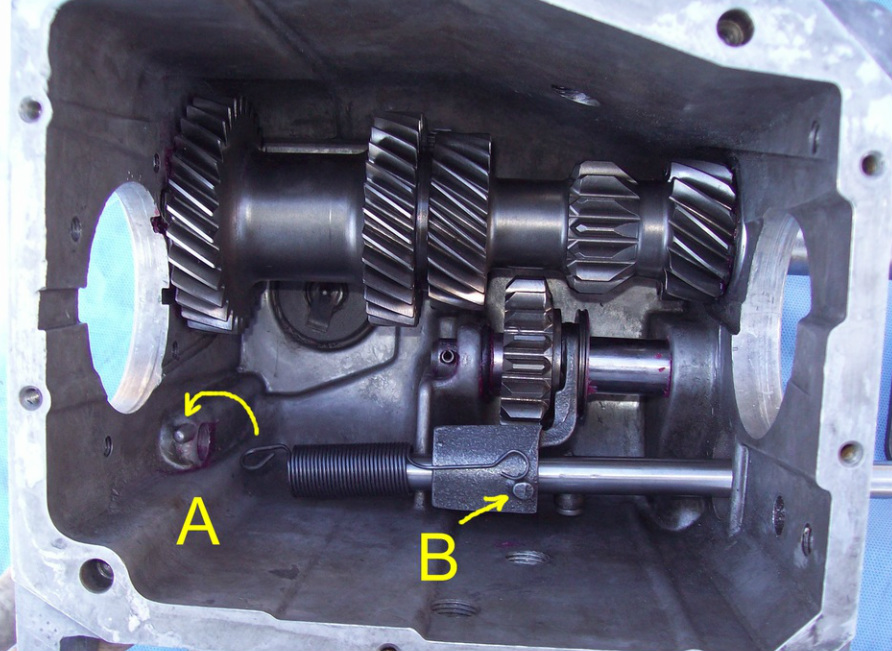
This is how it will look during the final assembly.
Step 6: New Seals
|
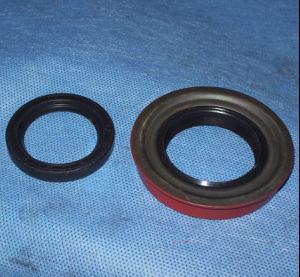
The kit included new seals for the input bearing retainer and the tail housing.
|
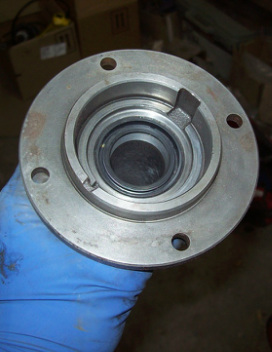
New front bearing retainer seal installed.
|
Tail housing seal ready to install.
|
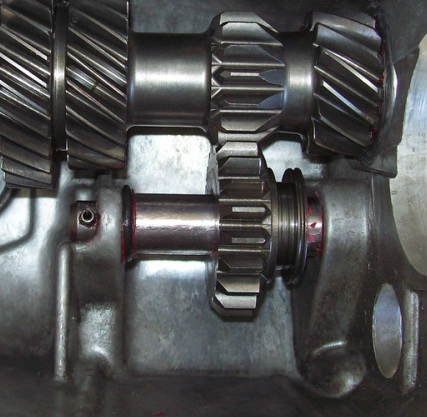
Step 7: Installing the Input and Main Shaft Into the Case
|
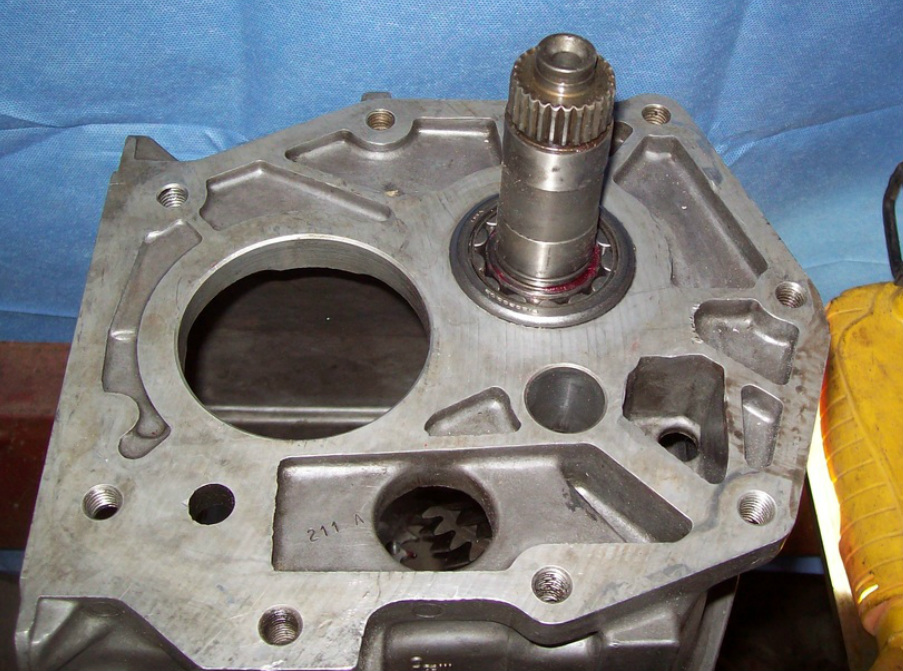
Gently lower the main shaft and gears into the case. Slide the rear bearing race over the end of the shaft and into this temporary position.
|
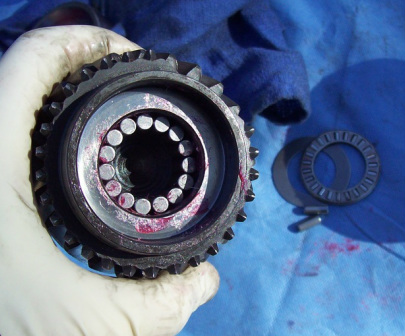
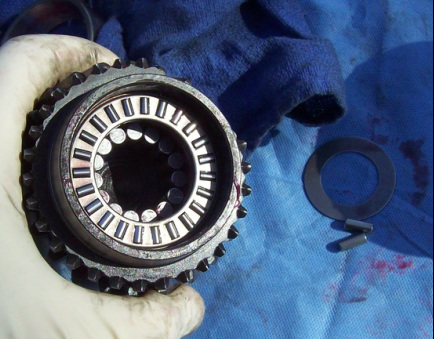
Using transmission lube to make them sticky, install the 15 roller bearings inside the input shaft.
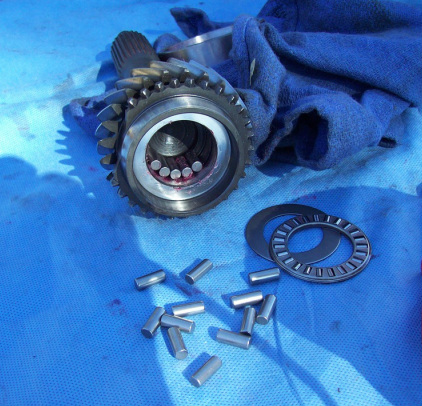
|
|
My kit included 17 bearings but only 15 are used. The lube holds them in place.
|
The needle bearing is next. The race is on the table.
|
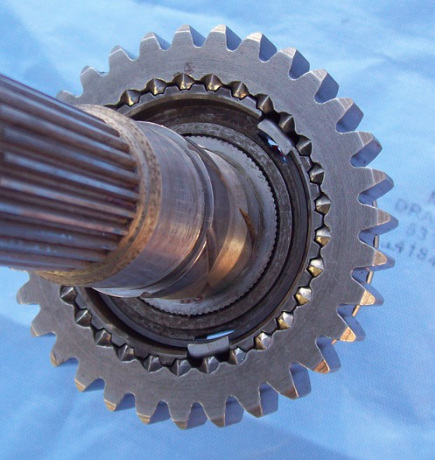
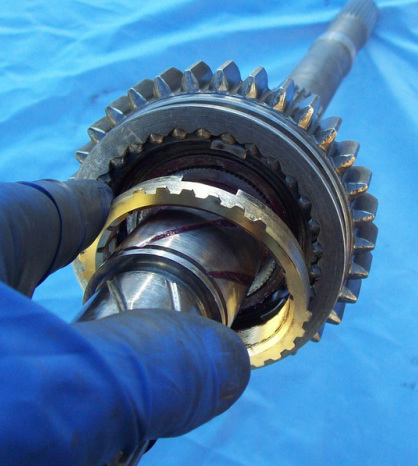
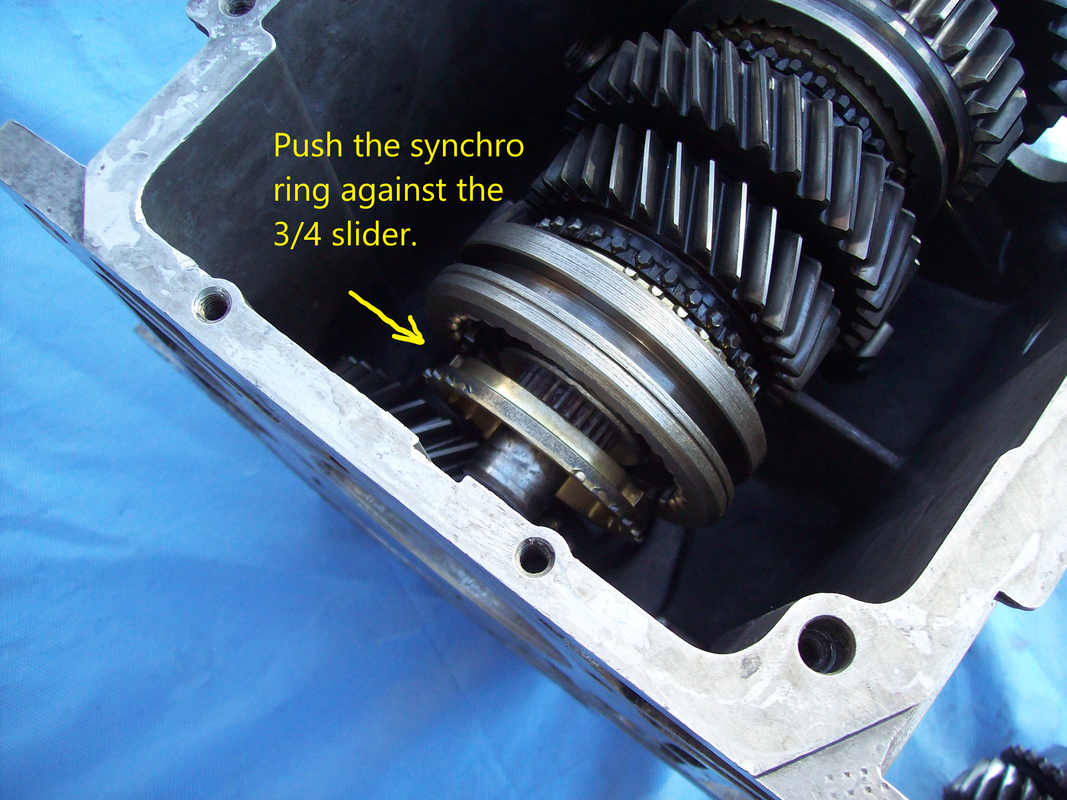
Next, you will install a new synchro ring onto the 3/4 slider. Use transmission gel and align the notches with the 3 keys inside the slider. See photo.
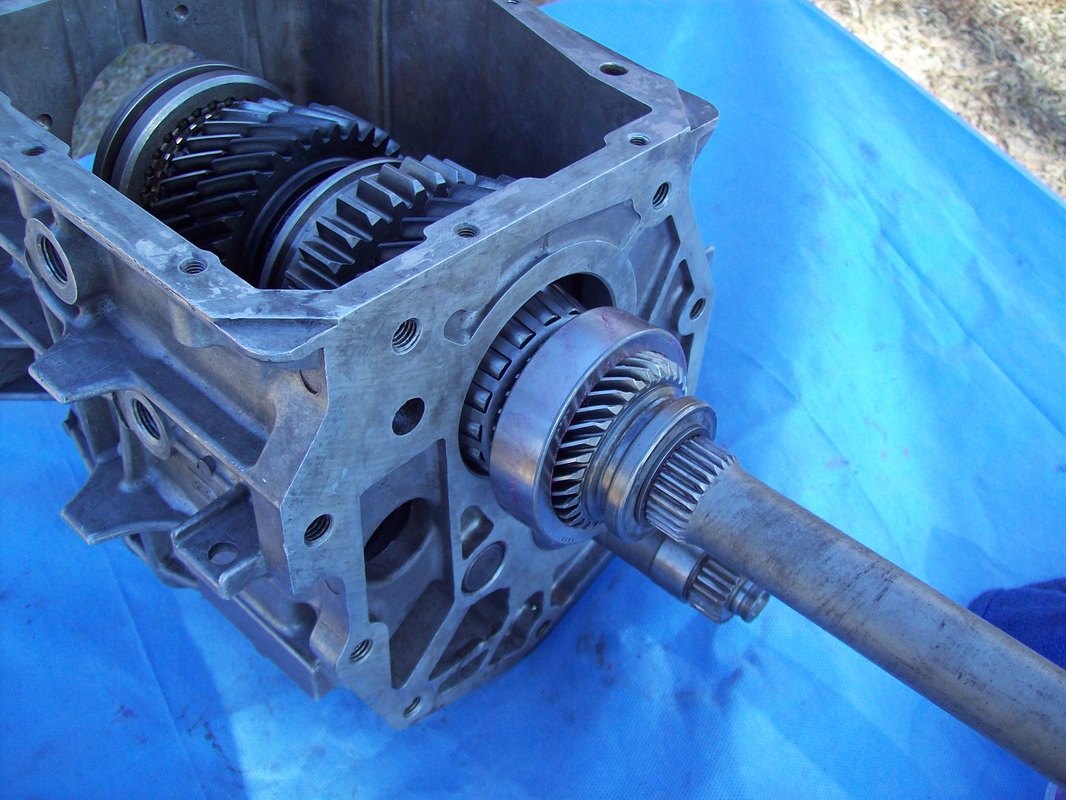
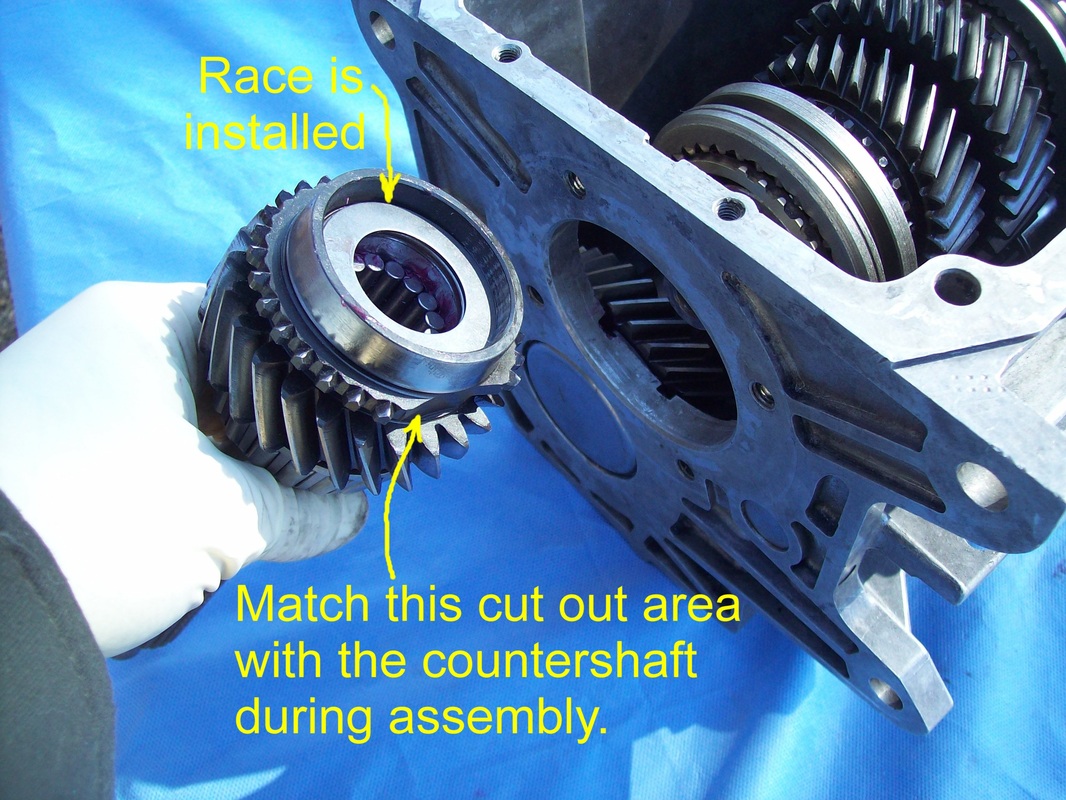
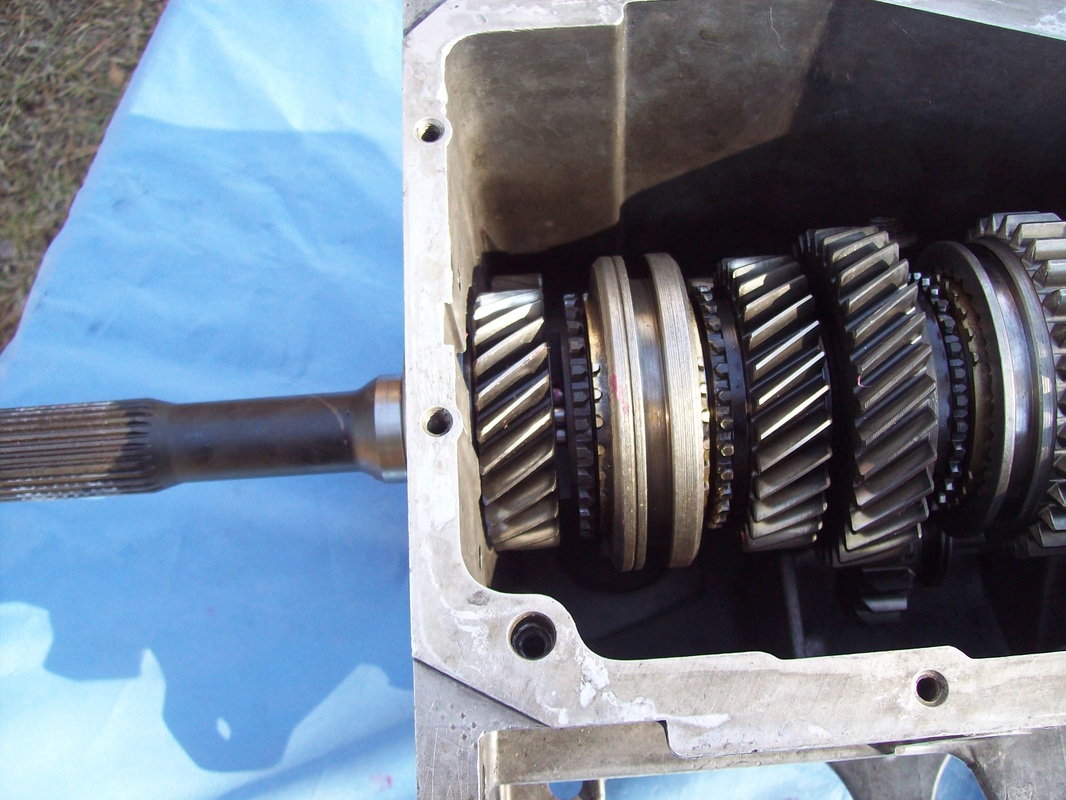
Apply lubricant to all bearings and contact surfaces, including the end of the main shaft. Study the photo on the left. Carefully align the cut out area of the input shaft with the countershaft as you install it onto the main shaft. Make sure none of the roller bearings inside the input shaft become dislodged or fall into the case during assembly.
|
|
|
Put the race inside the input bearing retainer. Leave the shims out for now.
|
Bolt the input bearing retainer into place with the large boss at the bottom.
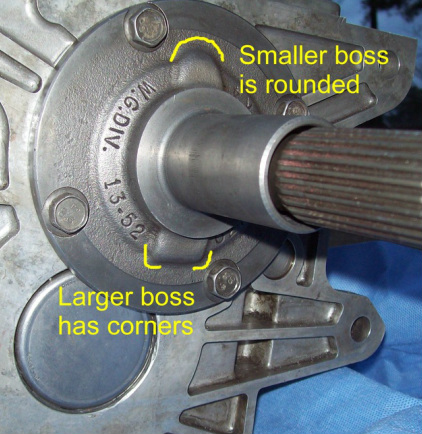
|
Step 8: 5th Gear Slider Assembly
|
All of the inner splines of the 5th gear slider ring are machined and one side has a slanted edge.
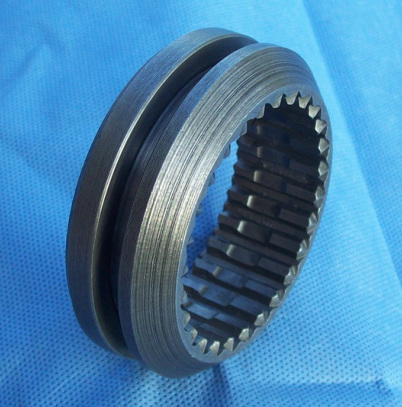
|
One side of the center hub is raised and the other side is flat.
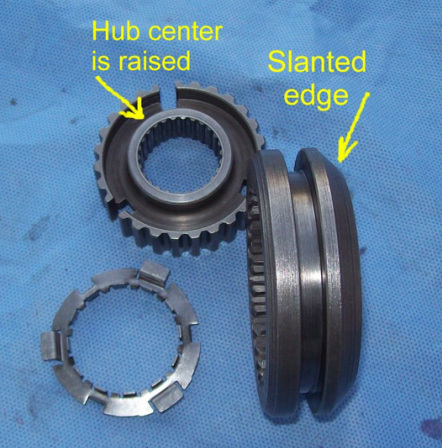
|
|
Lay the pieces on the table. The slanted edge and raised hub center should both be facing up. Lubricate both pieces and then insert the hub into the ring. Make sure the pieces slide freely.
|
Position the key inserts and then install one of the springs in a clockwise direction. Place the hook end of the spring under the center of the key at the 12 o'clock position - see photo below.
|
|
Align the retaining clip with the key inserts and press it fully into position.

|
Turn the assembly over, keeping the 12 o'clock key insert in the same position. Install the final spring in the same way you did the first one.
|
Test fit the smallest brass blocker inside the back of the slider assembly.
|

|
Step 9: Rear of the Case
|
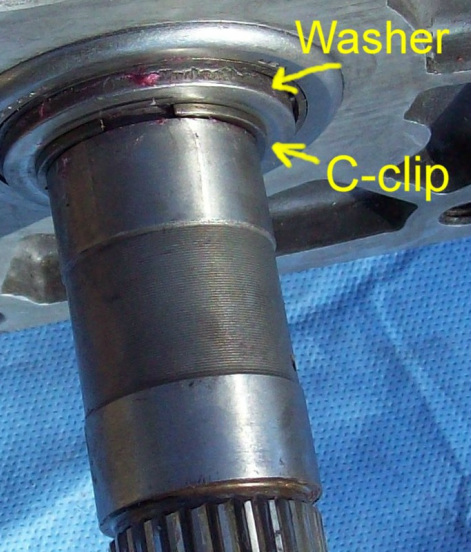
This thrust washer goes on the countershaft next to the rear bearing.
|
A thin C-clip will go on after the washer.
|
|
The washer is held in place by the thin C-clip.
|
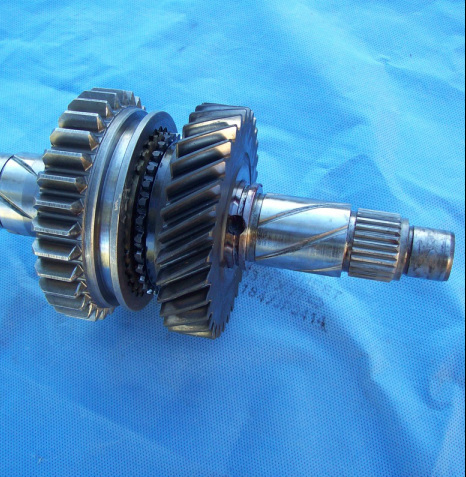
Slide the 5th Drive Gear onto the countershaft.

|
Install new shifter fork pads on the 5th gear shifter fork.
Repeat the process outlined in Step 5 until it looks like the photo below. Put the 5th gear slider and brass blocker together. Hold the slider/blocker assembly in the fork. Two things now happen at once. You will guide the slider/fork assembly onto the countershaft splines and simultaneously guide the rod through the installation steps outlined in Step 5.
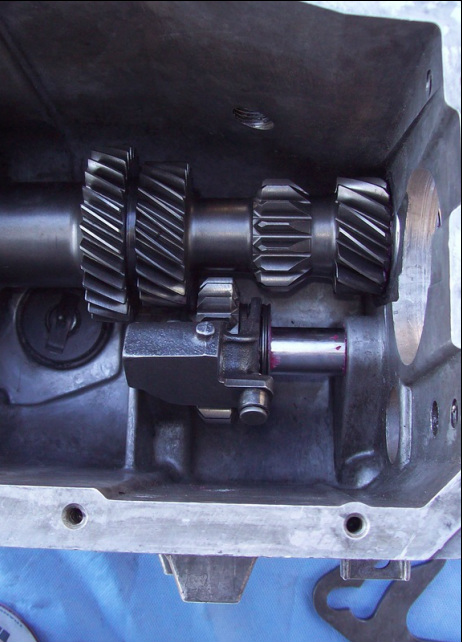
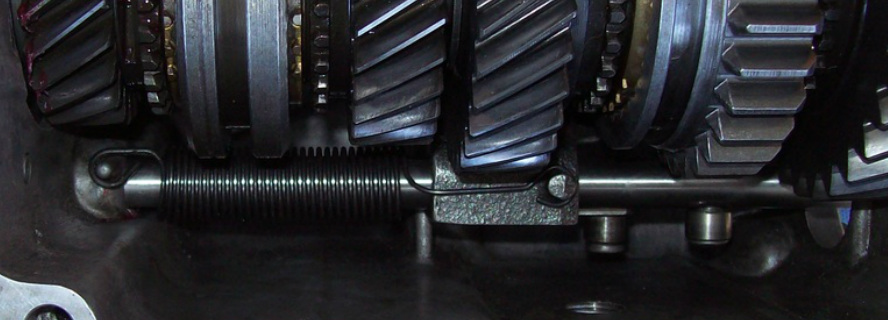
Here's another look at the Reverse/5th gear shift fork rod after installation.
|
Use a large socket as a mandrel to tap the raised center of the slider. Be sure to fully push the slider onto the countershaft splines. Do not strike the key retainer plate.
|
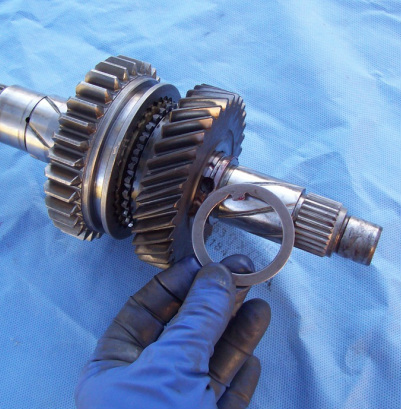
This large washer goes on the end of the countershaft. It is held in place by the snap ring.
|
This completes the 5th gear shift fork assembly.
Step 10: Reverse Shift Lever
|
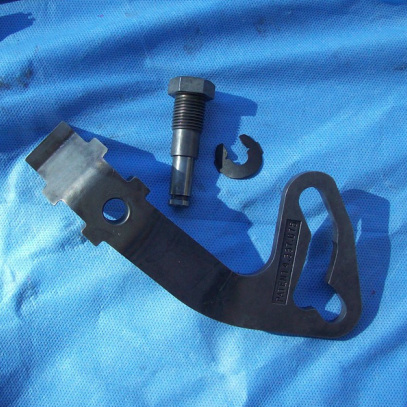
Reverse shift lever, bolt and clip.
|
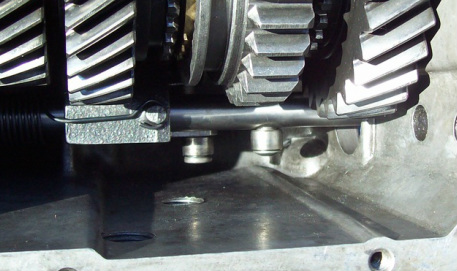
The reverse shift lever will connect with the 2 silver rollers. One roller is on the reverse shift fork. The other roller is on the reverse shift rod.
|
|
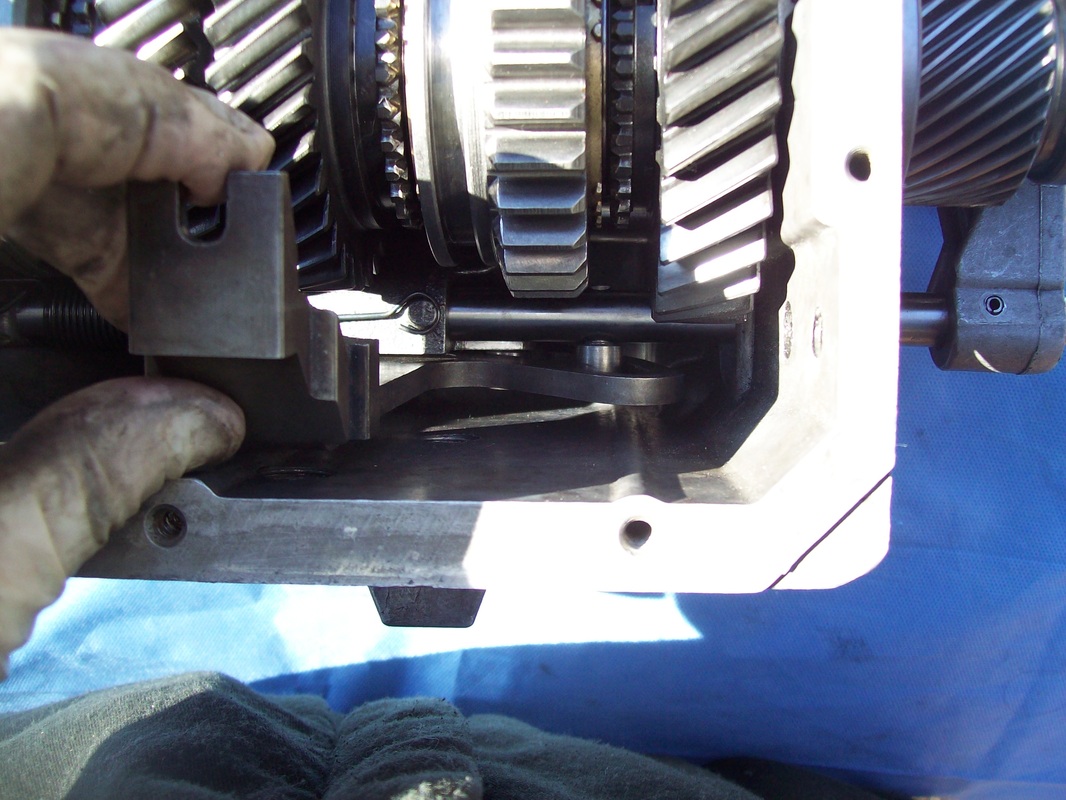
Hold the lever inside the case so the rollers are inside the reverse lever slot. Thread the bolt into the case to hold the lever in place.
|
The curved clip goes on the end of the bolt and holds the lever in place.
|
Step 11: Reverse Switch and Filler/Drain Plugs
|
The reverse switch screws into the case just below the reverse lever bolt.
|
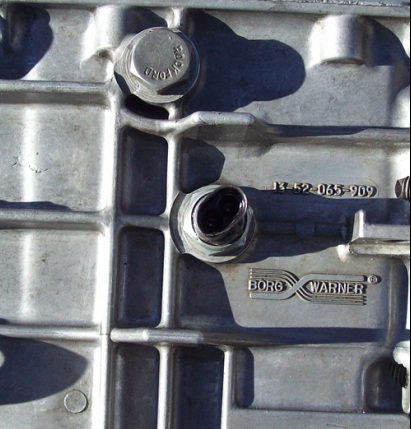
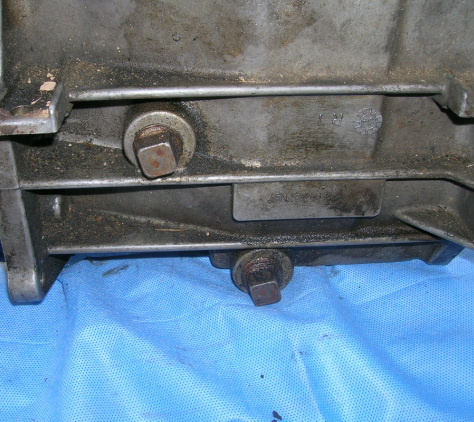
The drain and fill plugs go on the passenger side of the case.
|
Step 12: Case Lid, Drive Gear and Tail Housing
I am building this Camaro T5 in a special way. It's something called an S10 conversion. Basically, it means I'm moving the shifter to the S10 position by using certain parts from an S10 T5. Namely, the S10 tail housing, main shaft and case cover are used. Not all S10 conversions incorporate the S10 main shaft, but mine does. Up to this point, everything has proceeded exactly as it would for a stock V8 Camaro non-world class T5 rebuild. Even if you are rebuilding a Camaro T5 without the S10 conversion, you will see that the following steps are very similar.
|
Remove all dirt and sealant from the case cover. (This is an S10 case cover.)
|
Install new shift fork pads.
|
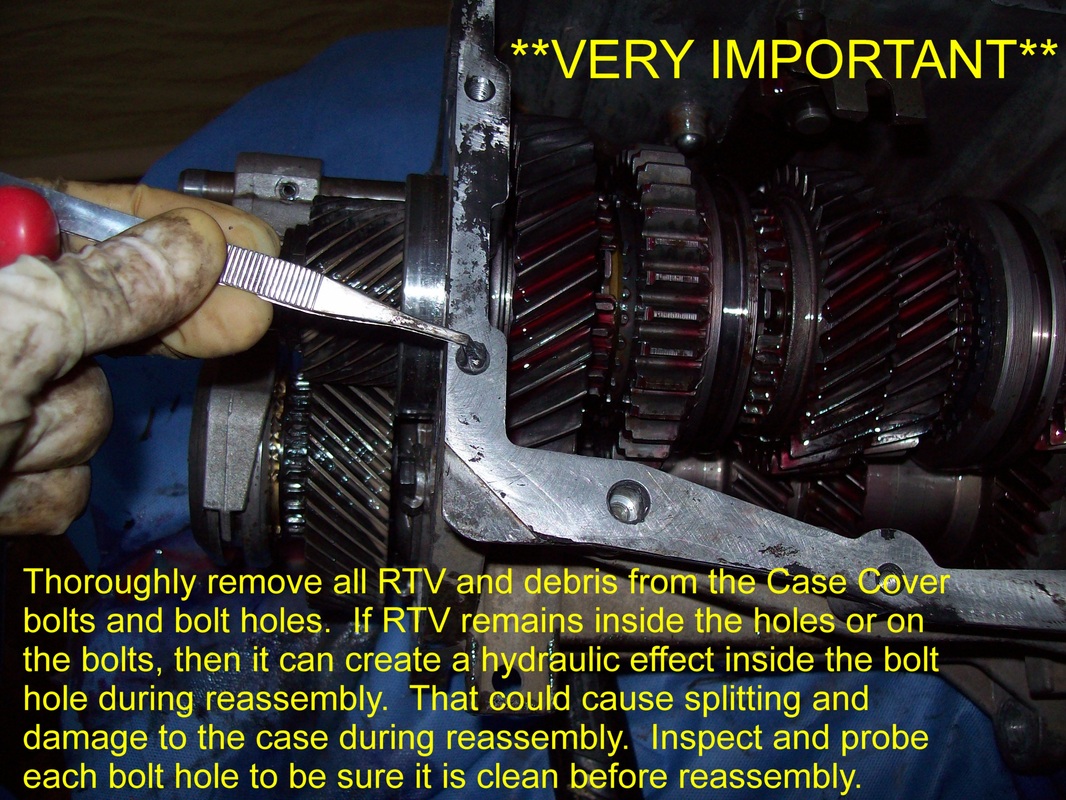
Before you apply fresh RTV and bolt the lid down - Did you remove all the dirt and old RTV from the bolts and from inside the holes? If not, do NOT bolt the lid down until you have done so.
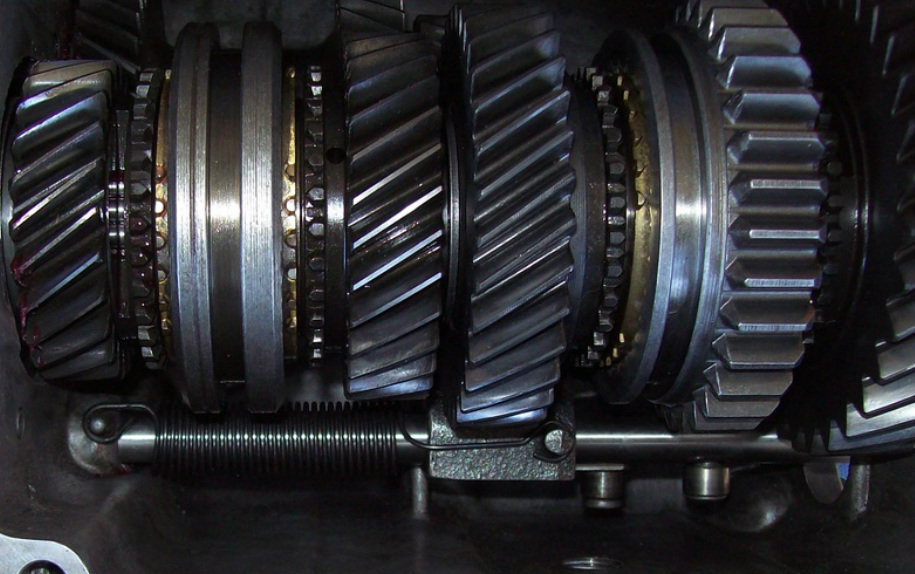
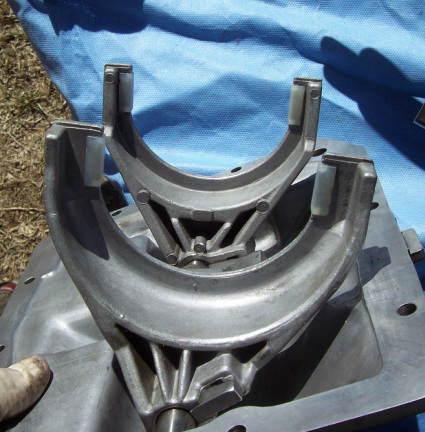
Following the directions in the T5 Factory Service Manual, apply fresh RTV sealant to the mating surfaces of the case and case cover. With both forward gear sliders and the reverse lever in neutral, lower the lid making sure the forks engage with the 1/2 and 3/4 sliders. (These photos are from a different T5 but they show the process well.)
Following the directions in the T5 Factory Service Manual, apply fresh RTV sealant to the mating surfaces of the case and case cover. With both forward gear sliders and the reverse lever in neutral, lower the lid making sure the forks engage with the 1/2 and 3/4 sliders. (These photos are from a different T5 but they show the process well.)
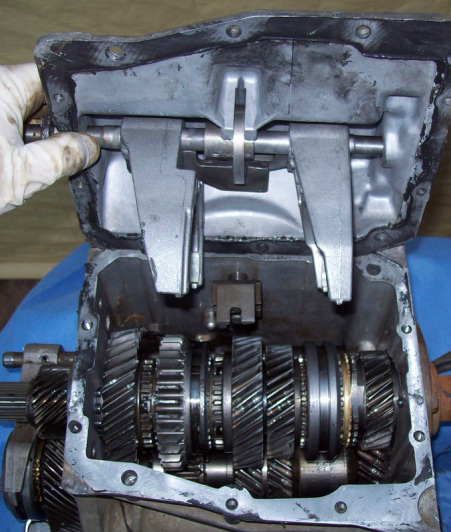
|
|
|
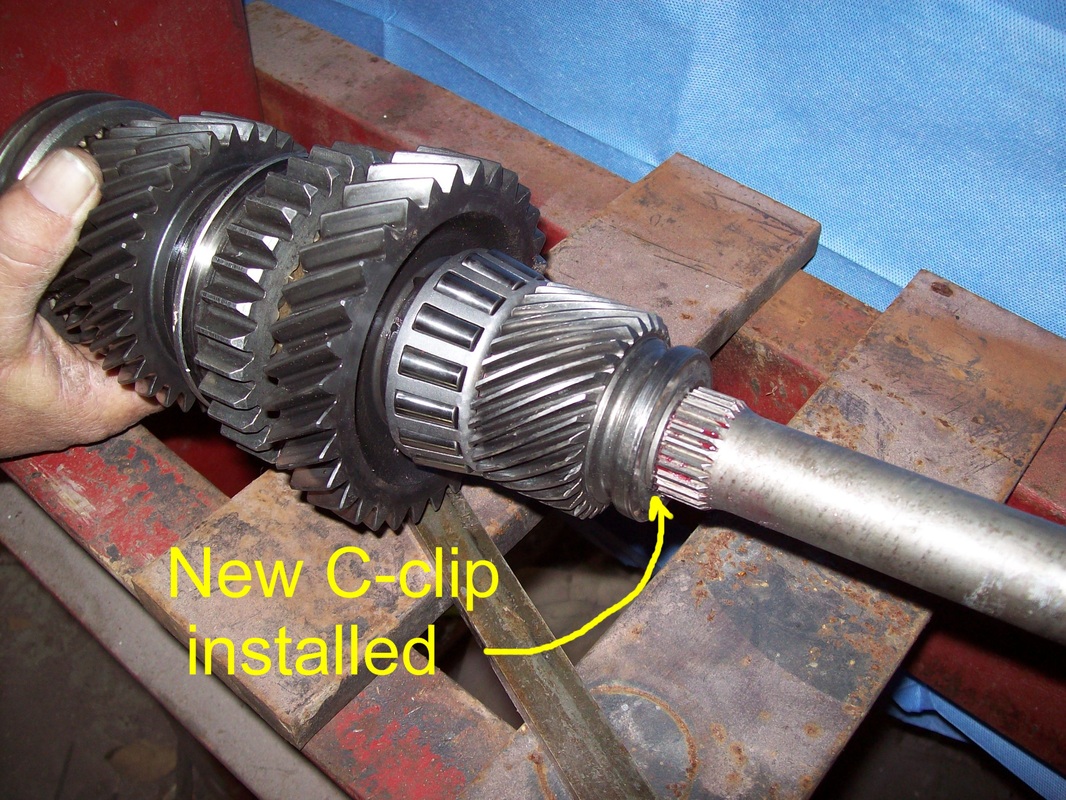
Install the Drive Gear and clip onto the main shaft. It's important to choose the correct Drive Gear because it can't be changed unless you remove the tail housing.
|
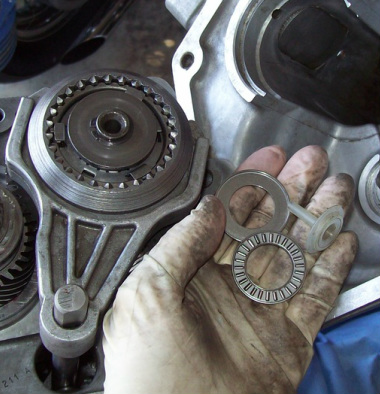
First the needle bearing, then the race, and finally the oil funnel in my hand will go onto the end of the countershaft. Use transmission lube to make them sticky so they stay in place.
|
Following the directions in the T5 Factory Service Manual, apply RTV sealant to the mating surfaces of the case and tail housing.
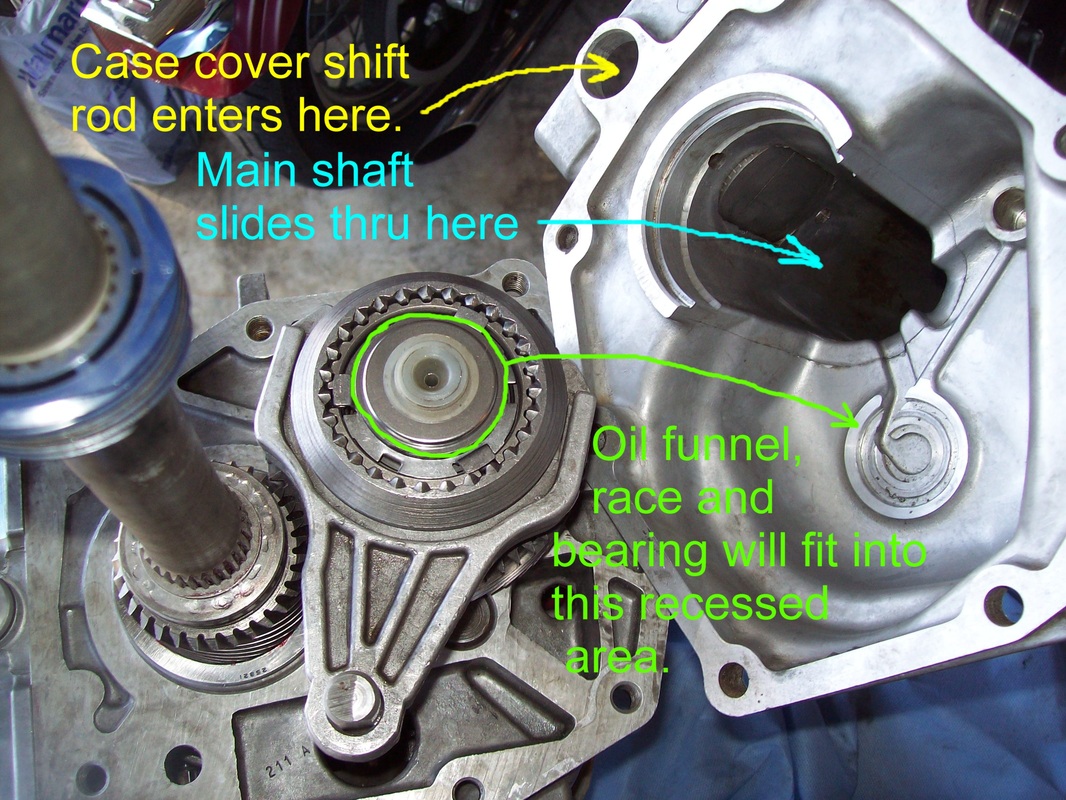
I find this next step easier to do with the transmission tilted up in the air. Apply lubricant to the shift rod and corresponding hole in the tail housing. Carefully slide the tail housing over the main shaft. Take care to align the countershaft oil funnel with the recessed area in the tail housing. Never use the bolts to draw the tail housing up to the case. Review the next photo before you bolt the tail housing to the case.
I find this next step easier to do with the transmission tilted up in the air. Apply lubricant to the shift rod and corresponding hole in the tail housing. Carefully slide the tail housing over the main shaft. Take care to align the countershaft oil funnel with the recessed area in the tail housing. Never use the bolts to draw the tail housing up to the case. Review the next photo before you bolt the tail housing to the case.
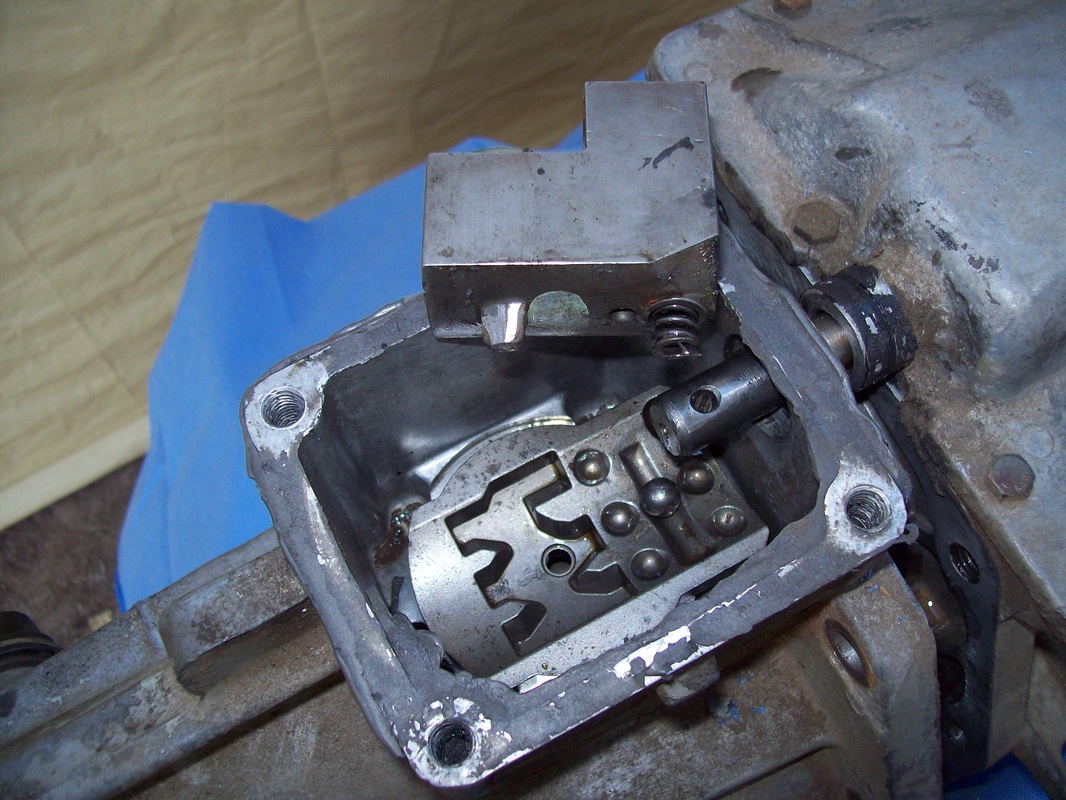
As you move the tail housing closer to the case, you must correctly position the shifter pieces onto the end of the shifter rod. You must be absolutely certain the roll pin has been removed from inside the largest piece. Slide all the shifter box pieces into their final position at the same time the case and tail housing meet.
|
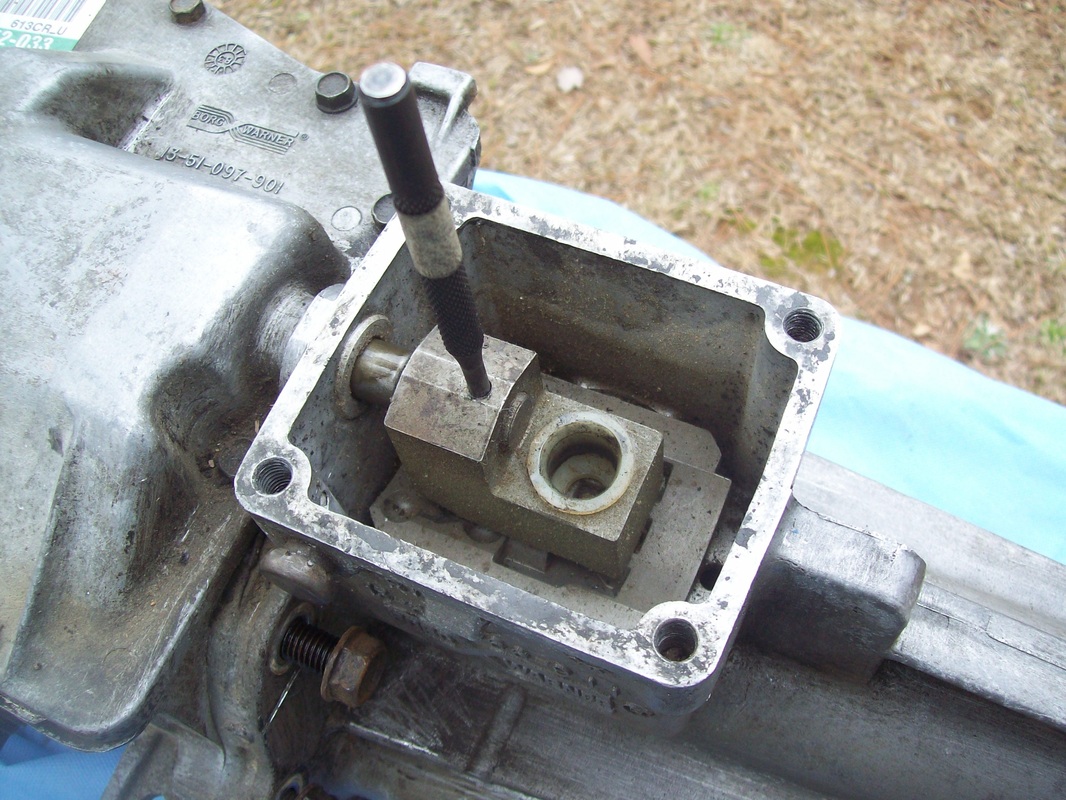
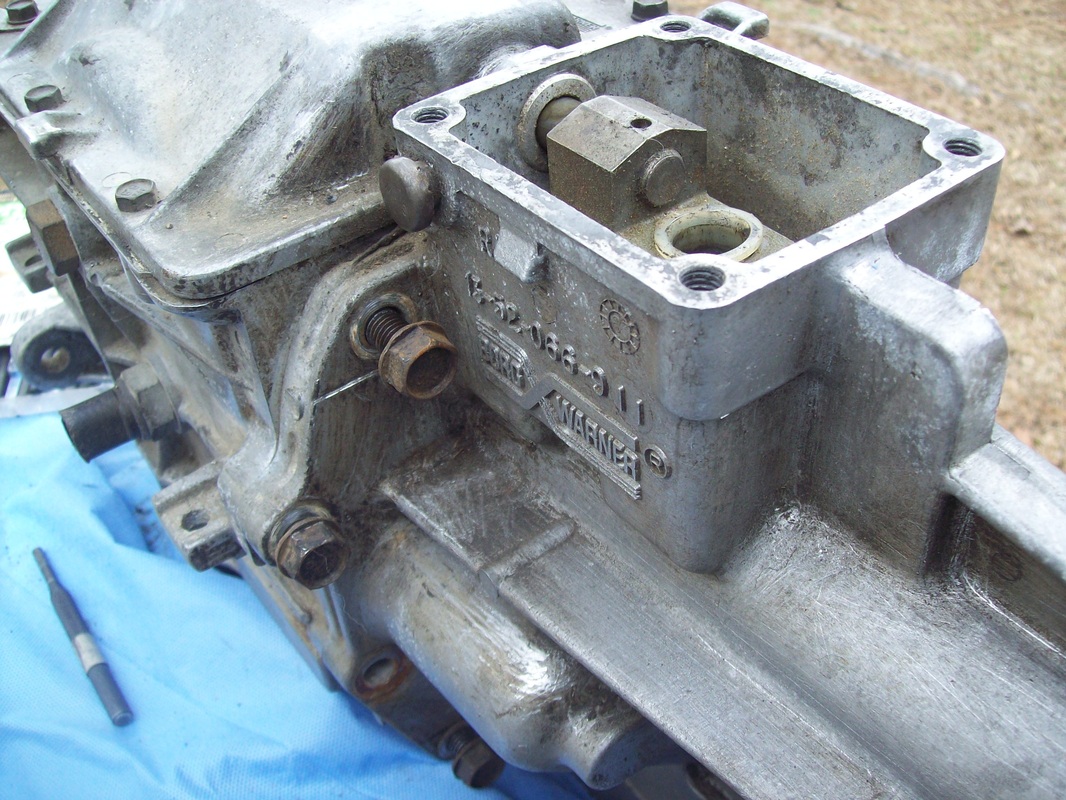
Here, the shifter box pieces are almost in the final position. The hole for the roll pin should line up with the shifter block.
|
After probing the roll pin hole with a drift to be sure everything is clear and lined up, install a new roll pin.
|
|
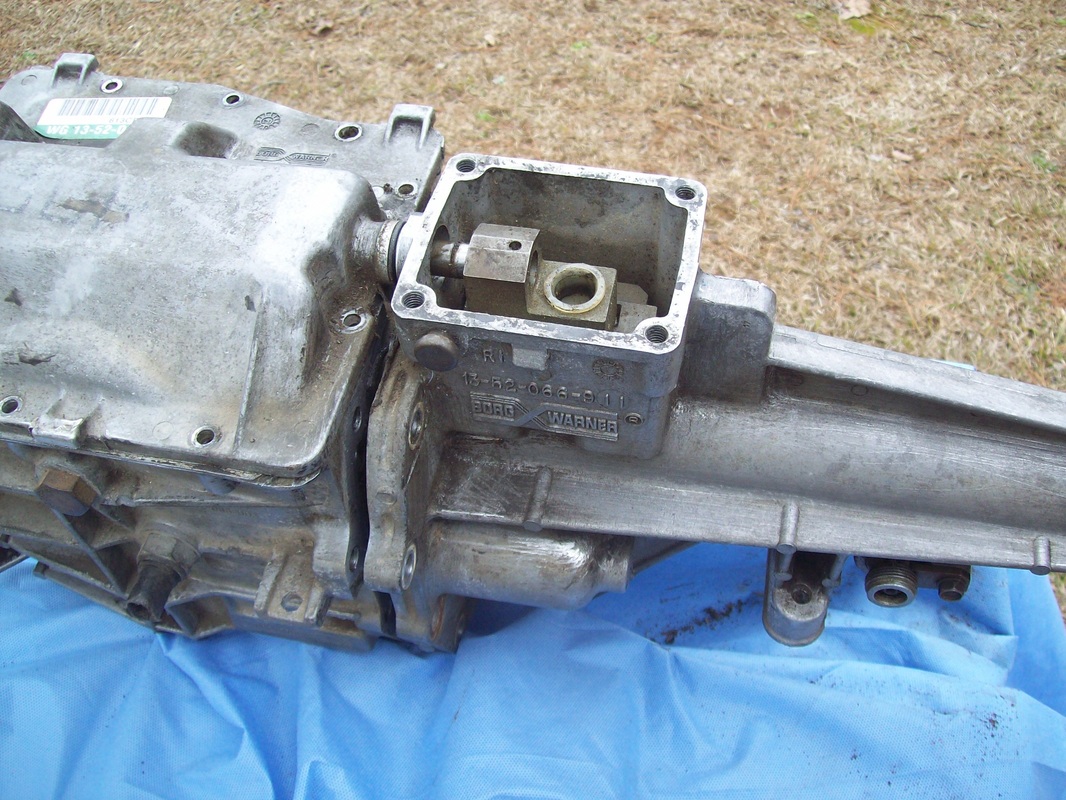
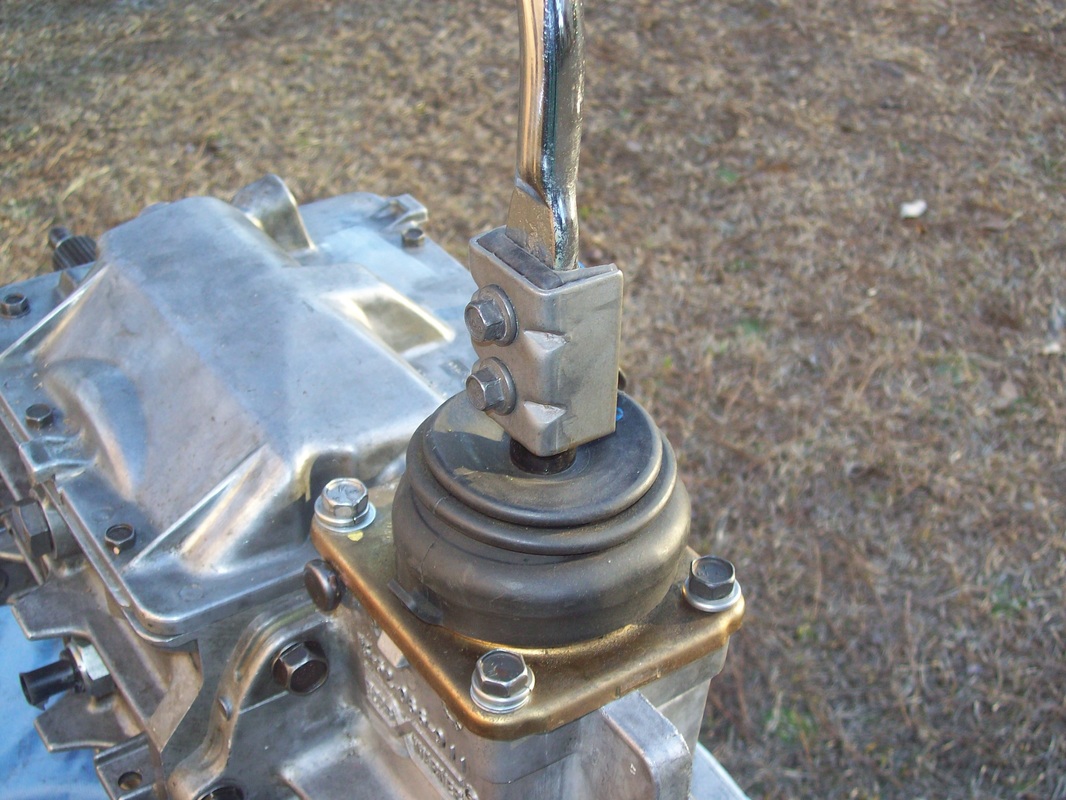
Install a few of the tail housing bolts and then the shifter handle. Never use the bolts to draw the tail housing up to the case.
|
Once you are satisfied that the transmission shifts properly, finish bolting the tail housing to the case.
|
Properly tighten the case cover and tail housing bolts to the torque specified in the T5 Factory Service Manual before the RTV sealant cures.
Properly torque the fill and drain plugs, reverse lever bolt and reverse switch as specified in the T5 Factory Service Manual. YOU ARE NOT DONE YET!
Properly torque the fill and drain plugs, reverse lever bolt and reverse switch as specified in the T5 Factory Service Manual. YOU ARE NOT DONE YET!
Several keys steps remain before the rebuild is complete.
1. Install the proper amount of shims inside the input shaft bearing retainer so there is no endplay. The procedure is outlined in the T5 Factory Service Manual. Use RTV to seal the bearing retainer in place. Recheck the final endplay.
2. Install a fluid plug in the tail housing if you plan to add transmission fluid before you install the T5 on the vehicle. It will help avoid spills and fluid contamination.
3. Refer to the T5 Factory Service Manual and then add the correct amount and type of transmission fluid through the shifter box. Use RTV to seal the shifter base plate to the shifter box.