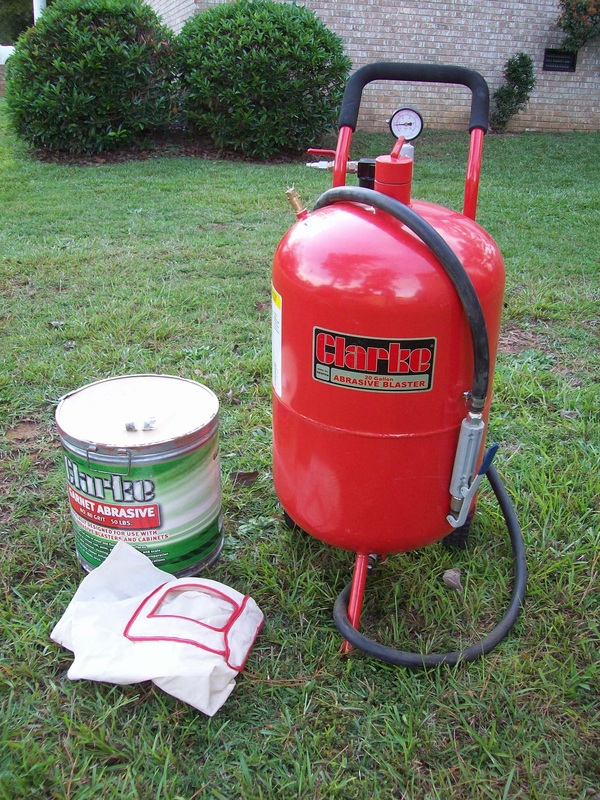
This sand blasting pressure tank will help me clean up stuff that won't fit inside my blasting cabinet.
|
This sand blasting pressure tank will help me clean up stuff that won't fit inside my blasting cabinet.
0 Comments
You may recall that it took me 3 hours to remove the passenger side upper control arm ball joint. Yes! It took me 3 hours to learn the correct technique to remove the rivets. On the driver's side however, I had the technique down cold and the rivets came out in less than 25 minutes start to finish. First, grind the head off the stud so it's flush. Then drill a hole into the center of the stud about 1/8" deep. 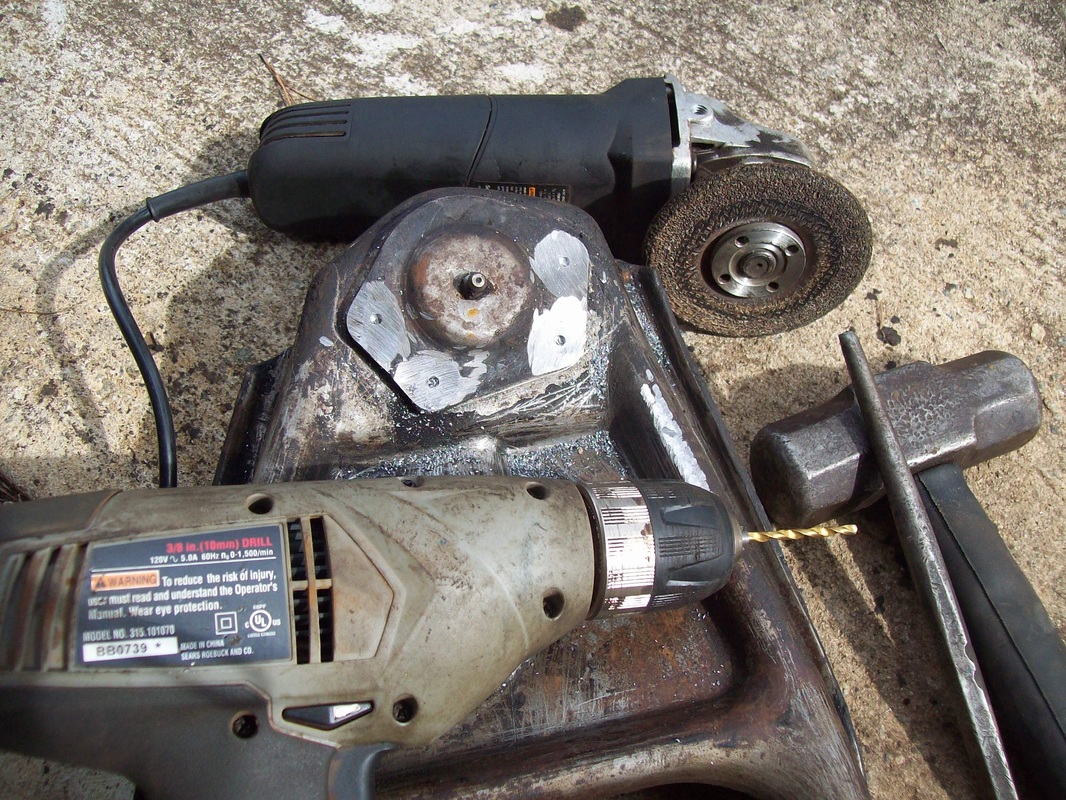 Next, pound the stud out with a sledge and steel punch. The control arm MUST be held securely on a firm surface or the blow from the sledge will not be very effective. The hole you drilled helps the punch stay centered on the stud. THEY ARE OUT! 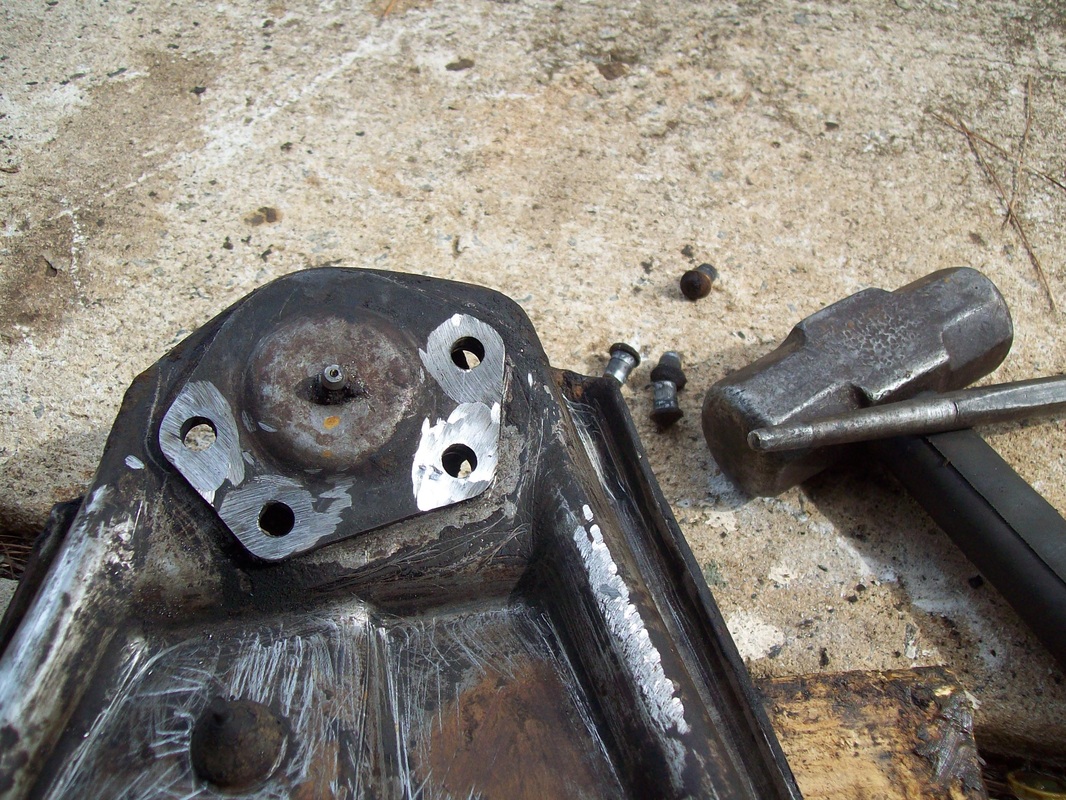 The PS brakes have been rebuilt and the hub and drum are back on. 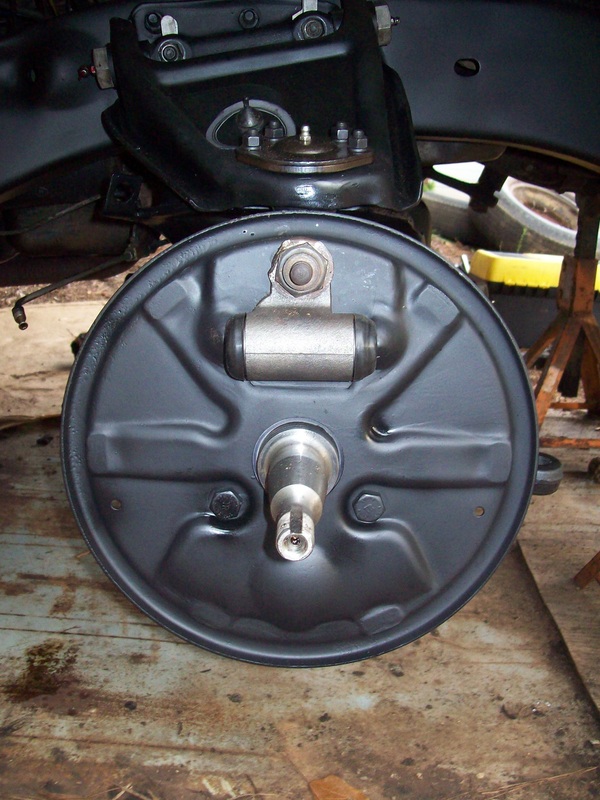 Now the driver's side needs to be cleaned. I got the last of it pulled apart today. 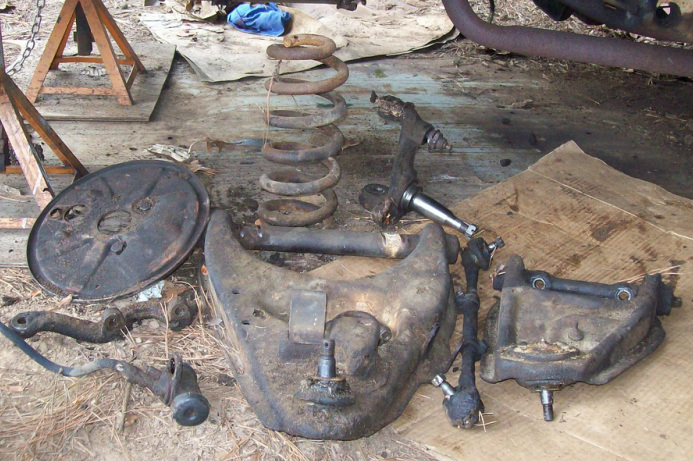 It's time to put the passenger side suspension back together. The pics tell it all. 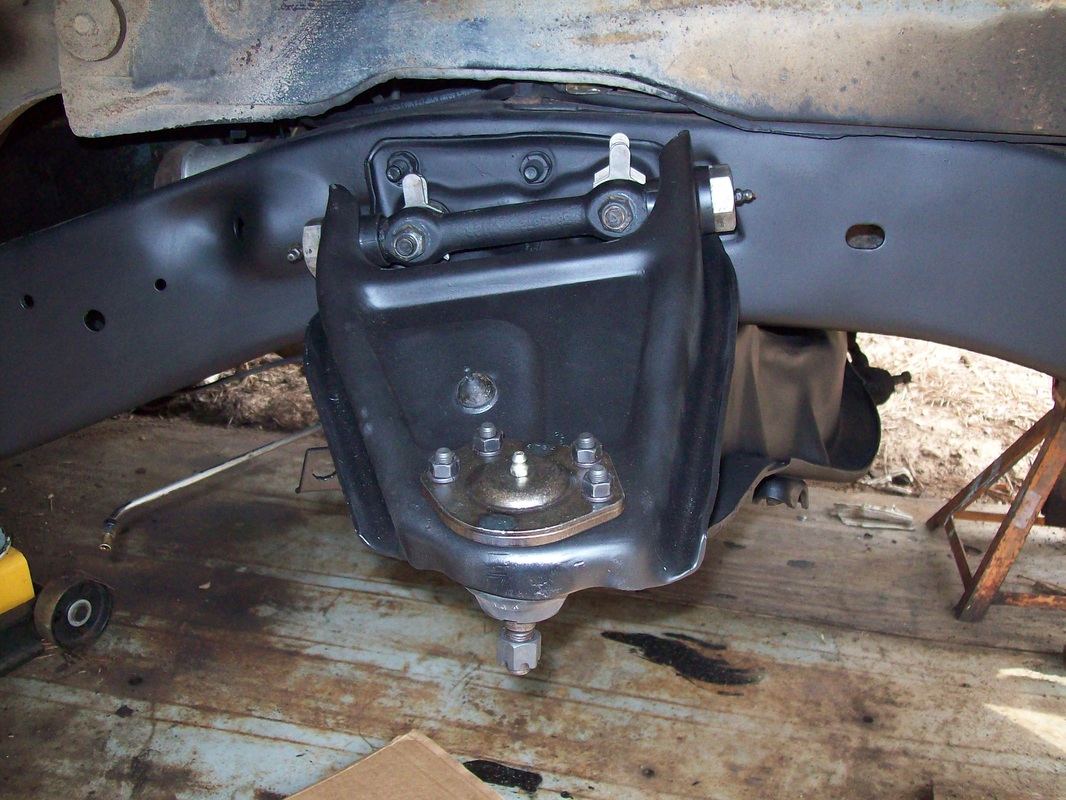 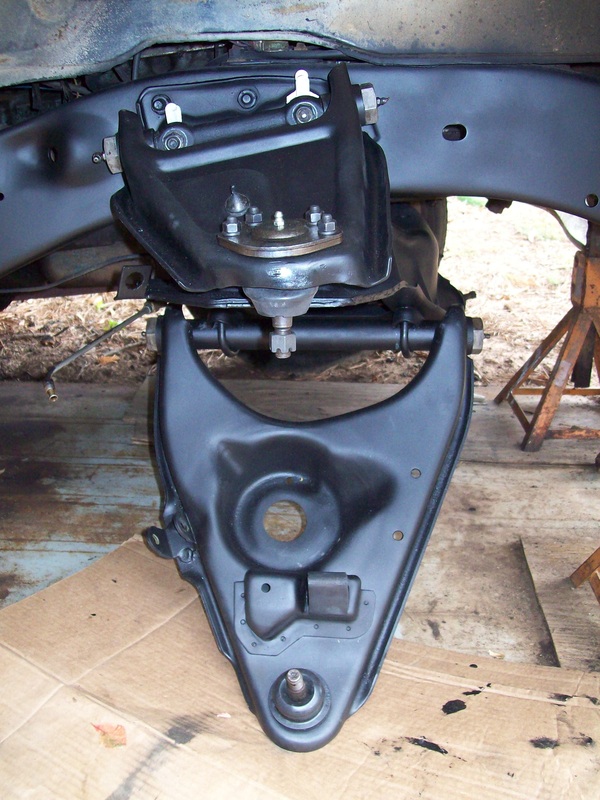 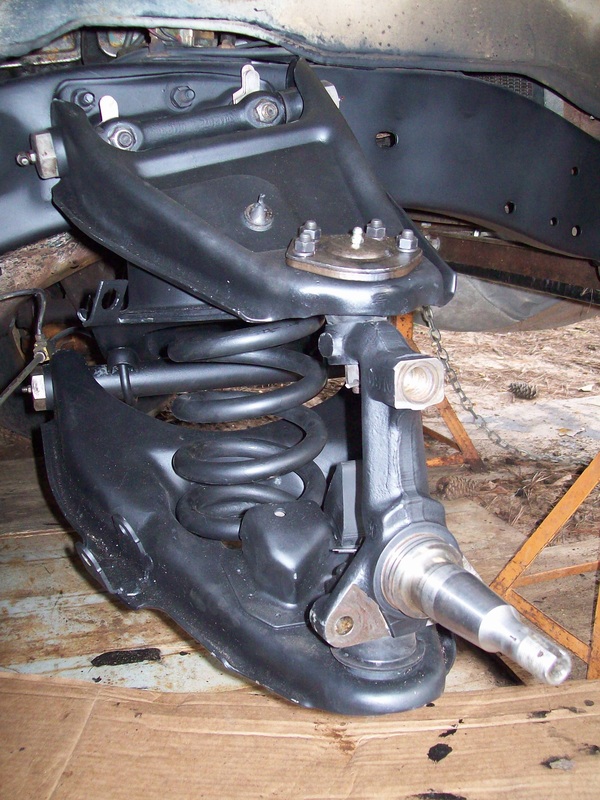 Looks a lot better than it used to! 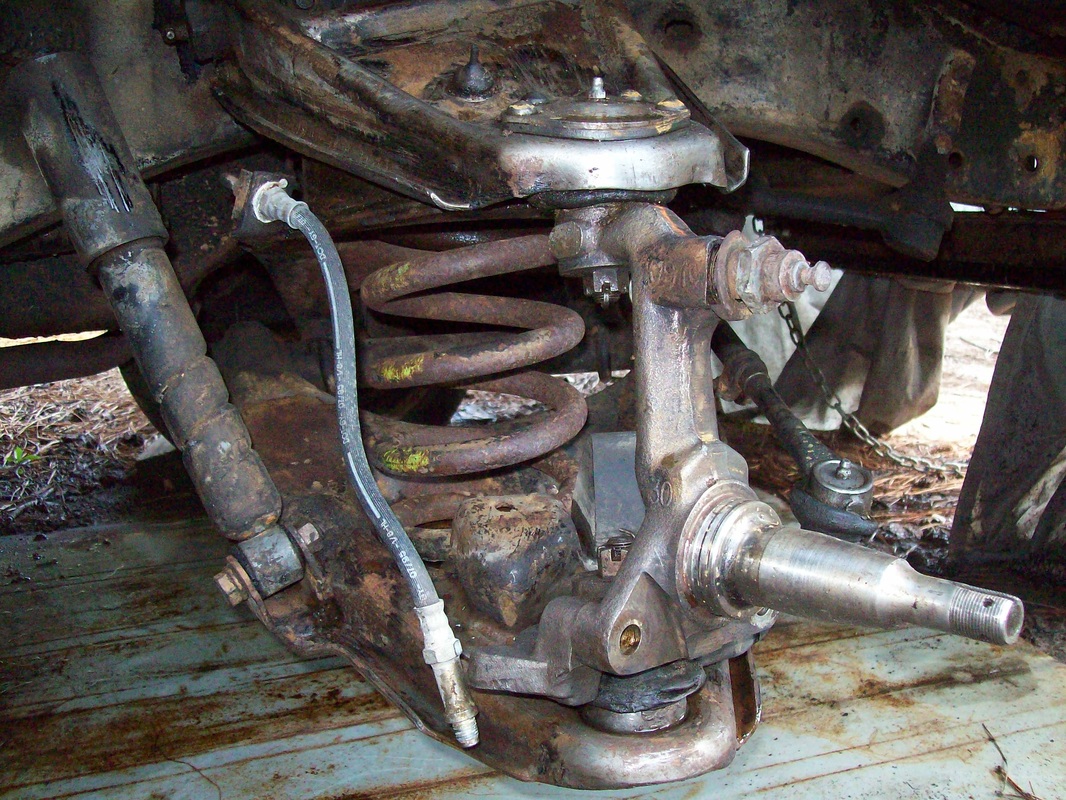 It sure takes a lot of time, but the results are worth it! The passenger side front suspension is clean, painted and ready to go back on. The frame is clean and painted as well. You will notice that the new upper and lower ball joints have been installed. 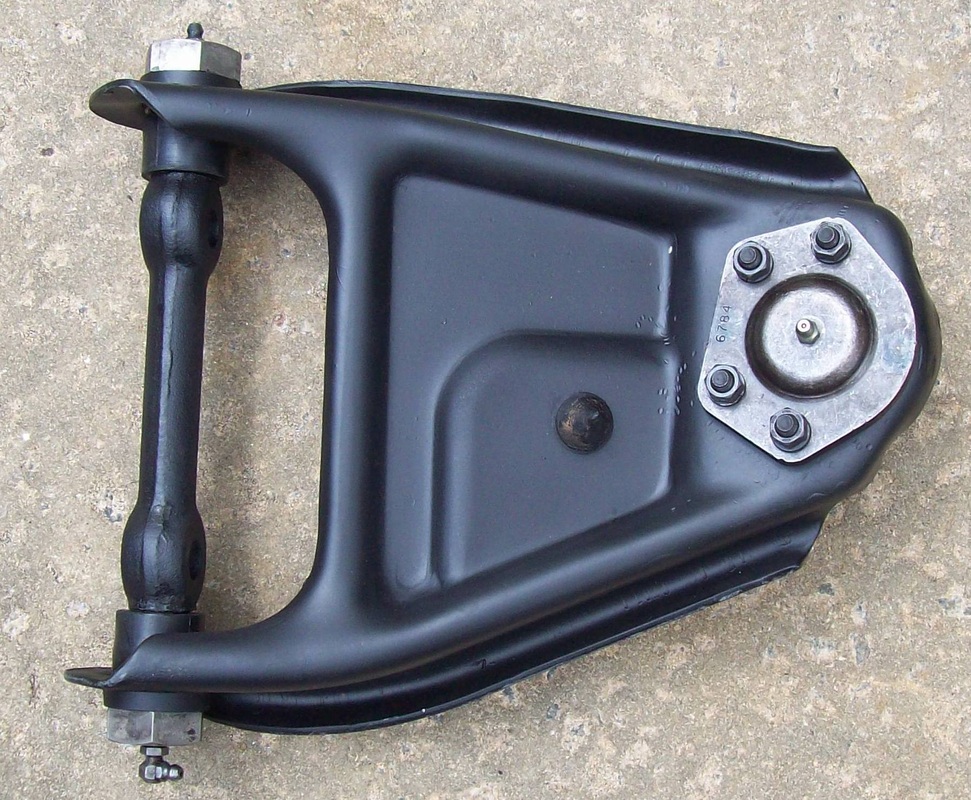 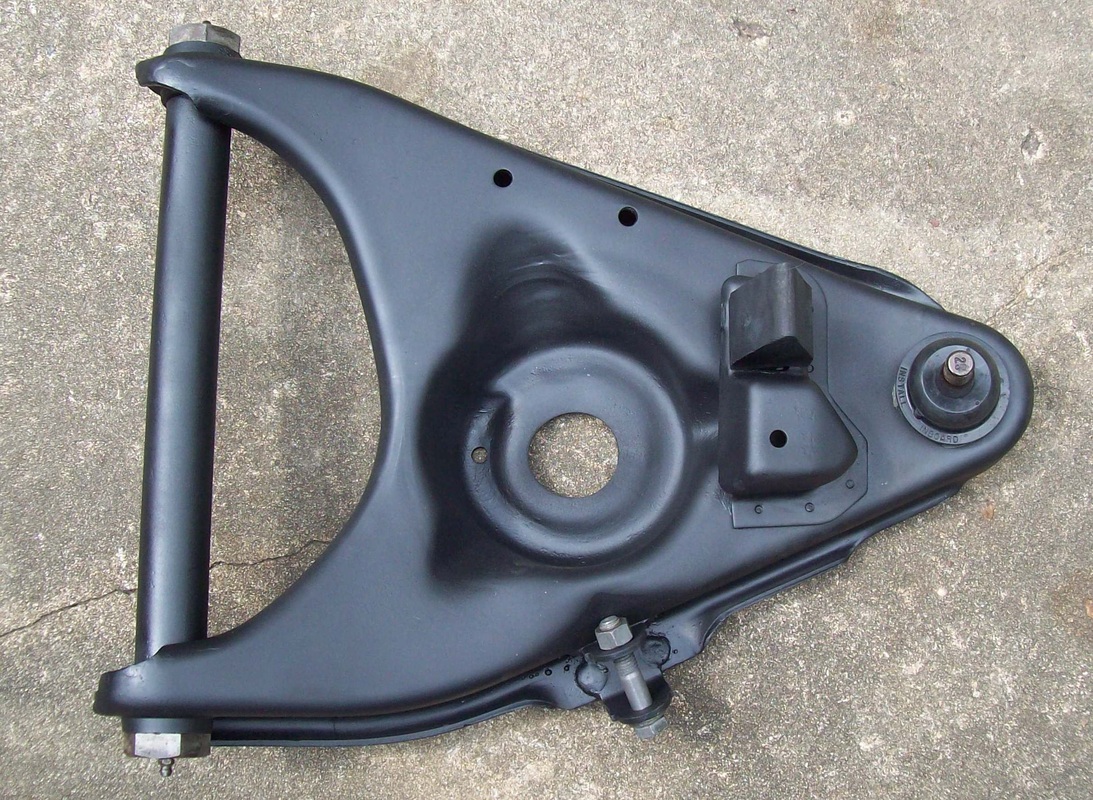  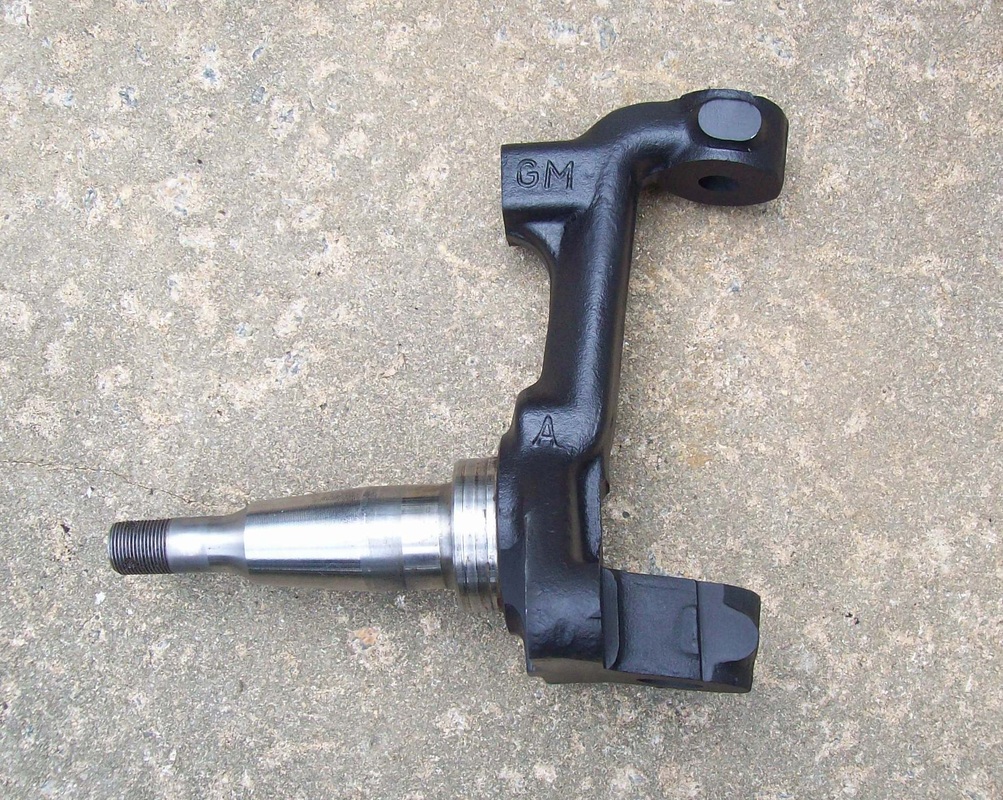 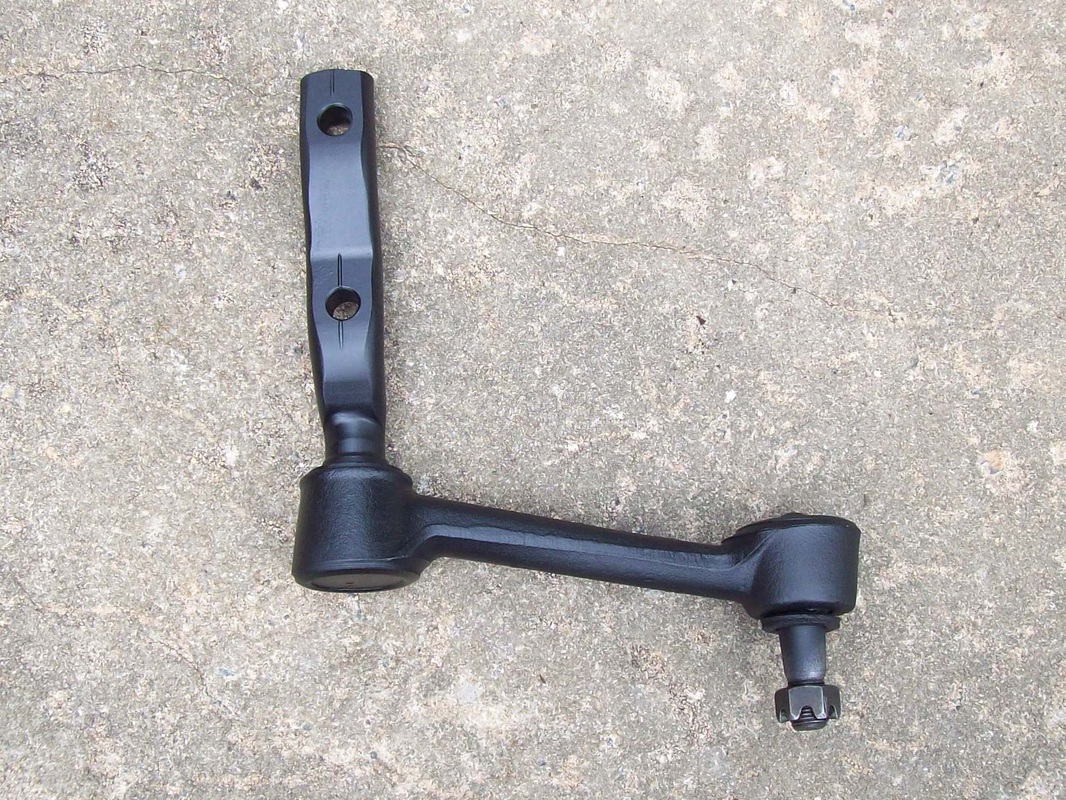 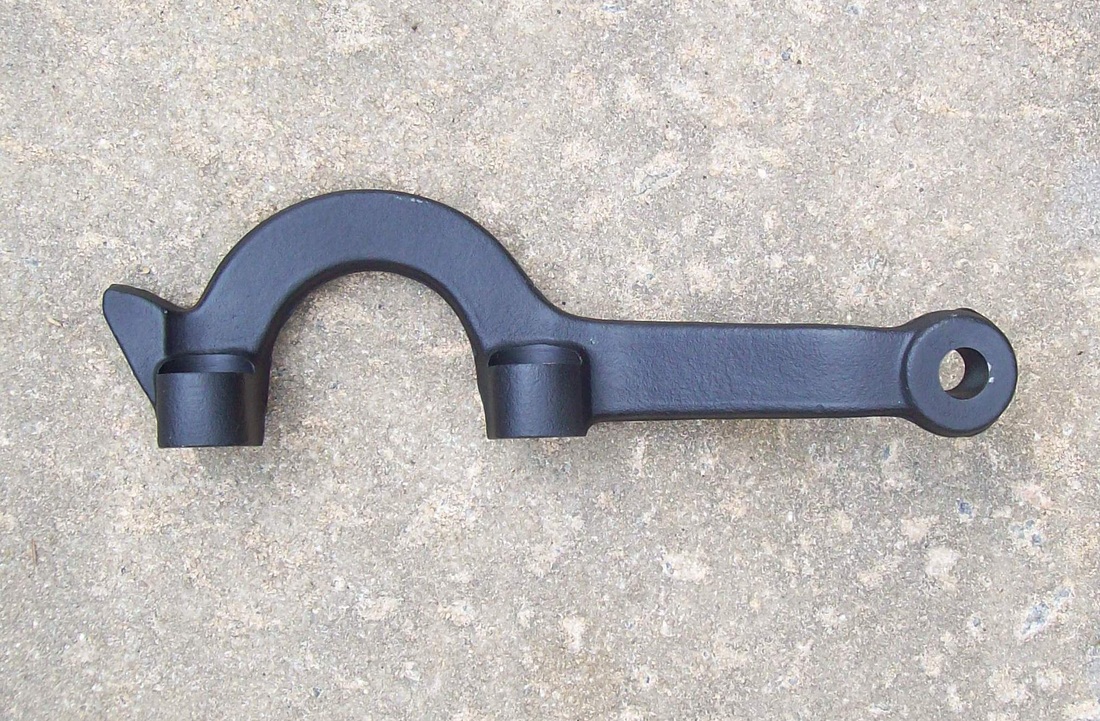 |
See my BLOG entries from prior months below:
April 2024
My Hobbies are:Auto Restoration Categories |
1963engineonrunstand |

|
 RSS Feed
