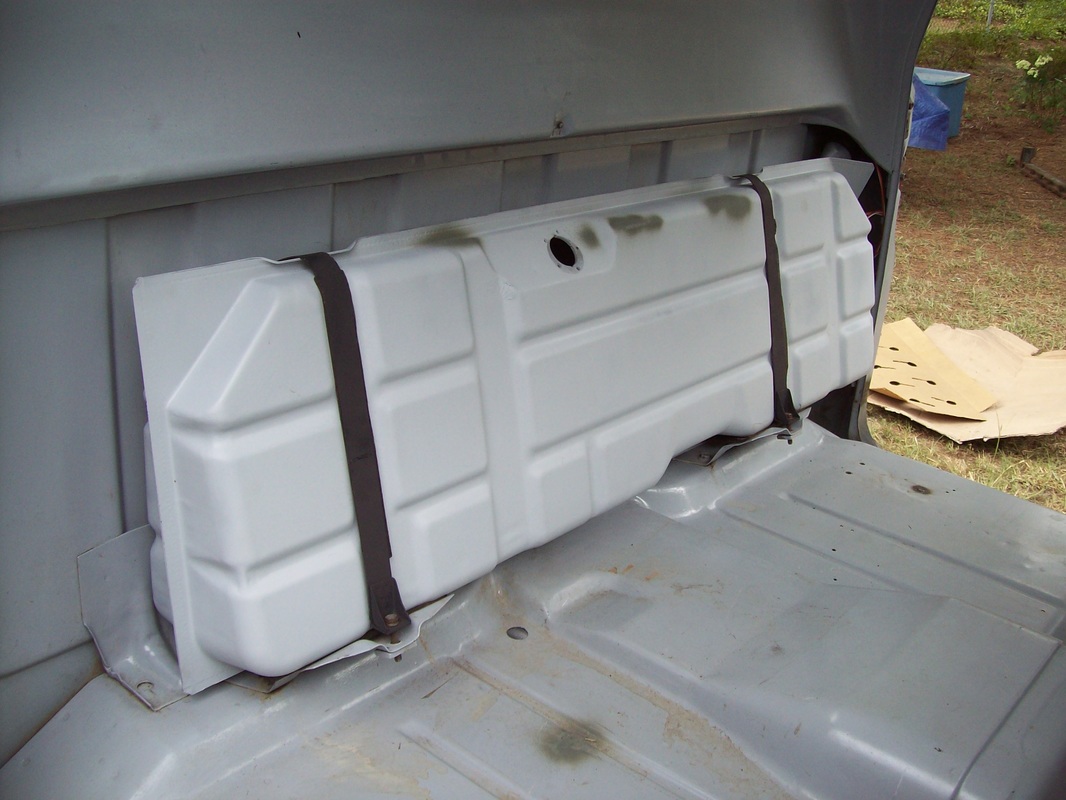
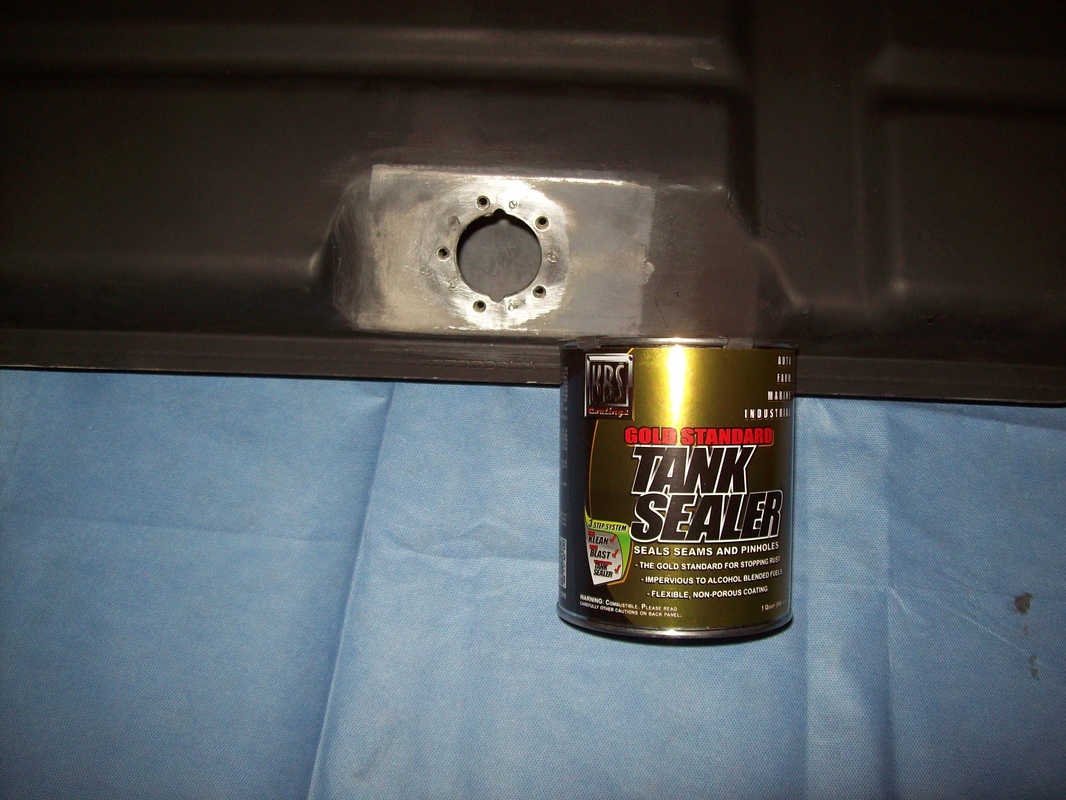
My new 3 point seat belts arrived last week. The mounting bolts arrived today so I started my installation. I'm taking lots of photos for a step by step DIY installation that'll be posted in the Tips & Tricks Section. I drilled some holes in the floor but didn't get to do the holes for the shoulder strap anchor. Might do those this weekend. The shoulder anchor nut and washer will get welded to the cab wall. Good thing I don't have any gas in the tank yet. Installed an in-line fuel filter too. 
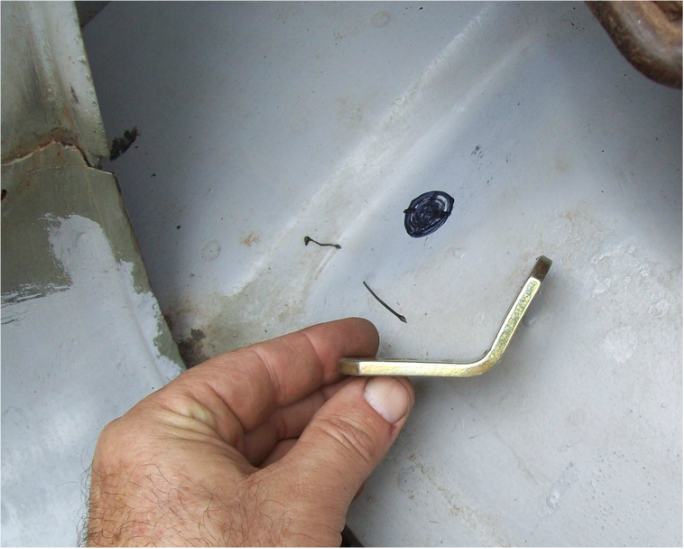
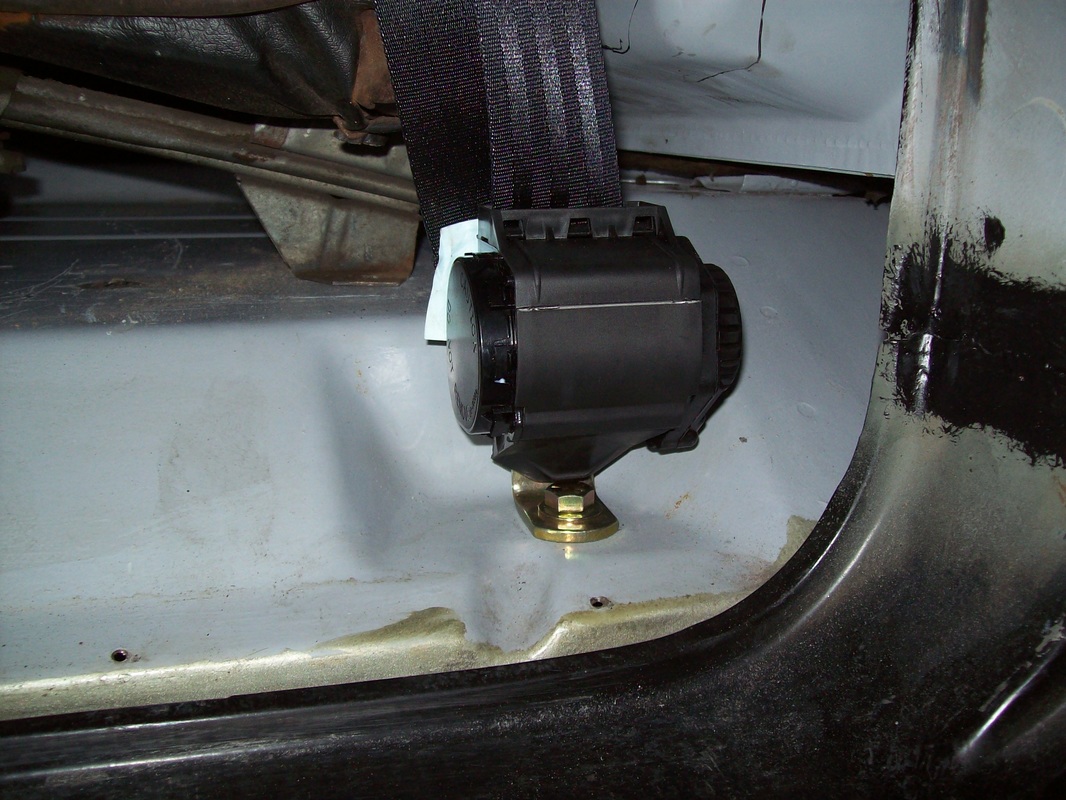
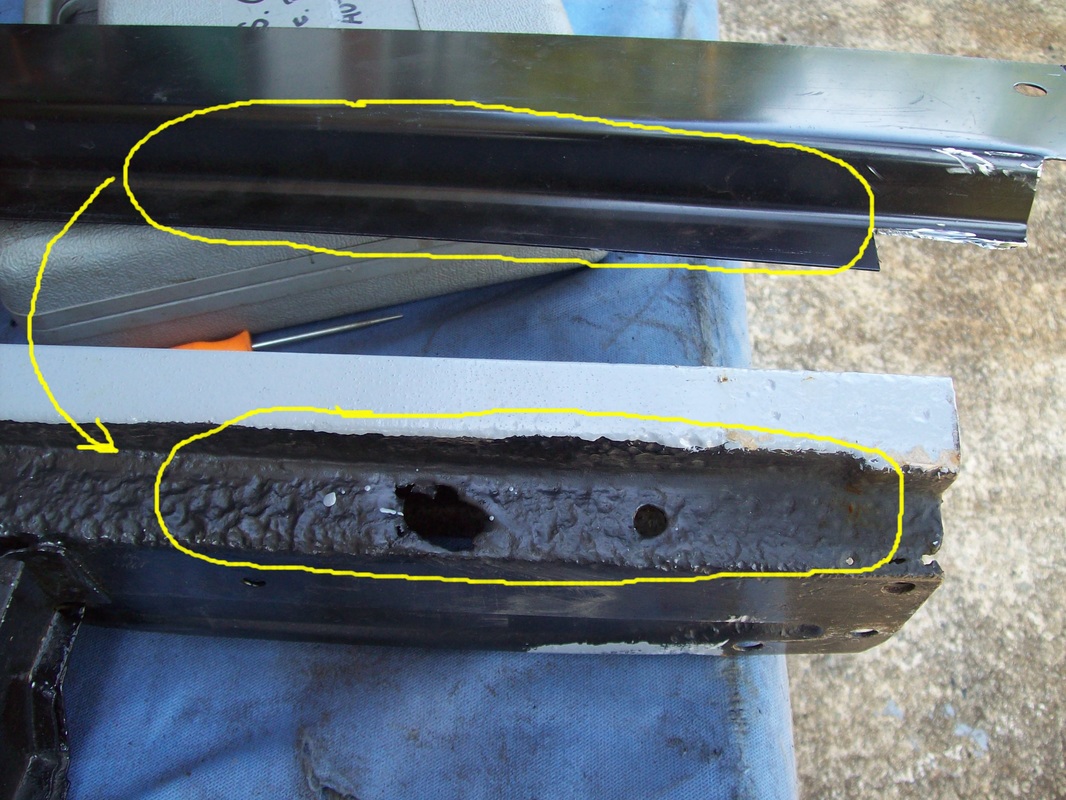
The PS bracket needed to be bent open a little. The seat belt mechanism will now be more vertical. 
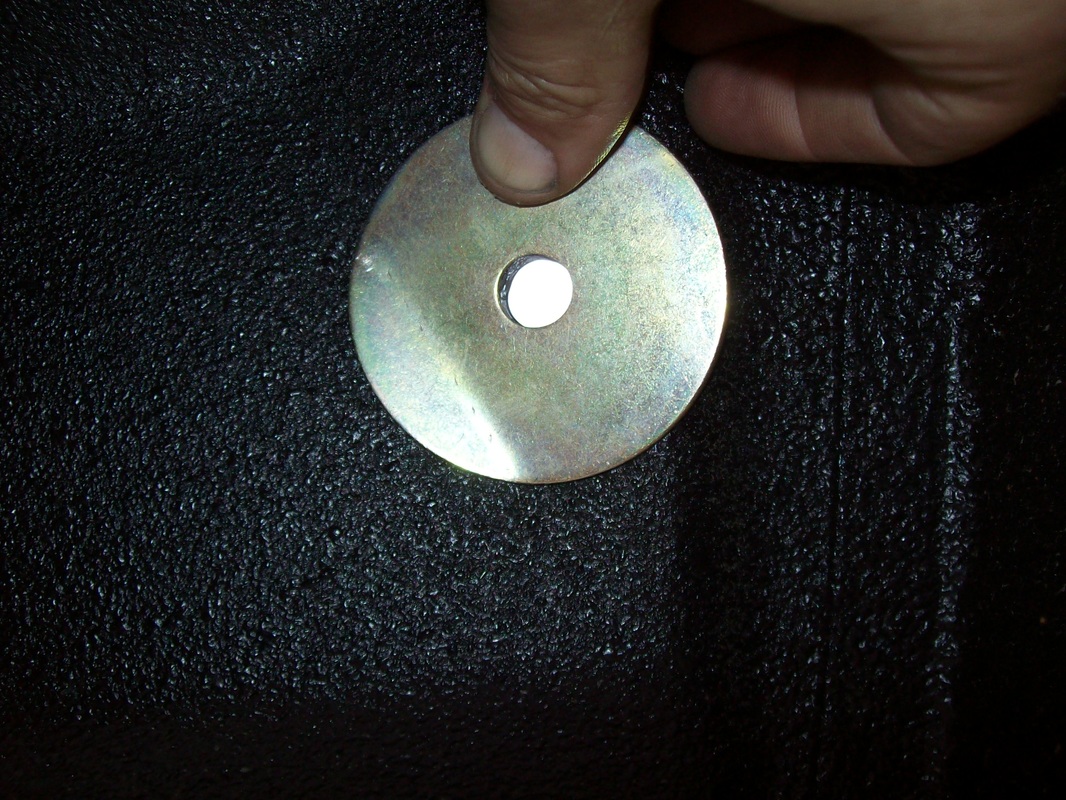
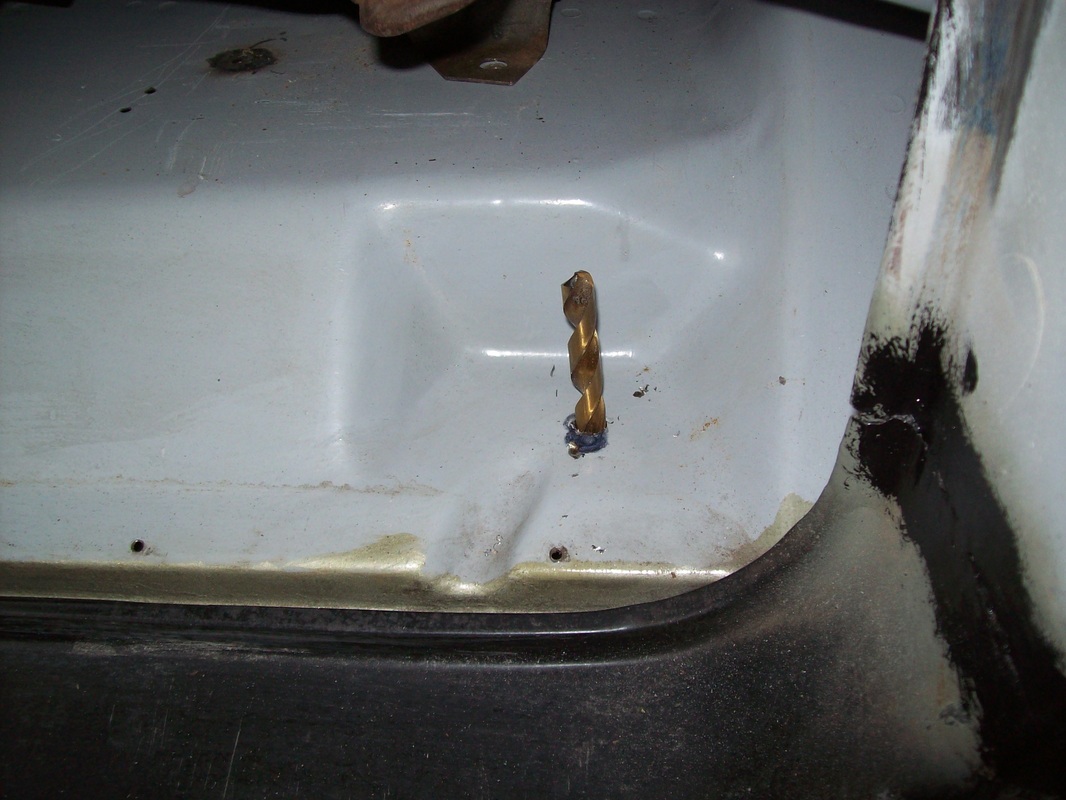
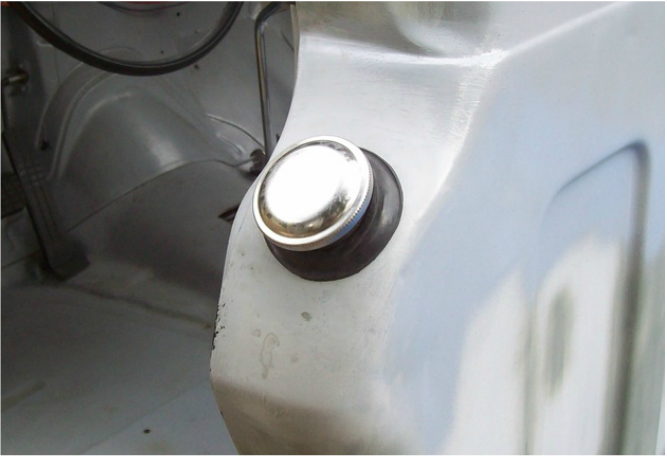
The support washer beneath the cab floor needed a little shaping too. 
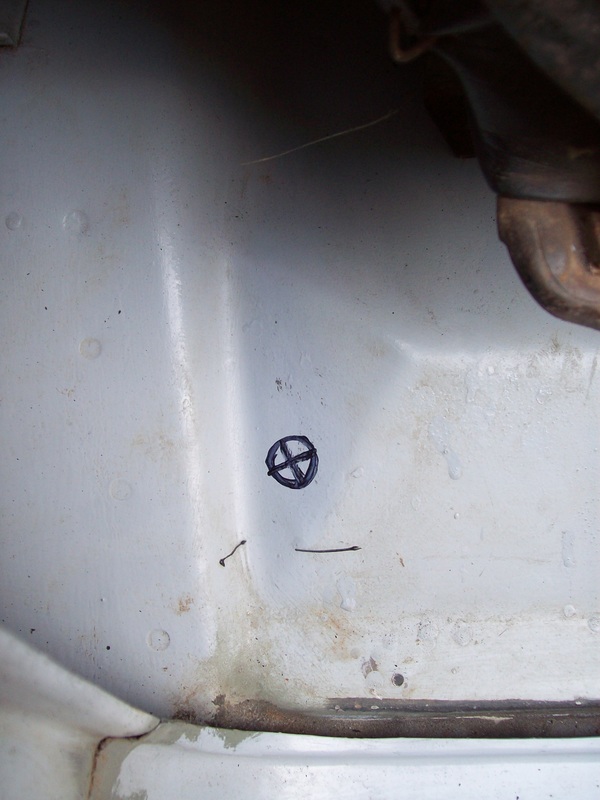
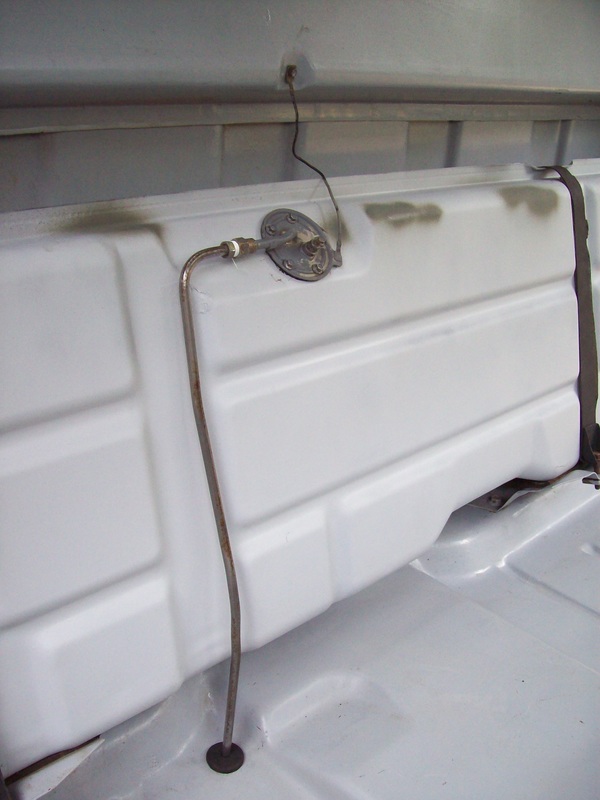
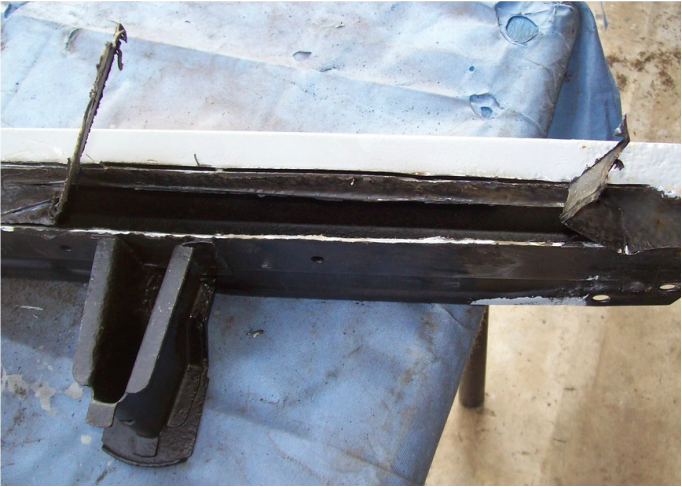
This anchor hole is in the factory position in front of the fuel line. 
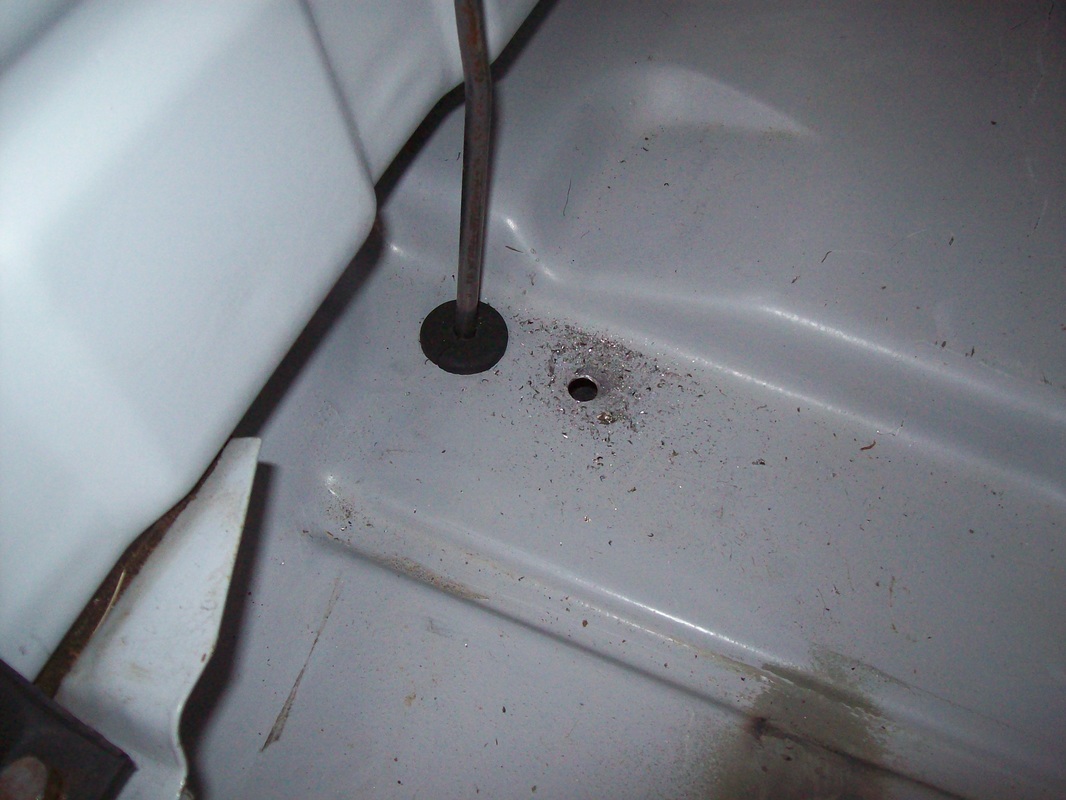
A matching hole on the DS floor. 
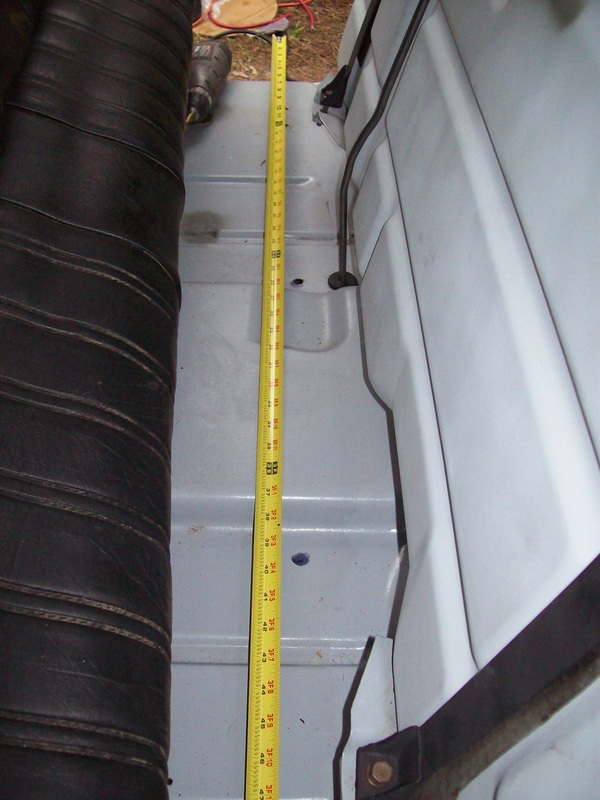
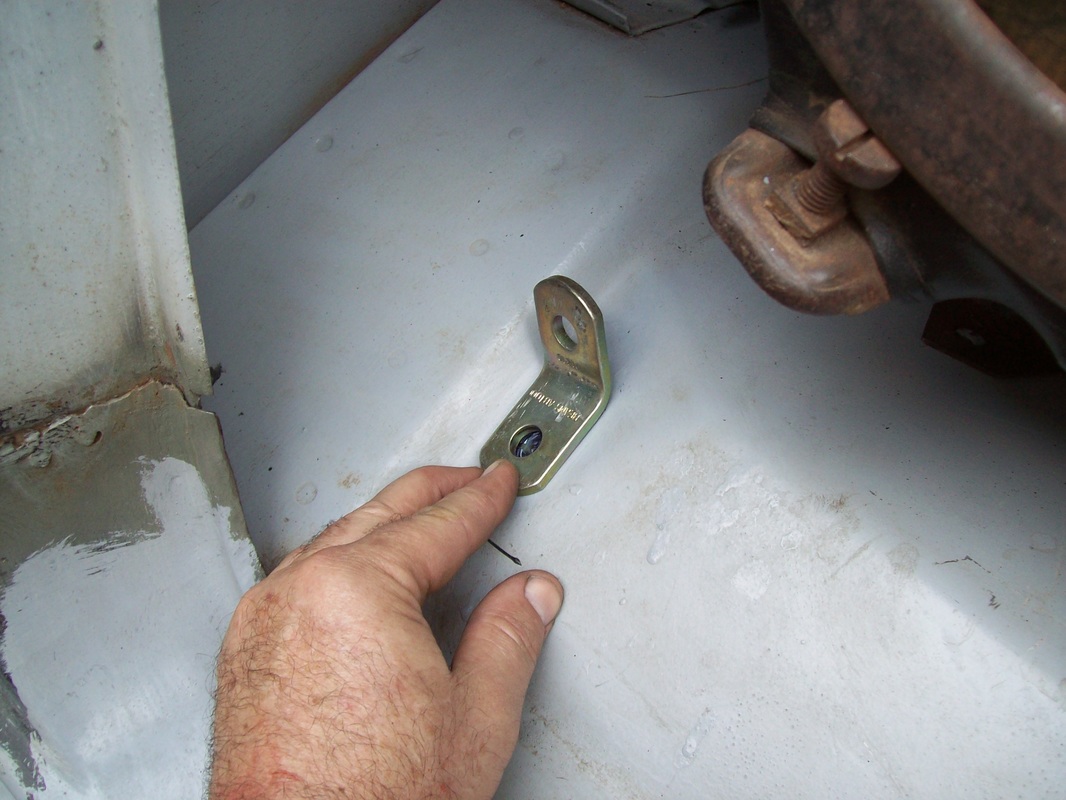
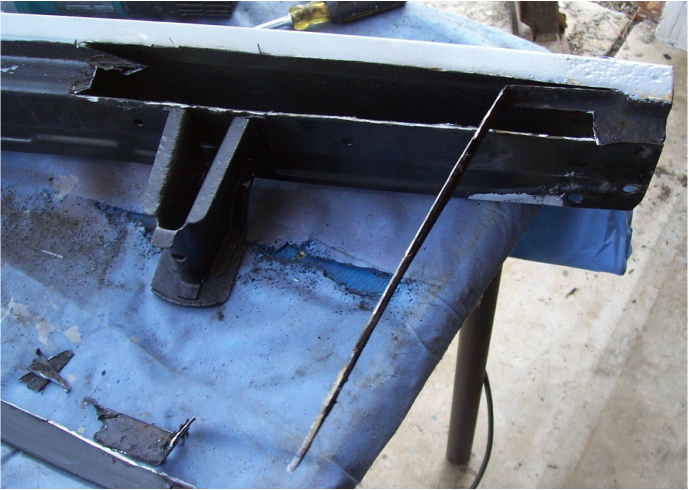
The DS hole I made could be about a half inch closer to the door sill, but it works well enough that I will not change it. The mechanism is as far away from the door as possible but still might bump. I will test it this weekend.
0 Comments
The tank sealant needs to dry 4 full days before adding fuel to the tank. I installed it today and will add fuel on Friday. Got my new cab courtesy light installed with all new wires too.
Preval makes special aerosol cans that are useful when you need to spray paint in small quantities for small projects. They will spray about 16oz. of paint and only have clean air inside. I tried one tonight and was pretty pleased overall. I needed to spray additional epoxy on the roof, cab and hood, so tonight was a good time to test the Preval aerosol can. Simply fill the jar 3/4 full and start spraying.
The instructions say the tank must be completely dry inside, so I let the tank dry overnight. The tank and sealant must also be at room temperature. The sealant is fairly thin so it will flow well. Make sure to stir it well. I used aluminum foil tape to seal the fuel pickup hole and then coated the screws with WD-40 to prevent the sealant from sticking to the threads. A slick magazine cover or other slick paper makes a nice disposable funnel. The tank was turned every 5 minutes to make sure that all inside surfaces were coated. The tank fill hole was sealed with duct tape. Make sure to use a drop cloth. I drained out the excess sealant after turning the tank for about 45 minutes. I was surprised to see that almost 3/4 of the sealant came back out. So I poured it back in and turned the tank for another 30 minutes. Instructions say to drain the tank for at least 30 minutes. This is how much came out. I could seal two more tanks with what I have left over! I removed the screws and foil tape at the fuel pickup hole. The inside of the tank was perfectly coated with sealant. It's pretty hard to see but I am convinced the sealant has coated the entire tank. These are the best pics I could get. To avoid any puddles, I still need to turn the tank every 15 minutes or so for the next few hours. I am very pleased with this product. I used the Eastwood tank sealer kit on another project and the KBS tank seal kit is much easier to use.
Removing the seat and tank is much easier when the doors are off, so now is a good time to clean and seal the gas tank. I will be using the gas tank rust removal and sealant kit made by KBS Coatings. About 2 years ago I cleaned this tank out with hot soapy water and then rinsed with diluted Muriatic acid to remove as much rust as possible, so this tank was already pretty clean inside. The gas I drained today came out very clean. First I washed the tank with hot water and Dawn dish detergent. Next, I used the KBS Klean from the kit followed by a water rinse. Between steps I sanded the external rust and sprayed those areas with Rustoleum Rust Reformer and then some primer after that. The Blast is an etching solution to give the inside of the tank some tooth for the sealant to adhere to. I will pour the sealant inside the tank tomorrow. It must be completely dry inside. A leaf blower is useful to help dry the inside of the tank quickly.
I measured the wood at the lumber store. They had nice pieces of Southern Yellow Pine. The boards were all 3/4" thick. Perfect! The 1X4 pieces were 3+7/16" wide. I'll just rip it on my table saw down to the required 3+1/8". The 1X6 pieces were 5+7/16". Perfect - no cutting needed! I also needed 4 pieces of 1X8. After cutting the boards to length and laying them in the bed, I scratched my head as I looked at large gaps between the boards. Get out the measuring tape! Yikes! I wrongly assumed the 1X8 would be 7+7/16". WRONG! The 1X8 was 7+ 4/16". That's 3/16" too narrow X 4 boards! Holy cow!
Right now, the plan is to add the extra 3/16" to each piece. I'll butt glue a 1X4 to the 1X8 and once it's dry I'll rip the 1X8 to the correct width of 7+7/16". The repair will be hidden by the metal bed strip anyway. Here are a couple pics from today's adventures. Today was the second time I've worked with a compressor and a paint spray gun. I find it to be tedious and messy. However, the results are much better than when I use a roller or brush. With all the preparation and clean up time I'm not so sure it's faster. I sprayed about one quart of epoxy today. Most of it was adding a thicker coat onto the bed parts that already had some epoxy.
Got more wiring done tonight. That went well. I also touched up the bed cross sills just to make sure they are ready when it's time to assemble the bed.
My original rear cross sill had terrible rust and was bent. I found a pretty nice replacment at the salvage yard but it had a few rust holes that needed repair. There was a lot of pitting on the ledge where the bed wood sits too. My repair tonight went well because I noticed some sheet metal I had laying around had the correct shape to make the repair. That reduced the fabrication time. I still need to drill a few holes.
A stepside C10 has triangular pieces that mount to the bottom back cab corner. They are designed to help prevent mud and rocks from coming up onto the step in front of the rear fender. Mine were all twisted and bent, but today I tried my hand at straightening them. They look pretty straight now so I will media blast them, apply epoxy primer and put them back on the truck once the bed has been installed. Here are some BEFORE and AFTER pics.
|
See my BLOG entries from prior months below:
March 2024
My Hobbies are:Auto Restoration Categories |
- Main BLOG Page
- Steering Column Page
-
T5 Info Page
- Thinking about installing a T5? READ THIS FIRST
- My T5 videos
- Making a Custom Shifter
- Complete T5 Driveline - Installation from Engine to Rear Axle
- S10 T5 Transmission Jeep Shaft Swap - DIY and skip the adapter plate.
- Camaro Drive Gear Relocation
- T5 Tail Stock with a Cable Speedo Connection
- World Class and Non-World Class versions of the T5 - How to tell them apart.
- How to determine the T5 gearing
- A possible solution for cable speedometers.
- T5 Transmission Identification - What the Tags and Markings Mean
- What's the difference between a Camaro T5, an S10 T5, and an Astro T5?
- T5 Transmission Tear Down
- T5 S10 Transmission Rebuild
- T5 Transmission Rebuild
- T5 pre-purchase inspection and questions
- T5 Resource List
- T5 Case Inspection
- Bell housing differences
- T5 Drive Gear and Driven Gear Combinations
- A Camaro T5 with the S10 Conversion
-
Tips & Tricks Section
- DIY Wiring Tips
- Oil Pump Priming Tool
- Piston Stop Tool
- Broken Bolt Extraction
- DIY 3 Point Seat Belt Installation
- 1963 Chevy C10 Steering Column Removal
- 1963 Chevy C10 Steering Column Disassembly
- 1963 Chevy C10 Steering Column Rebuild
- 1963 Chevy C10 Steering Column Installation
- Easy Clutch Pedal Adjustment
- Making the Steering Column Safer
- Power Steering
- How to improve gauge cluster lighting.
- Stripping Paint - Polycarbide Abrassive Wheel
- Jeep Cherokee Door Check Modification - Very Simple
- Keeping the hood aligned
- DIY All Cable Ebrake System for 1963-1972 C10
- Alignment Tools - Easier than you think
- Conversion to dual master cylinder brakes 1963-1966 C10.
- Steering column modification
- A simple way to remove old control arm bushings.
- An easy way to adjust brake shoes
- How to remove a pilot bushing from the crankshaft.
- Cutting spot welds
- E-brake clip removal made easy
- Harmonic Balancer Installation - Tapping threads in the crank
- POR 15 with less mess.
- Engine Run Stand
- Engine Dolly - EZ to make
- Steering Wheel Restoration Page
- Sway Bar Info
- Power Brake Booster Page
-
Other Projects
- 1934 Chevy Coupe Build Page
- 1934 Chevy Master 5 Window Coupe
- 1963 Body repairs
- Anvil
- Hot Rod 283 SBC Build
- Grand Cathedral Game
- 1968 C10 Short Fleet
- Rockwell Drill Press
- 283ci SBC Engine
- Safety Stand for Lift
- Coat Hook
- Engine Run Stand
- 1963 Short Fleet Project
- Metal sculpture figures
- Shop Project
- Shop Sign
- Lean-to Shop Addition
- Air Compressor Project
- 2 Post Automotive Lift
- 1963 Chevy Custom C10 SBFS BBW
- Metal Top Outdoor Work Table
- Bearings to grenade
- Bar Stool Go Kart
- Special Bolts Plaque
- Vise Stand
- Grinder Stand
-
Random Pics
- 2021 Stovebolt Jamboree Pictures
- 1963 Custom Comfort Seat
- Flywheel differences
- Carb spacer
- Bimini 2019
- T5 shifter ideas
- Engine Torque and HP
- LUGNUTZ DIY Shop
- Alaska 2018
- 2019 ODSS Homecoming
- Chevy 3 speed transmission ID
- 2018 Stovebolt Homecoming Pics
- Anvil
- Pallet Rack Shelving
- Reference PICS
- shop plywood walls
- Welding Stuff