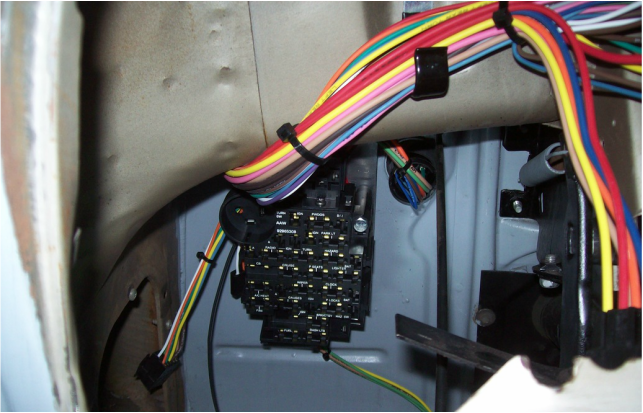
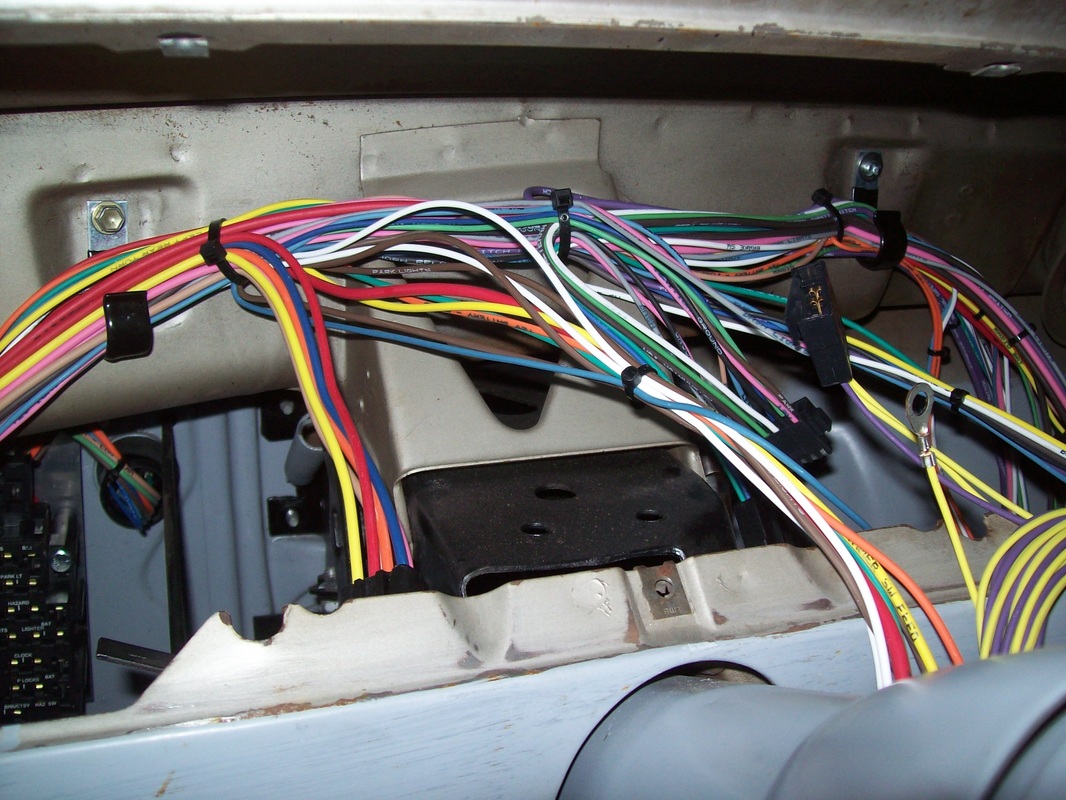
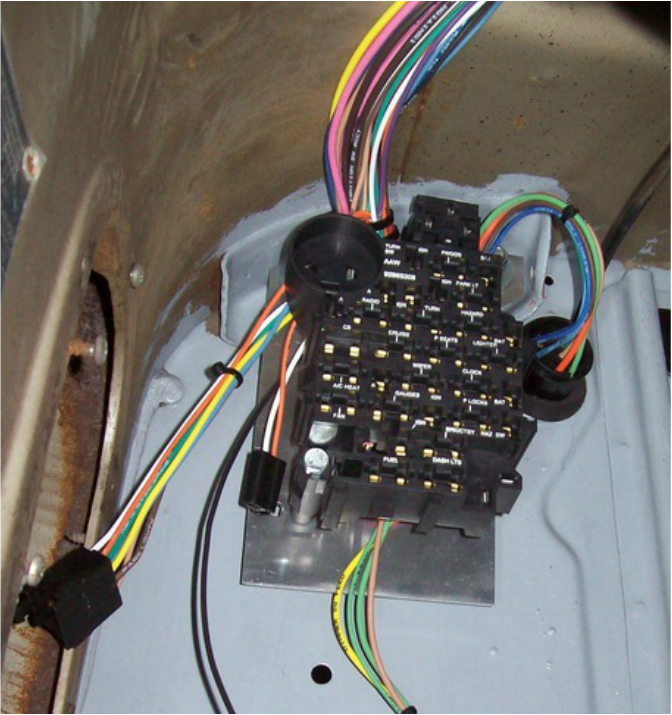
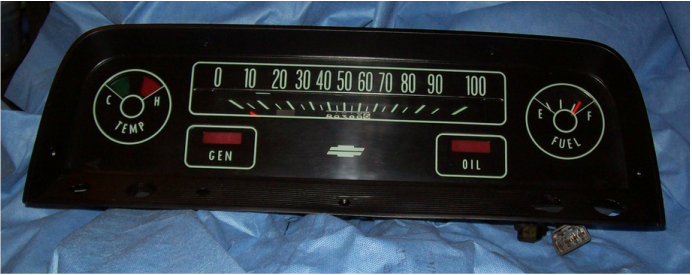
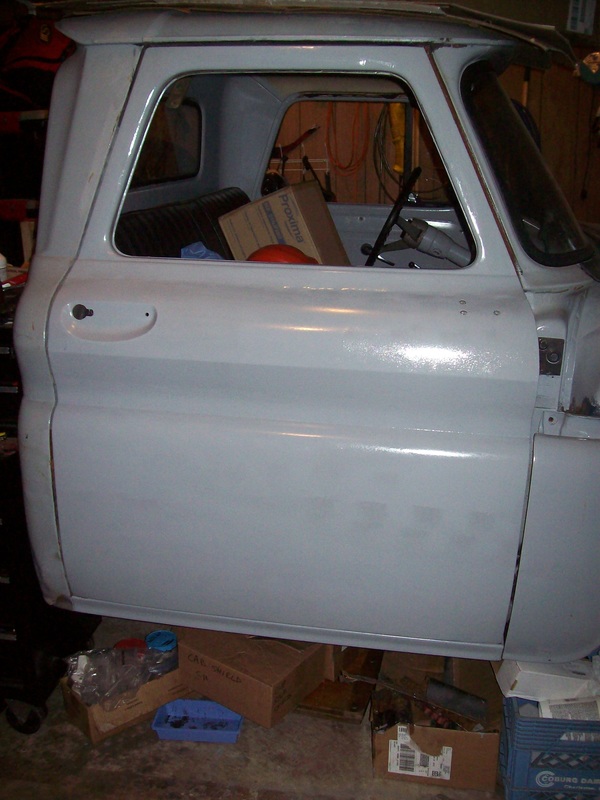
I removed the doors yesterday so the wiring will take less effort. American Autowire makes a complete wiring kit for the 1960-66 trucks and the reviews are 5 star. Today I installed the fuse box and routed the wires up inside the dash. Next comes the instrument cluster that I restored about 3 years ago.
3 Comments
It's time to bring the bed sides and rear fenders out of storage. More for motivation than anything else. I sprayed gray rattle can primer on the original front panel so it will match. It will only be used until I buy a new front panel. The other bed pieces have epoxy primer.
I have 2 front bed panels and both have serious rust at the lower 3" of the panel. That's where the water sits. I'm trying to decide if I should repair the best panel or buy a new panel. I like to save original pieces but it will take a lot of work.
I finished welding the tailgate together. Now on with getting the rest of the bed ready. I picked up this front bed panel over a year ago and pulled it out of storage today. Stripping the paint has revealed some pretty nasty rust areas. Looks like I'll be making more repairs soon.
The tailgate right lower corner patch is done and looks pretty good. A little body filler should make it nearly invisible. I celebrated by painting epoxy primer on the door skin, inner door panel and of course the tailgate.
The patch piece was carefully trimmed and shaped so it matches the rest of the lower tailgate. I welded some holes closed too.
About 2 years ago I saved a patch piece from an otherwise rotten tailgate at the salvage yard. Tonight I started my tailgate repair. There are a few big holes and a large dent that will get flat pieces of sheet metal for the repair. The lower right corner patch piece looks great and will work very well. I'm not finished shaping the patch piece but I can tell it will work very well.
The poly carbide wheel on my grinder strips paint fast. It's just like erasing paint. This PS door panel took only 20 minutes. The tailgate took longer but has more uneven areas. I have a patch for the lower right corner.
Pinching the door skin edges around the shell is a slow tedious process. You can't help but get nervous wondering if things will line up once the door is put back on the cab. The trial installation confirmed a good fit. This was a lot of work and I'm still not done.
The PS door needs a new skin. I measured and then cut off the old skin and prepared the inside of the door shell with POR-15. I cut out and prepared the original door handle brace too. With plans to finish the door later this week, I rebuilt the PS door hinges. That way the door will hang without sagging as I make final adjustments just before I weld the skin.
|
See my BLOG entries from prior months below:
April 2024
My Hobbies are:Auto Restoration Categories |
- Main BLOG Page
- Steering Column Page
-
T5 Info Page
- Thinking about installing a T5? READ THIS FIRST
- My T5 videos
- Making a Custom Shifter
- Complete T5 Driveline - Installation from Engine to Rear Axle
- S10 T5 Transmission Jeep Shaft Swap - DIY and skip the adapter plate.
- Camaro Drive Gear Relocation
- T5 Tail Stock with a Cable Speedo Connection
- World Class and Non-World Class versions of the T5 - How to tell them apart.
- How to determine the T5 gearing
- A possible solution for cable speedometers.
- T5 Transmission Identification - What the Tags and Markings Mean
- What's the difference between a Camaro T5, an S10 T5, and an Astro T5?
- T5 Transmission Tear Down
- T5 S10 Transmission Rebuild
- T5 Transmission Rebuild
- T5 pre-purchase inspection and questions
- T5 Resource List
- T5 Case Inspection
- Bell housing differences
- T5 Drive Gear and Driven Gear Combinations
- A Camaro T5 with the S10 Conversion
-
Tips & Tricks Section
- DIY Wiring Tips
- Oil Pump Priming Tool
- Piston Stop Tool
- Broken Bolt Extraction
- DIY 3 Point Seat Belt Installation
- 1963 Chevy C10 Steering Column Removal
- 1963 Chevy C10 Steering Column Disassembly
- 1963 Chevy C10 Steering Column Rebuild
- 1963 Chevy C10 Steering Column Installation
- Easy Clutch Pedal Adjustment
- Making the Steering Column Safer
- Power Steering
- How to improve gauge cluster lighting.
- Stripping Paint - Polycarbide Abrassive Wheel
- Jeep Cherokee Door Check Modification - Very Simple
- Keeping the hood aligned
- DIY All Cable Ebrake System for 1963-1972 C10
- Alignment Tools - Easier than you think
- Conversion to dual master cylinder brakes 1963-1966 C10.
- Steering column modification
- A simple way to remove old control arm bushings.
- An easy way to adjust brake shoes
- How to remove a pilot bushing from the crankshaft.
- Cutting spot welds
- E-brake clip removal made easy
- Harmonic Balancer Installation - Tapping threads in the crank
- POR 15 with less mess.
- Engine Run Stand
- Engine Dolly - EZ to make
- Steering Wheel Restoration Page
- Sway Bar Info
- Power Brake Booster Page
-
Other Projects
- 1934 Chevy Coupe Build Page
- 1934 Chevy Master 5 Window Coupe
- 1963 Body repairs
- Anvil
- Hot Rod 283 SBC Build
- Grand Cathedral Game
- 1968 C10 Short Fleet
- Rockwell Drill Press
- 283ci SBC Engine
- Safety Stand for Lift
- Coat Hook
- Engine Run Stand
- 1963 Short Fleet Project
- Metal sculpture figures
- Shop Project
- Shop Sign
- Lean-to Shop Addition
- Air Compressor Project
- 2 Post Automotive Lift
- 1963 Chevy Custom C10 SBFS BBW
- Metal Top Outdoor Work Table
- Bearings to grenade
- Bar Stool Go Kart
- Special Bolts Plaque
- Vise Stand
- Grinder Stand
-
Random Pics
- 2021 Stovebolt Jamboree Pictures
- 1963 Custom Comfort Seat
- Flywheel differences
- Carb spacer
- Bimini 2019
- T5 shifter ideas
- Engine Torque and HP
- LUGNUTZ DIY Shop
- Alaska 2018
- 2019 ODSS Homecoming
- Chevy 3 speed transmission ID
- 2018 Stovebolt Homecoming Pics
- Anvil
- Pallet Rack Shelving
- Reference PICS
- shop plywood walls
- Welding Stuff