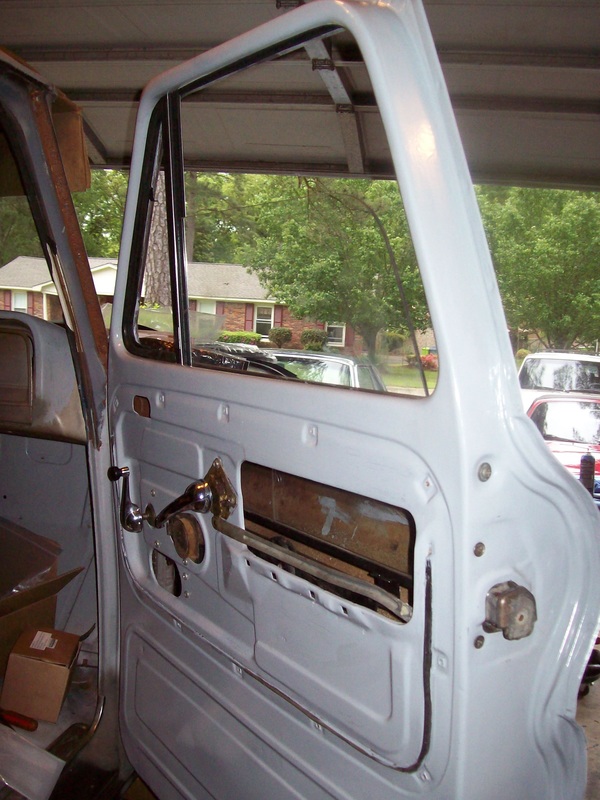
When I installed my T5 transmission, I decided to remove the 1965 E-brake crossmember and upgrade to the 1966 version. It eliminates the need for the 1965 frame crossmember. Using parts from a 1966 truck I parted out, I fabricated a hybrid of the 1965 and 1966 E-brake mechanisms. I removed my 1965 cable from the cab and replaced it with the slightly shorter 1966 cable. 
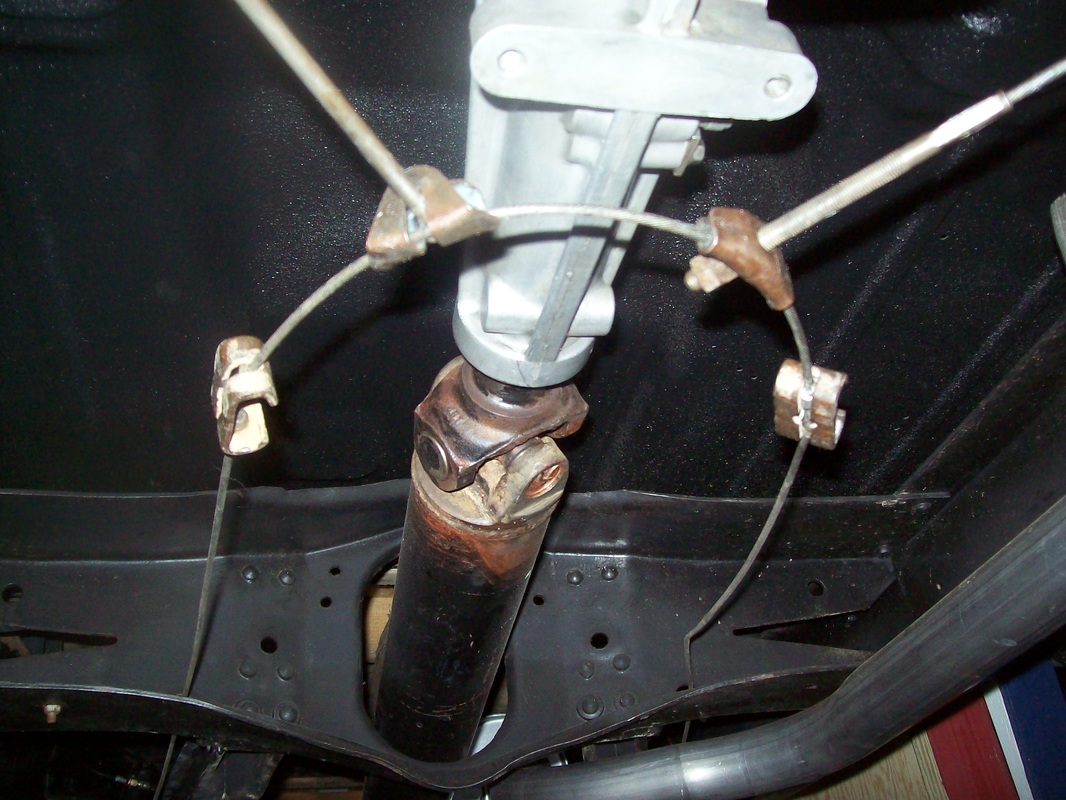
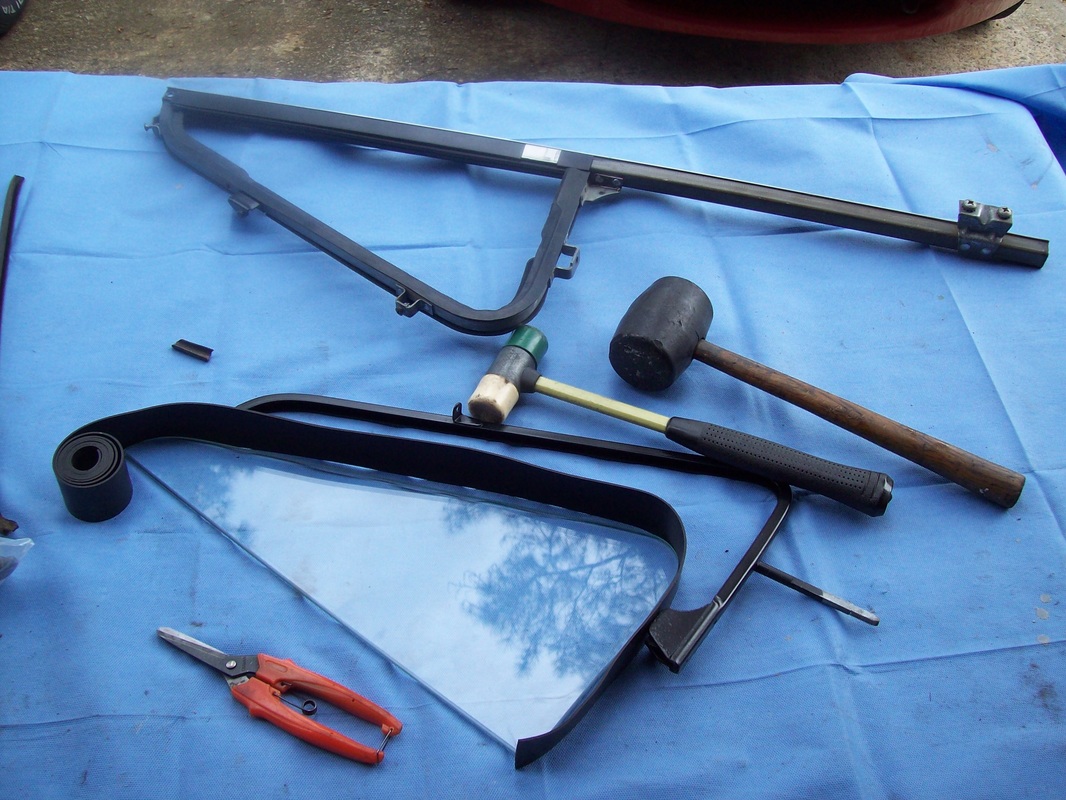
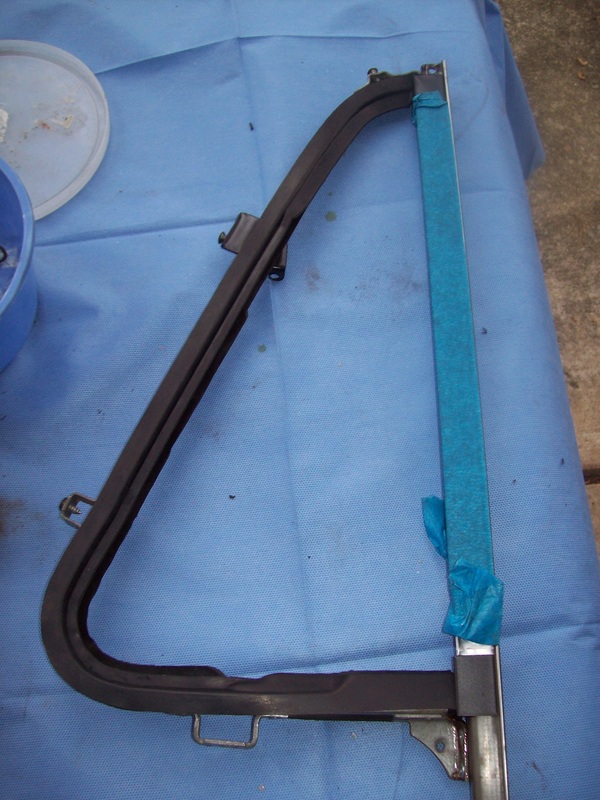
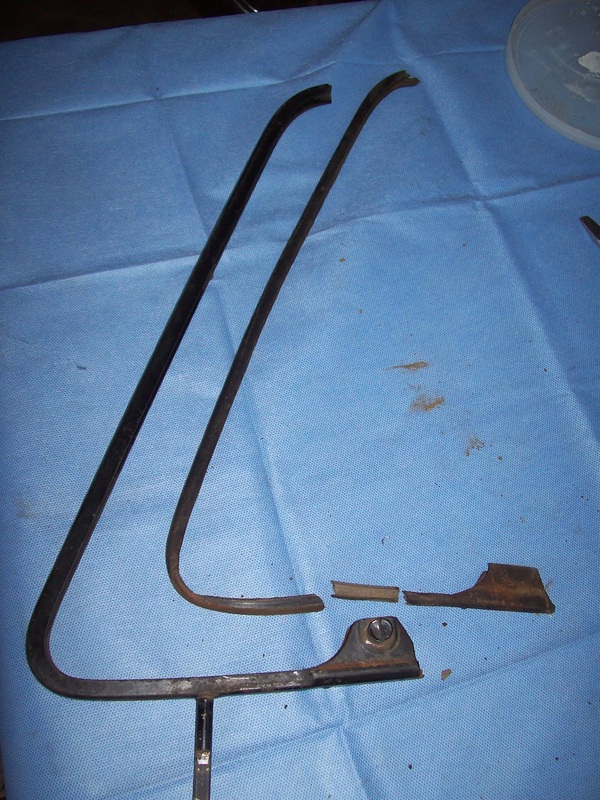
The 1966 system uses a rod, 2 cable saddle guides and 2 pigtail cable guides. I did not need to use the pigtail guides. 
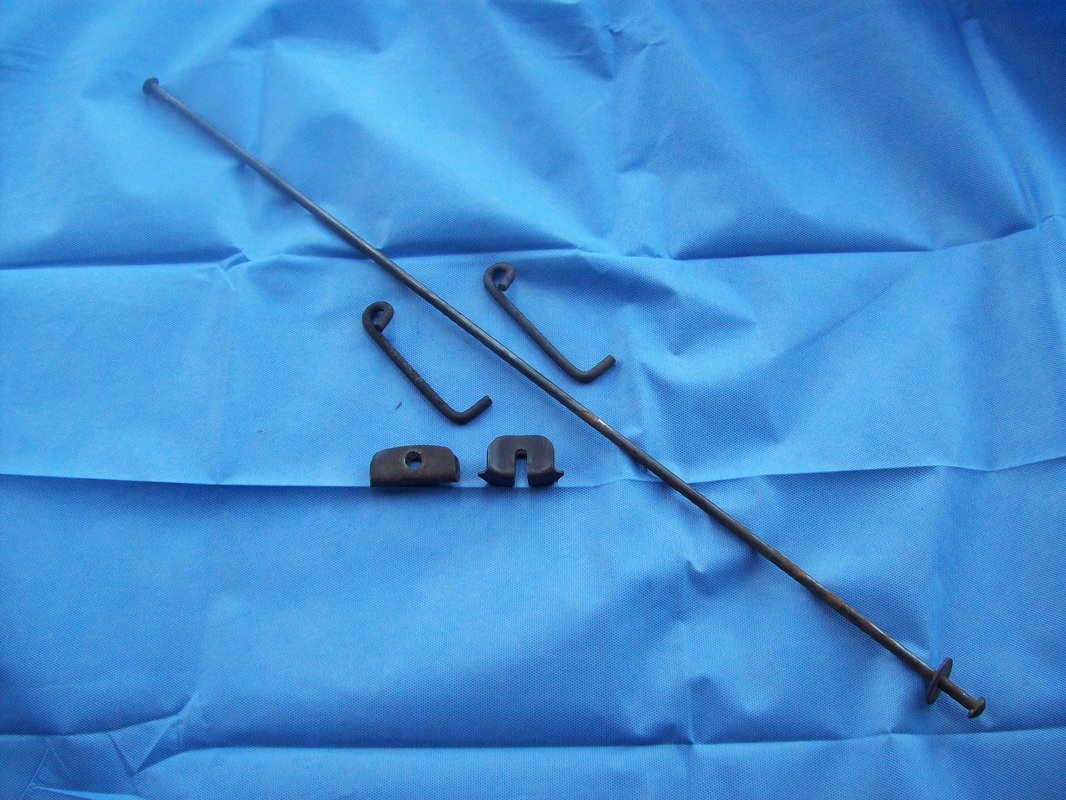
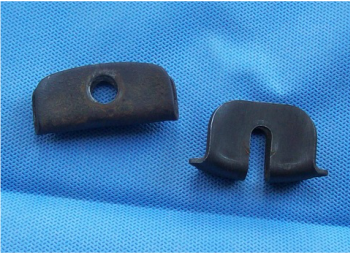
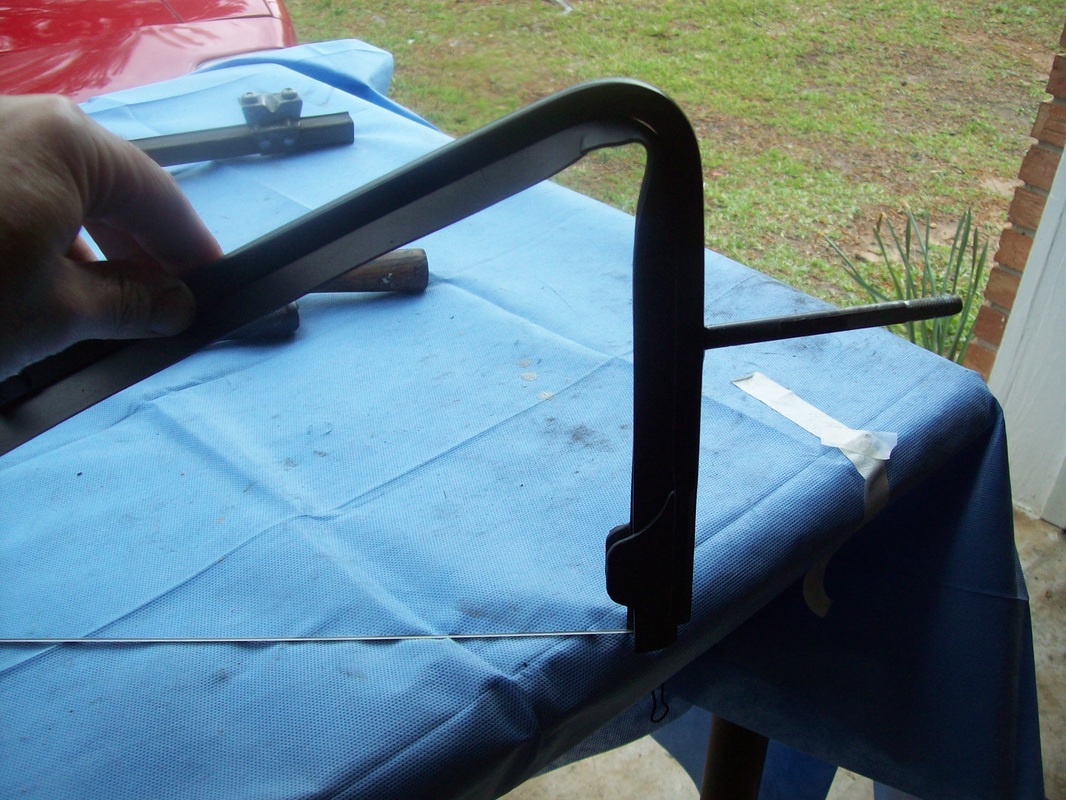
The curved saddle guides hold the front section of the cable and provide tension when the E-brake is applied. The slotted saddle sits on the PS rod. 
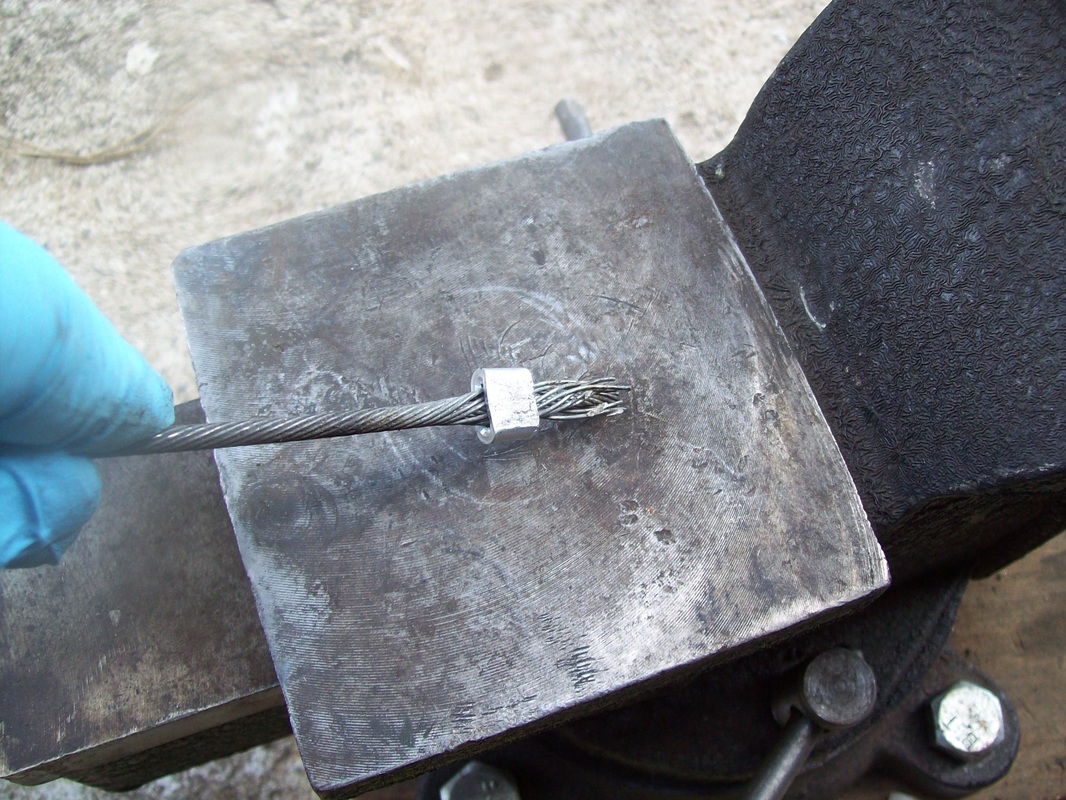
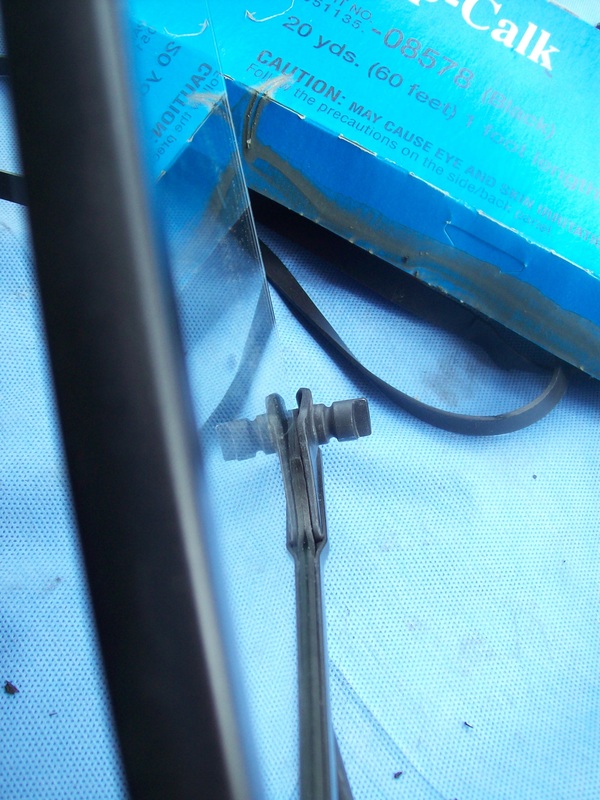
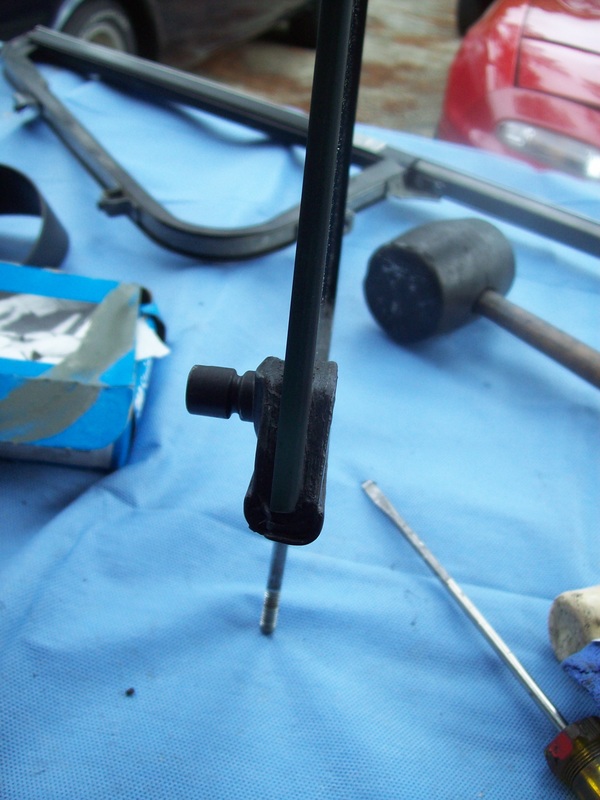
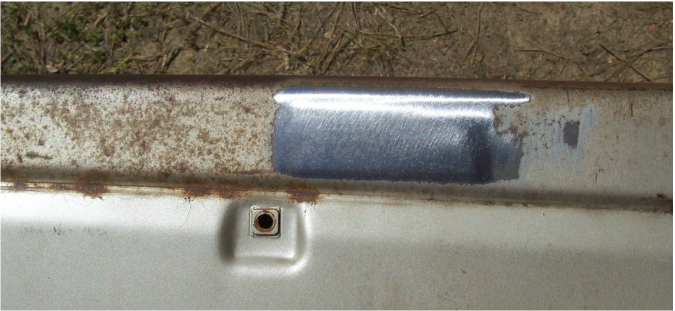
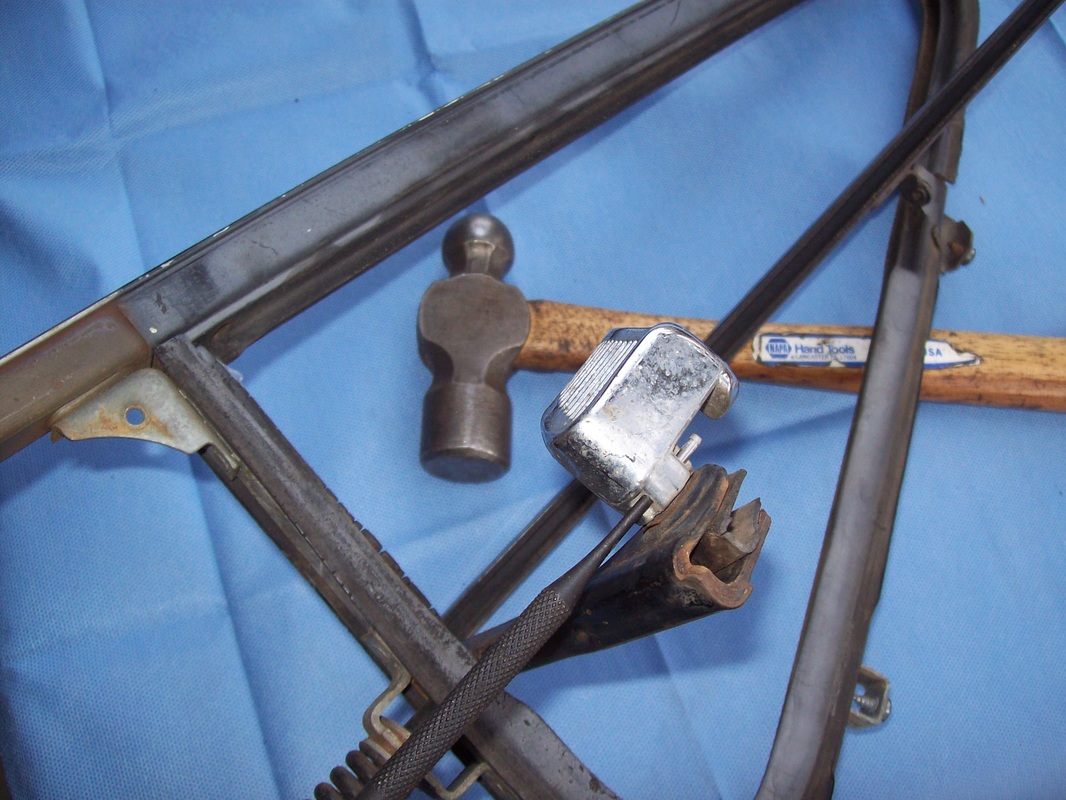
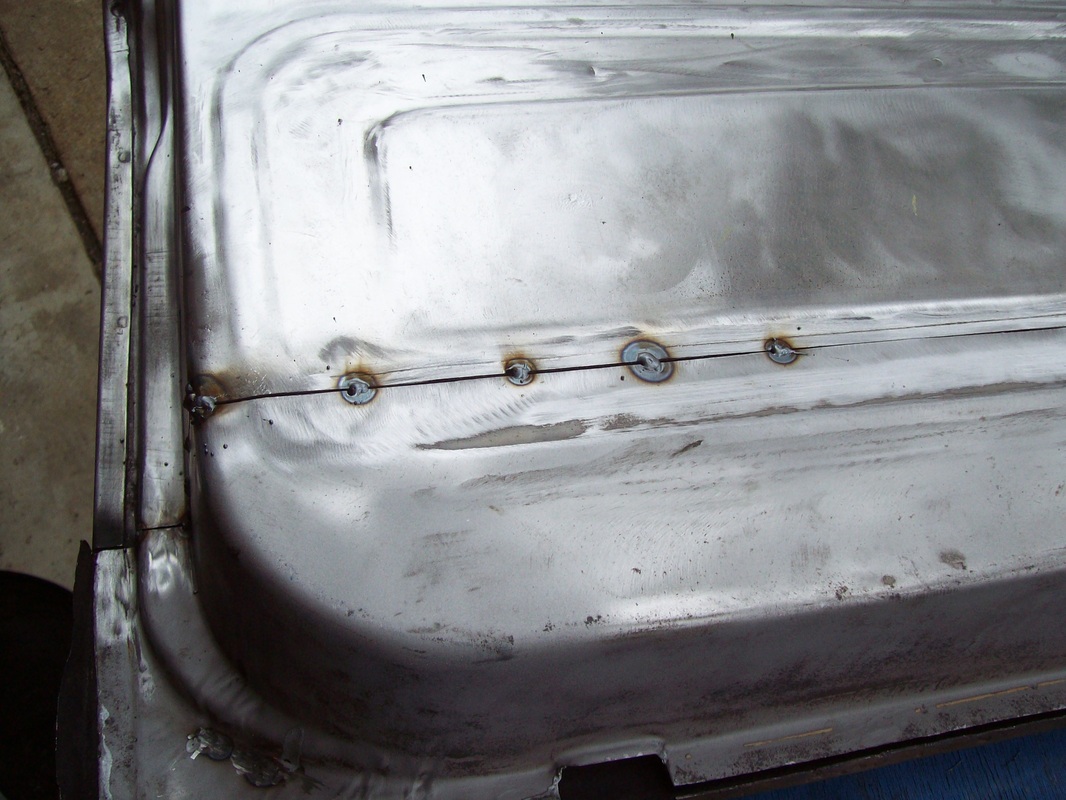
For this modification, I needed 12 inches of undamaged cable. I attached a new aluminum cable end stop. 
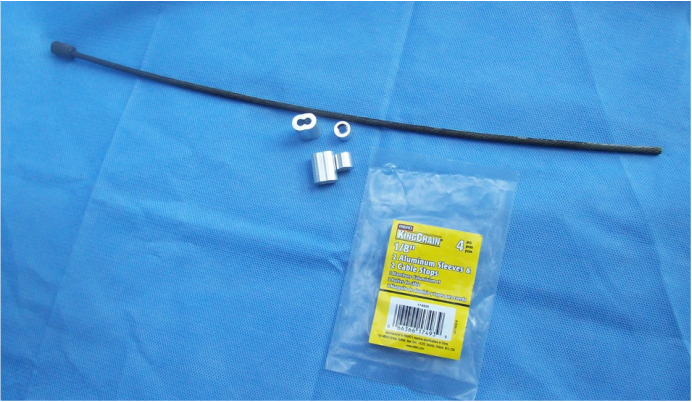
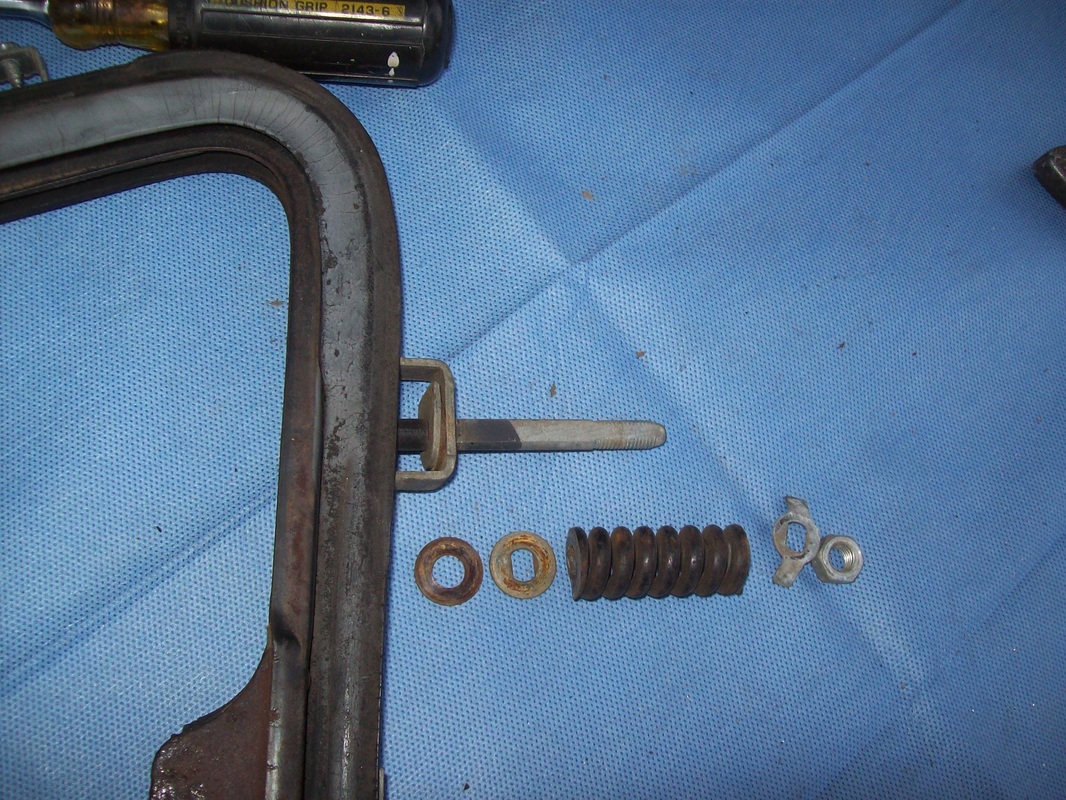
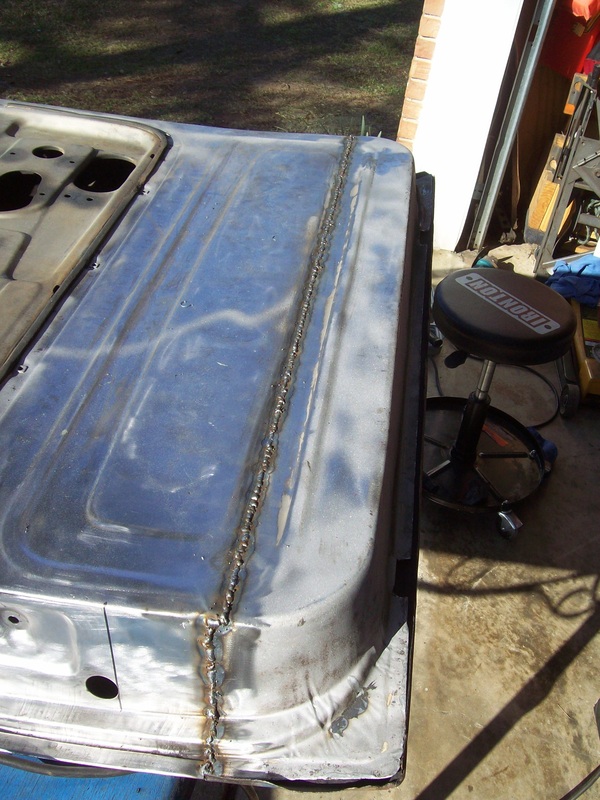
A good smack with a 3 pound sledge hammer made the anchor secure. 
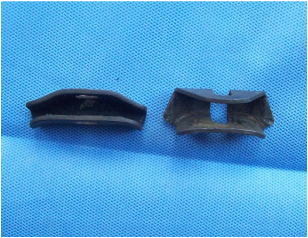
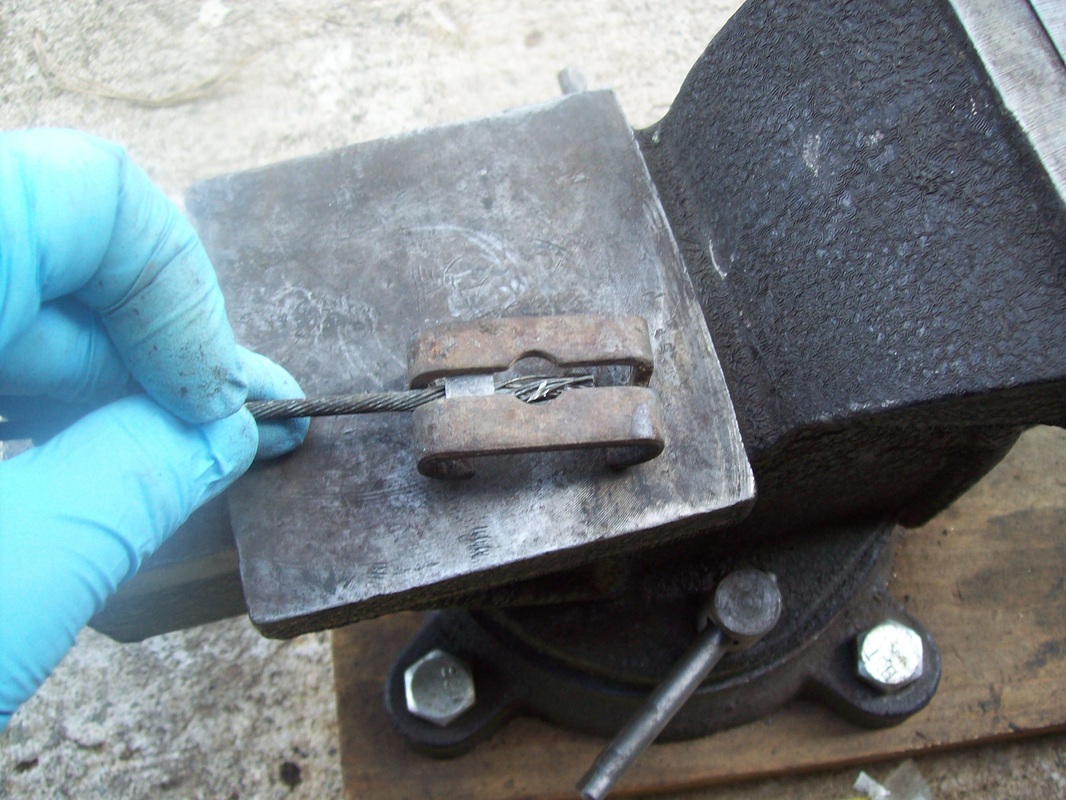
I made sure the cable connection bracket would not slip off the cable stop. 
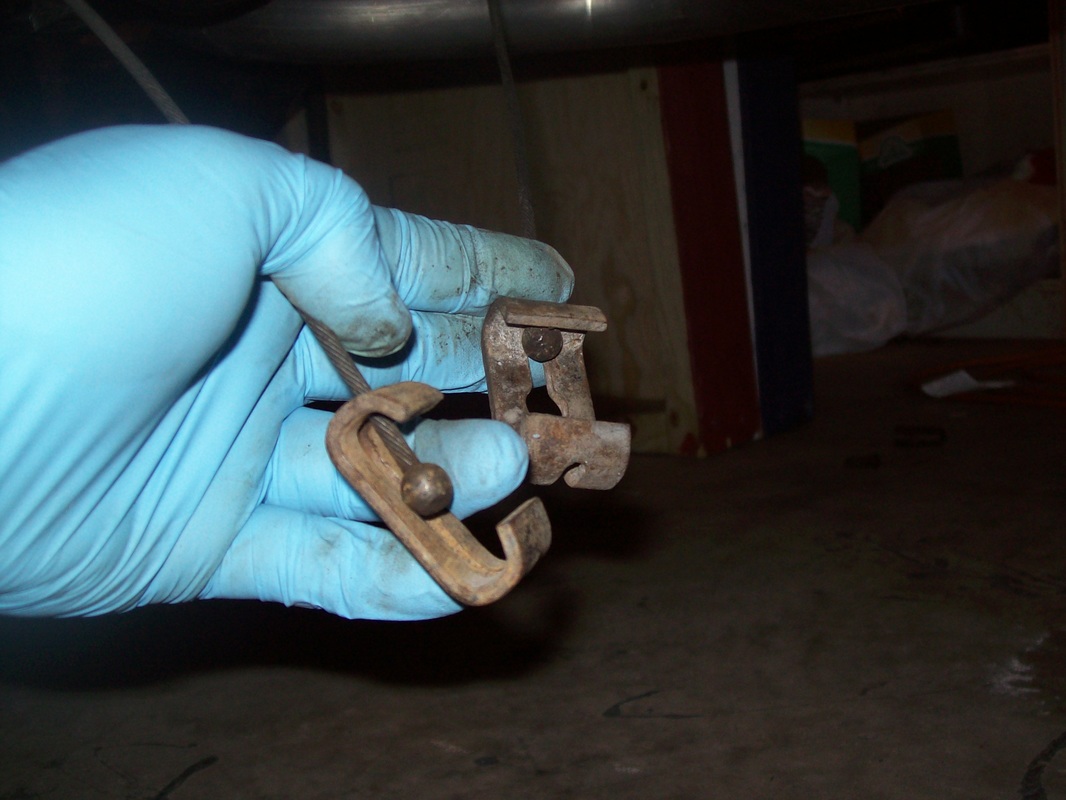
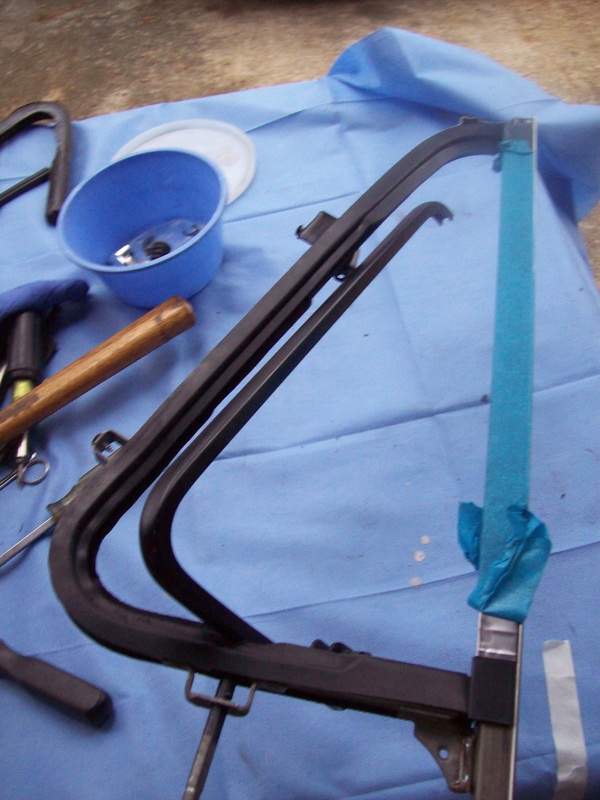
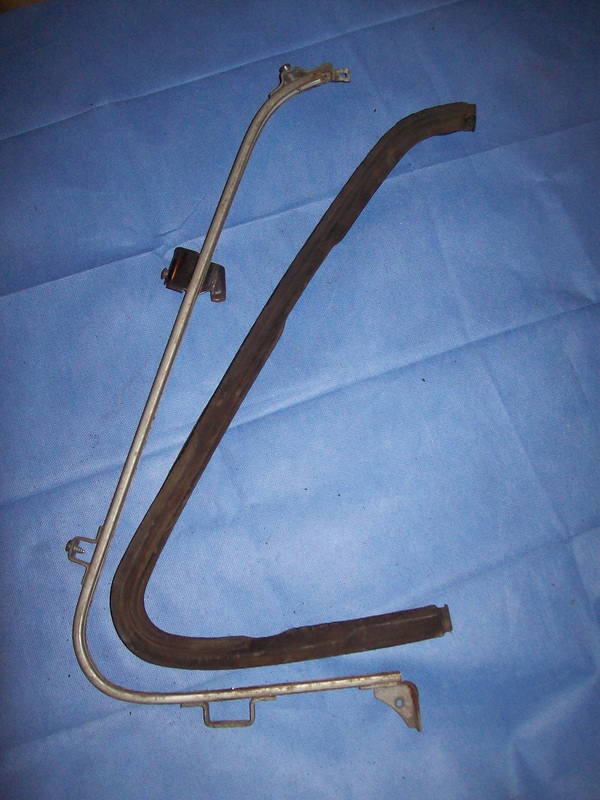
I put the cable connection brackets on the ends of my 1965 cables. The 12 inches of cable in the middle lays inside the saddle guides. Cable tension is adjusted by the 2 nuts on the end of the DS cable coming from the cab.
0 Comments
The 1984-2001 Jeep Cherokee front door checks work nicely in 1960-66 C10 doors. It has 2 detents which is a nice feature. The Jeep checks do not allow the door to open as much as the OEM door checks but it's not enough of a difference to really matter. If you have a set of Cherokee door checks with the rubber stop, then this simple modification will allow the door to open a little wider. Why not? It's super easy.
The T-shirt I ordered arrived, so now is a good time to show it off before I get any spaghetti sauce stains on the front. LOL! This shirt caught my eye because it's a stepside with the same 6 lug slotted wheels and door mirror that my truck has.
The remaining work to rebuild my PS vent window went smoothly once my parts arrived. Some 3M strip caulk was used to fill any gaps left where the glass setting tape wasn't wide enough. I'll document the steps when I rebuild my DS vent. I'm glad I bought the OEM style window channel insert. The fit is excellent. The main glass installation went smoothly too. Both of my original window regulators are in excellent shape. The doors are hung but latch adjustments need to be made.
I went to the Charlotte Auto Fair last Saturday and bought some parts. PS door skin, vent window seal kit and other stuff. Here are pics of my PS vent rebuild. So far, it's going pretty smooth but I'm awaiting the arrival of another order that has some parts I need. A test fit before I install the glass.
After welding a couple of holes closed on the top surface of the hood, I applied epoxy primer to the hood, doors and hinges. Yes, it's a GMC hood.
A poly carbide wheel on my grinder really reduces the time needed to strip paint. I cleaned up the original PS hinges too. I guess the PS door was used very little because the hinges don't need to be rebuilt.
Here are a few pics of the PS vent being taken apart. Most of it involved drilling out rivets. I'll buy a vent window rebuild kit within the next 2 weeks. I'm planning a photo walk through showing the rebuild steps.
The vent glass was too tight in the frame to remove by hand so I came up with my own method which worked pretty well.
My DS door repair has been a week long project. I finally cut the patch after checking and rechecking the measurments. It was a good fit. The preparation paid off with a good result. I also used my stud gun to pull some dents on the DS door. Some filler will finish the job. Before After Before After
|
See my BLOG entries from prior months below:
April 2024
My Hobbies are:Auto Restoration Categories |
- Main BLOG Page
- Steering Column Page
-
T5 Info Page
- Thinking about installing a T5? READ THIS FIRST
- My T5 videos
- Making a Custom Shifter
- Complete T5 Driveline - Installation from Engine to Rear Axle
- S10 T5 Transmission Jeep Shaft Swap - DIY and skip the adapter plate.
- Camaro Drive Gear Relocation
- T5 Tail Stock with a Cable Speedo Connection
- World Class and Non-World Class versions of the T5 - How to tell them apart.
- How to determine the T5 gearing
- A possible solution for cable speedometers.
- T5 Transmission Identification - What the Tags and Markings Mean
- What's the difference between a Camaro T5, an S10 T5, and an Astro T5?
- T5 Transmission Tear Down
- T5 S10 Transmission Rebuild
- T5 Transmission Rebuild
- T5 pre-purchase inspection and questions
- T5 Resource List
- T5 Case Inspection
- Bell housing differences
- T5 Drive Gear and Driven Gear Combinations
- A Camaro T5 with the S10 Conversion
-
Tips & Tricks Section
- DIY Wiring Tips
- Oil Pump Priming Tool
- Piston Stop Tool
- Broken Bolt Extraction
- DIY 3 Point Seat Belt Installation
- 1963 Chevy C10 Steering Column Removal
- 1963 Chevy C10 Steering Column Disassembly
- 1963 Chevy C10 Steering Column Rebuild
- 1963 Chevy C10 Steering Column Installation
- Easy Clutch Pedal Adjustment
- Making the Steering Column Safer
- Power Steering
- How to improve gauge cluster lighting.
- Stripping Paint - Polycarbide Abrassive Wheel
- Jeep Cherokee Door Check Modification - Very Simple
- Keeping the hood aligned
- DIY All Cable Ebrake System for 1963-1972 C10
- Alignment Tools - Easier than you think
- Conversion to dual master cylinder brakes 1963-1966 C10.
- Steering column modification
- A simple way to remove old control arm bushings.
- An easy way to adjust brake shoes
- How to remove a pilot bushing from the crankshaft.
- Cutting spot welds
- E-brake clip removal made easy
- Harmonic Balancer Installation - Tapping threads in the crank
- POR 15 with less mess.
- Engine Run Stand
- Engine Dolly - EZ to make
- Steering Wheel Restoration Page
- Sway Bar Info
- Power Brake Booster Page
-
Other Projects
- 1934 Chevy Coupe Build Page
- 1934 Chevy Master 5 Window Coupe
- 1963 Body repairs
- Anvil
- Hot Rod 283 SBC Build
- Grand Cathedral Game
- 1968 C10 Short Fleet
- Rockwell Drill Press
- 283ci SBC Engine
- Safety Stand for Lift
- Coat Hook
- Engine Run Stand
- 1963 Short Fleet Project
- Metal sculpture figures
- Shop Project
- Shop Sign
- Lean-to Shop Addition
- Air Compressor Project
- 2 Post Automotive Lift
- 1963 Chevy Custom C10 SBFS BBW
- Metal Top Outdoor Work Table
- Bearings to grenade
- Bar Stool Go Kart
- Special Bolts Plaque
- Vise Stand
- Grinder Stand
-
Random Pics
- 2021 Stovebolt Jamboree Pictures
- 1963 Custom Comfort Seat
- Flywheel differences
- Carb spacer
- Bimini 2019
- T5 shifter ideas
- Engine Torque and HP
- LUGNUTZ DIY Shop
- Alaska 2018
- 2019 ODSS Homecoming
- Chevy 3 speed transmission ID
- 2018 Stovebolt Homecoming Pics
- Anvil
- Pallet Rack Shelving
- Reference PICS
- shop plywood walls
- Welding Stuff