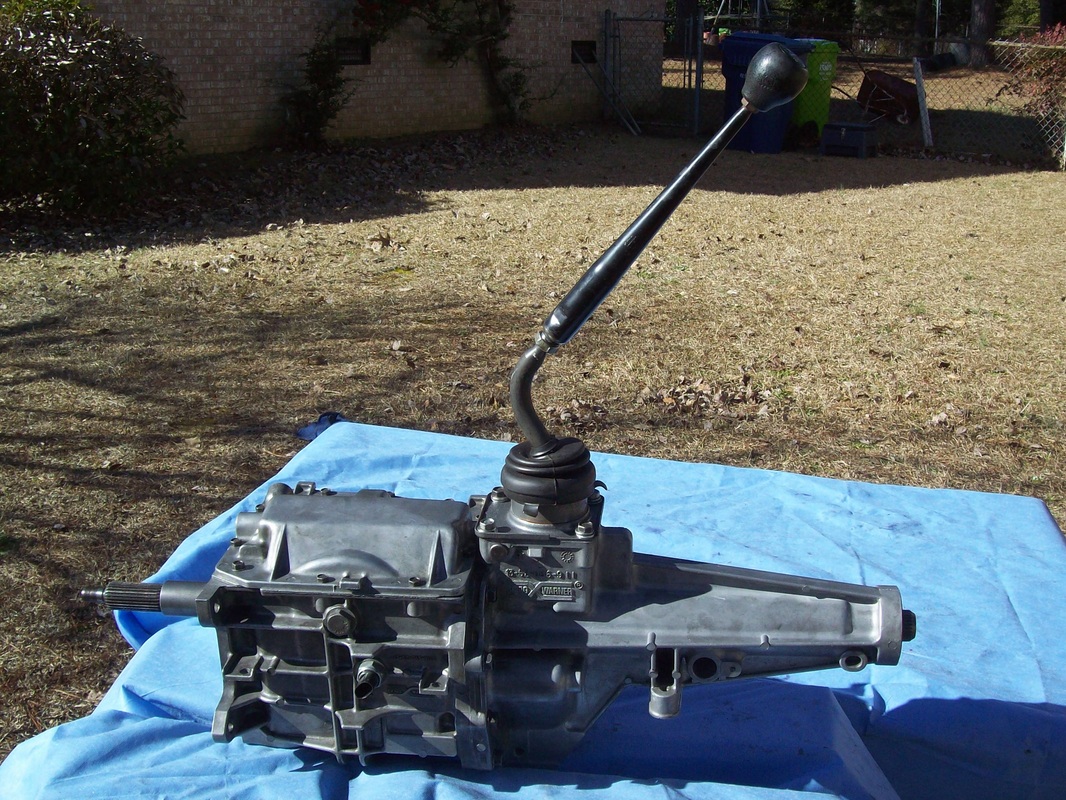
I had a free Saturday today so I put the time to good use. This T5 is all back together and ready for storage. Before I put it on the truck, I'll need to install shims inside the front bearing retainer to eliminate any shaft endplay. Then I'll need to seal the case with RTV. 
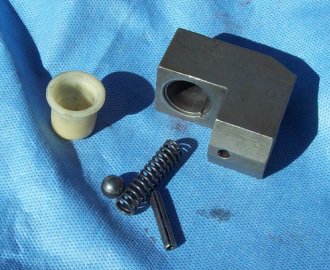
The countershaft is already inside the case, so I will install the reverse gear next. Just a few simple parts. 
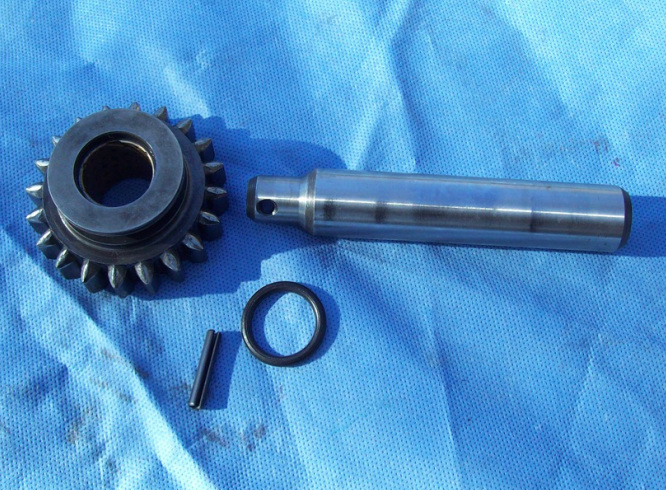
A roll pin holds it all together. 
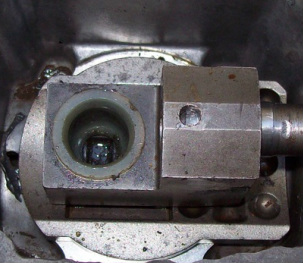
The reverse gear shaft goes in until it's flush with the case. 
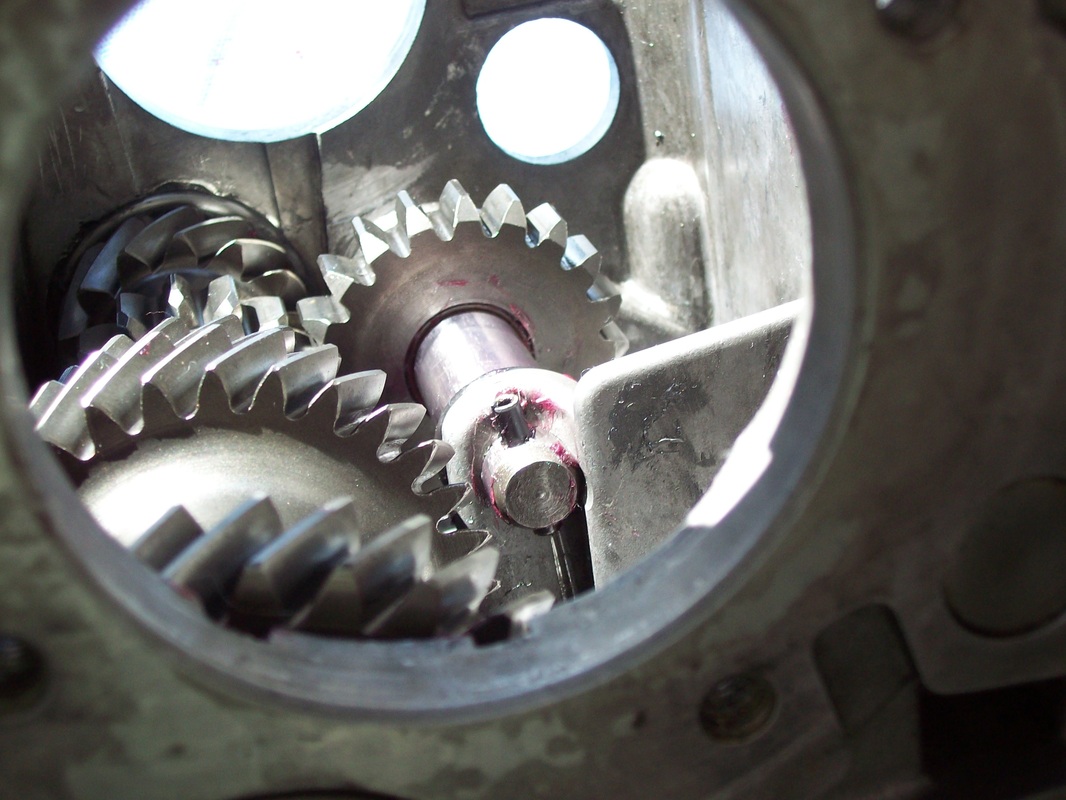
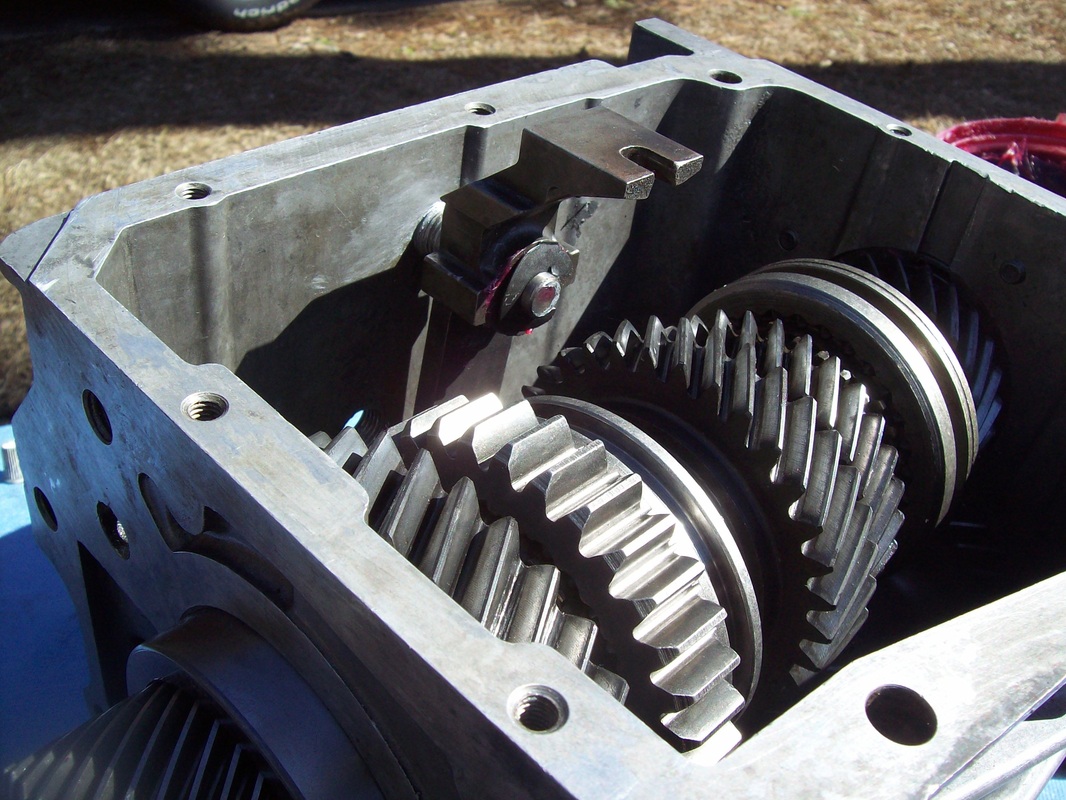
Now is a good time to lay the reverse shift fork into place. 
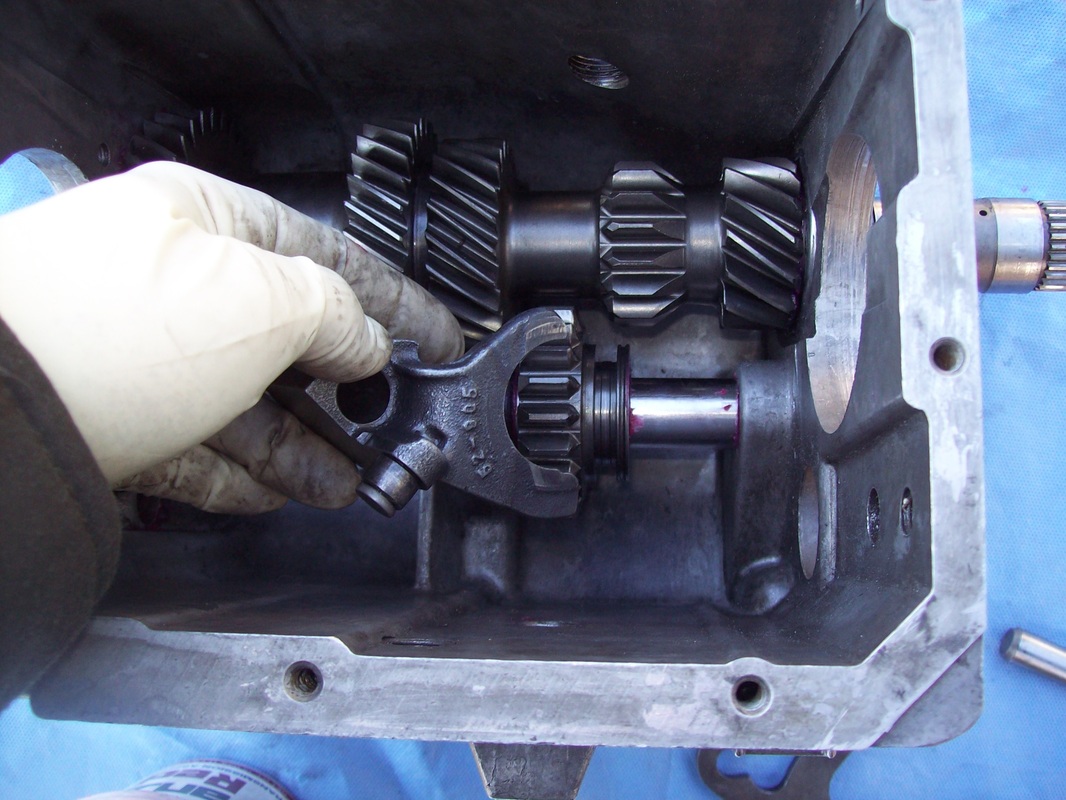
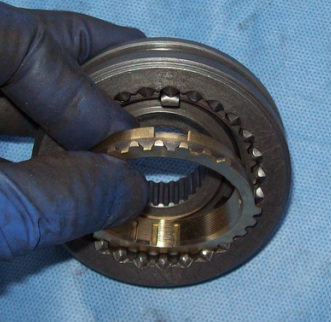
I have temporarily installed the 5th gear slider part way so you can see how it slides through the reverse shift fork. It will not be as easy to see once the main shaft is installed because it will partly block your view. I will now remove the 5th gear shift fork until I am ready for it. This washer goes up against the countershaft rear bearing. 
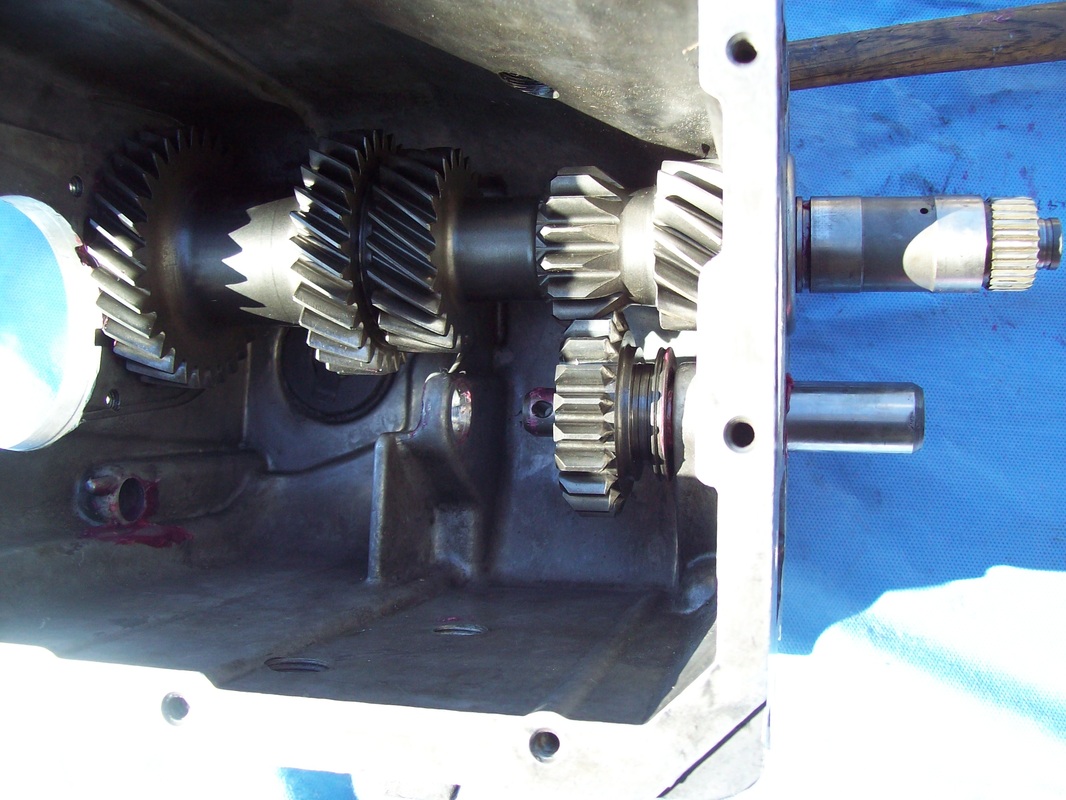
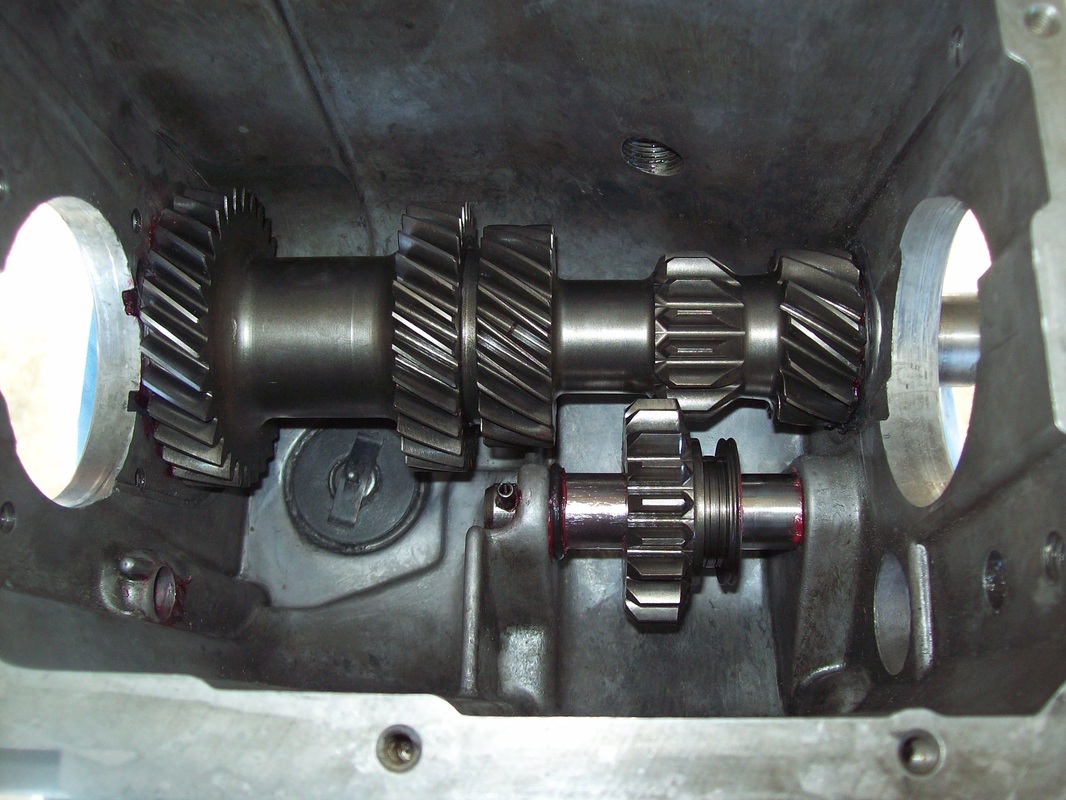
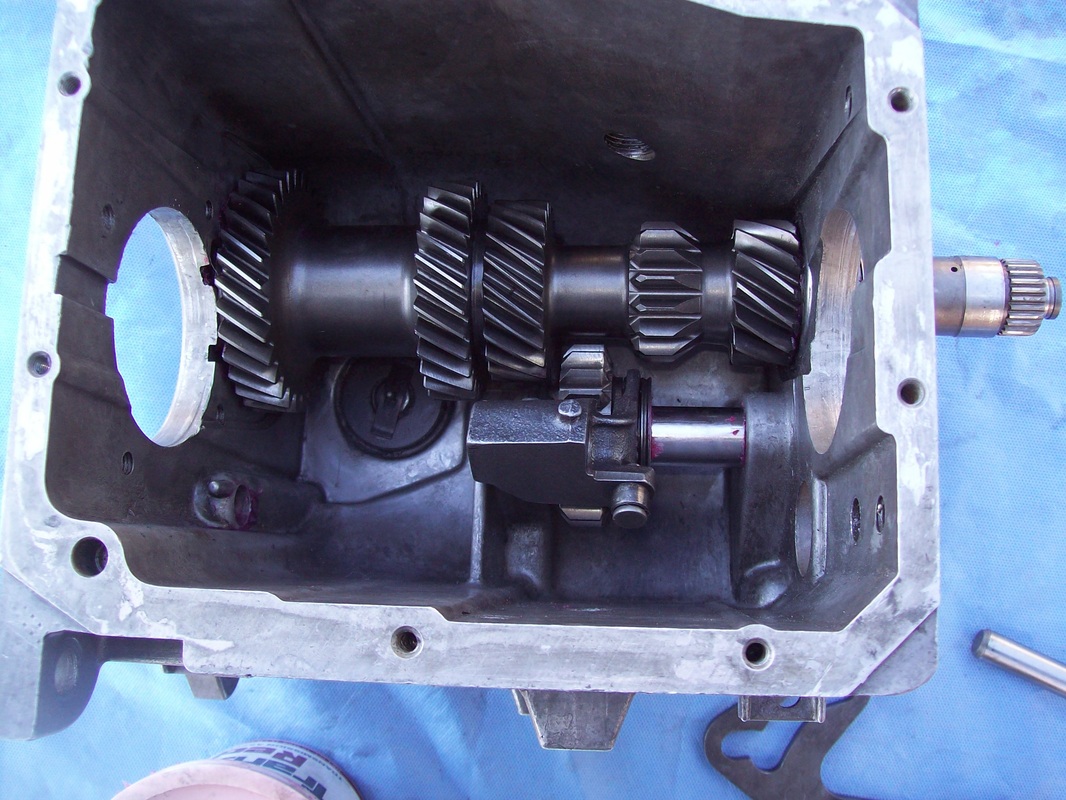
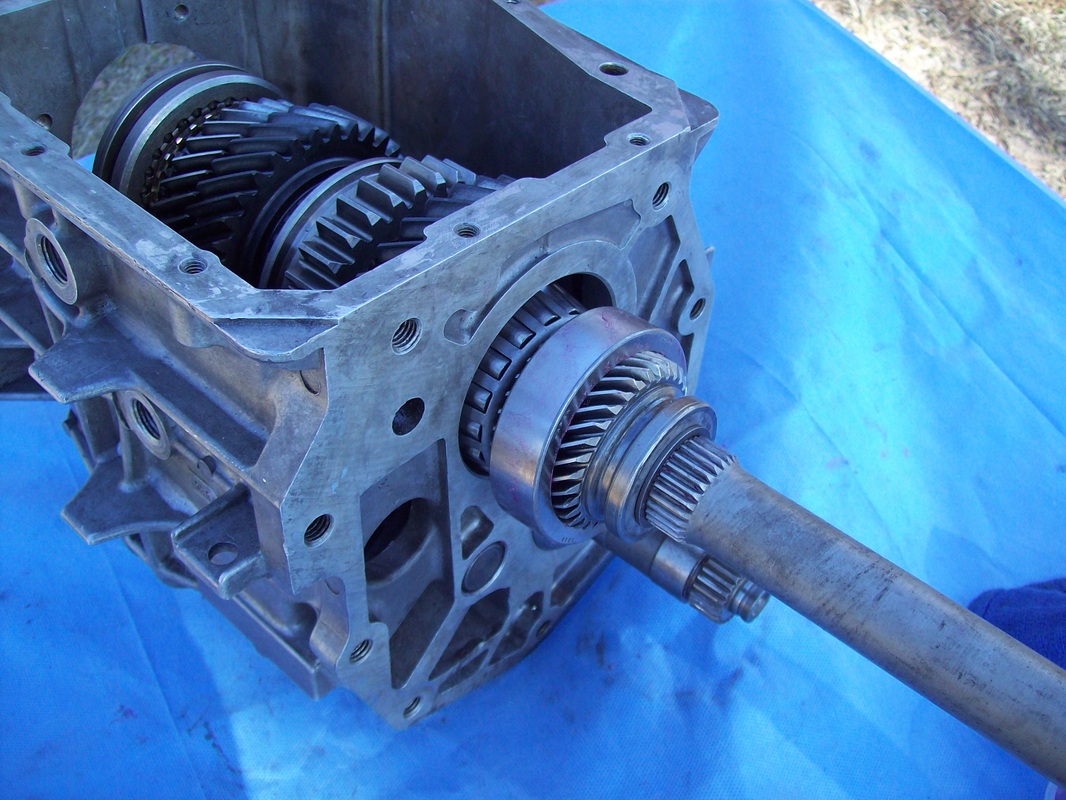
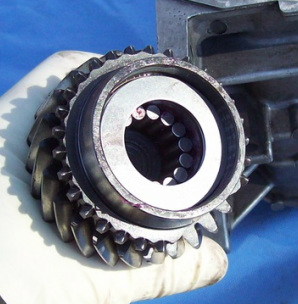
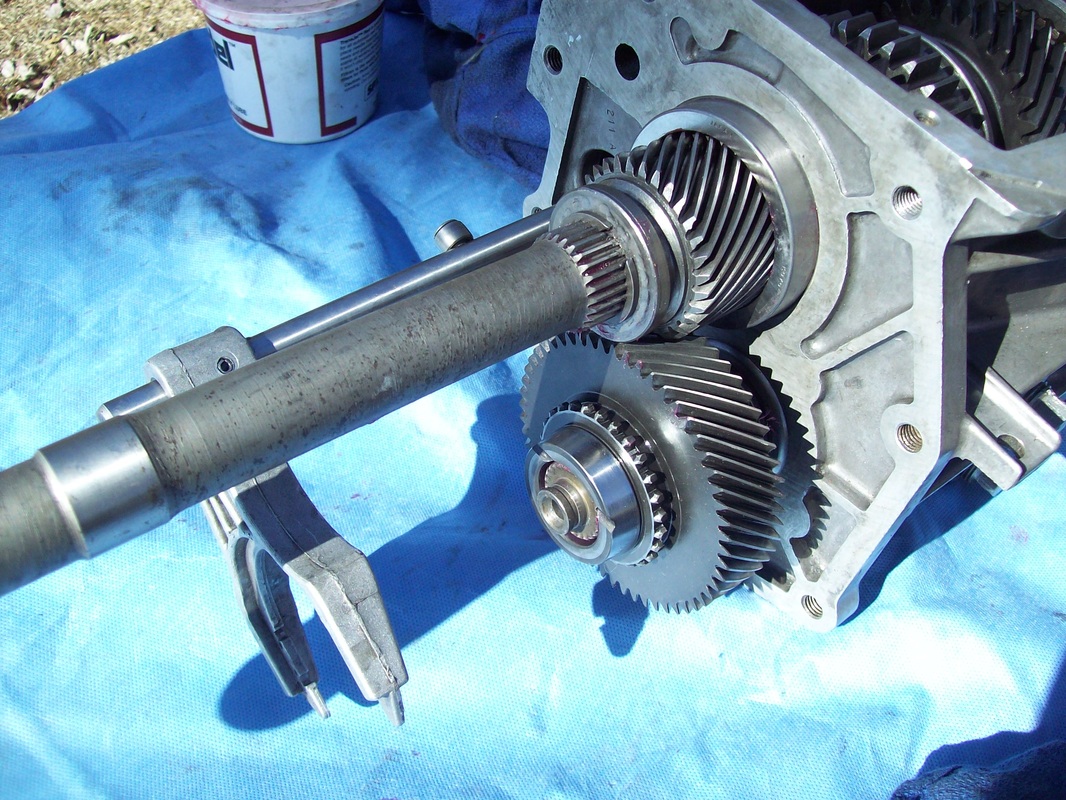
The main shaft is carefully slid into place and the rear race slid over 5th gear in readiness for installation. 
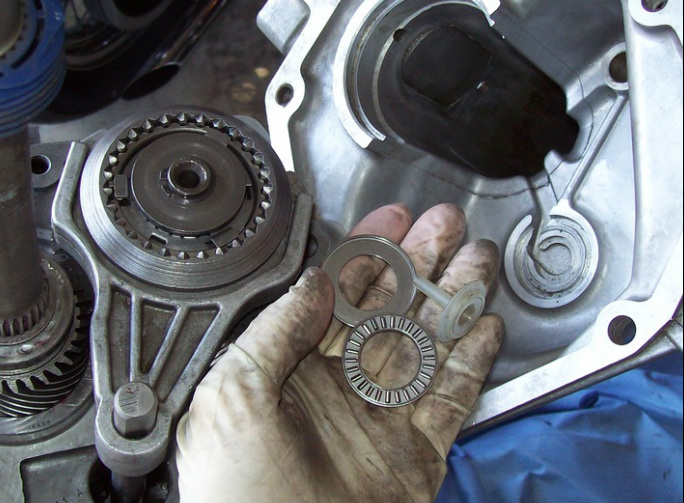
Using transmission lube to make them sticky, 15 roller bearings are placed inside the input shaft. The kit had 17 bearings but I am certain only 15 are used. 
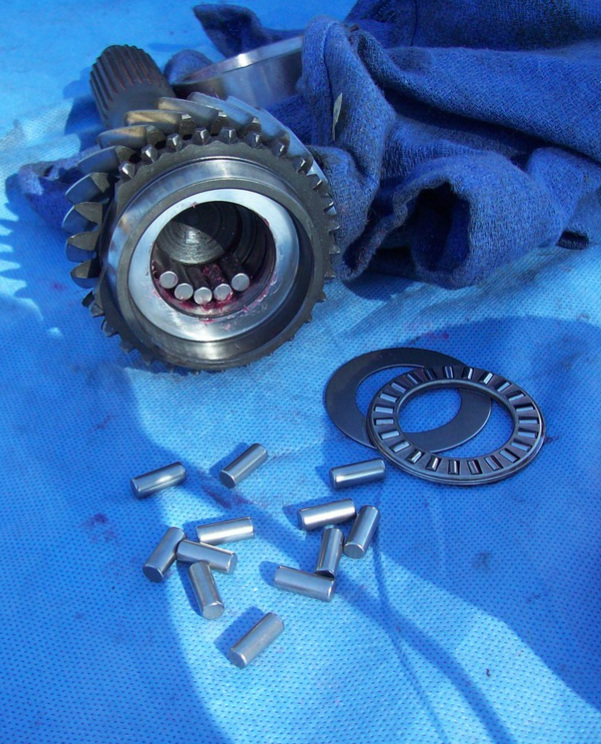
See the 2 extra roller bearings on the table next to the needle bearing and race? 
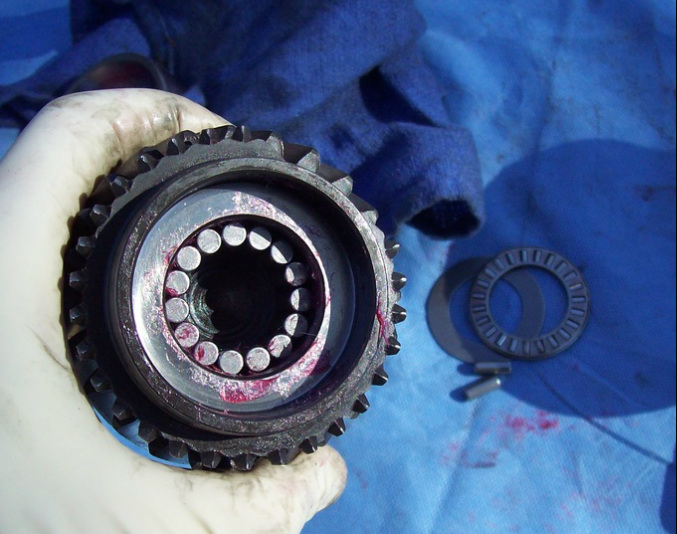
Next comes the needle bearing and then the race. 
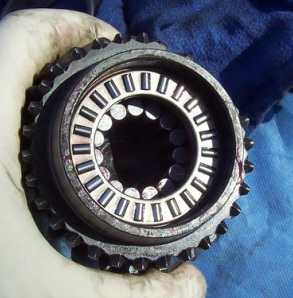
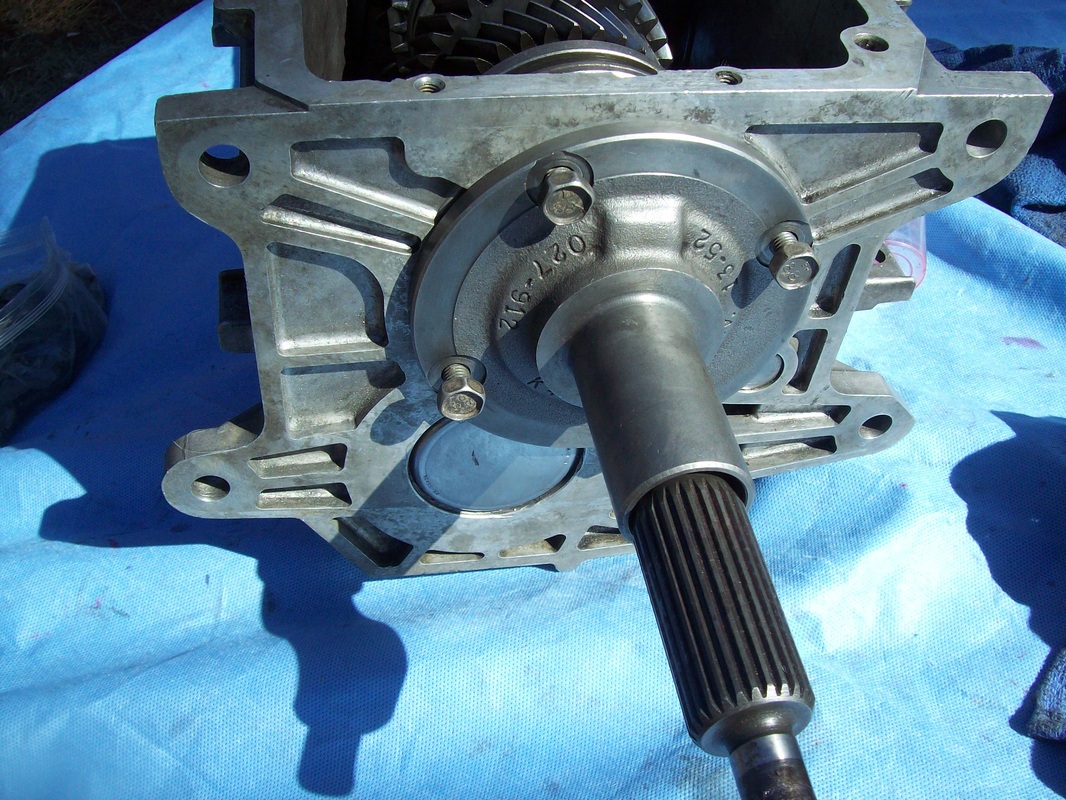
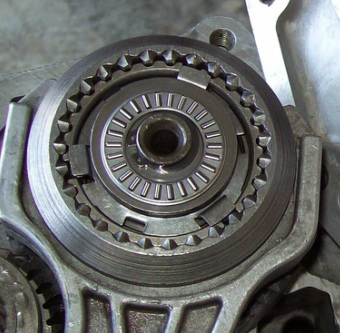
Carefully install the input shaft taking care not to dislodge any of the roller bearings. 
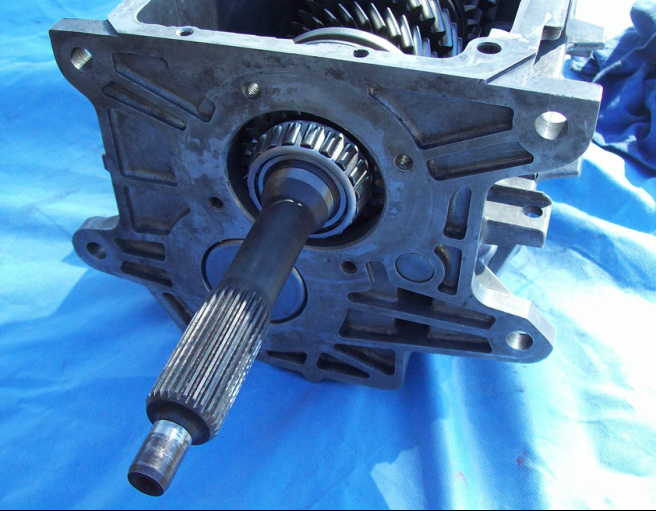
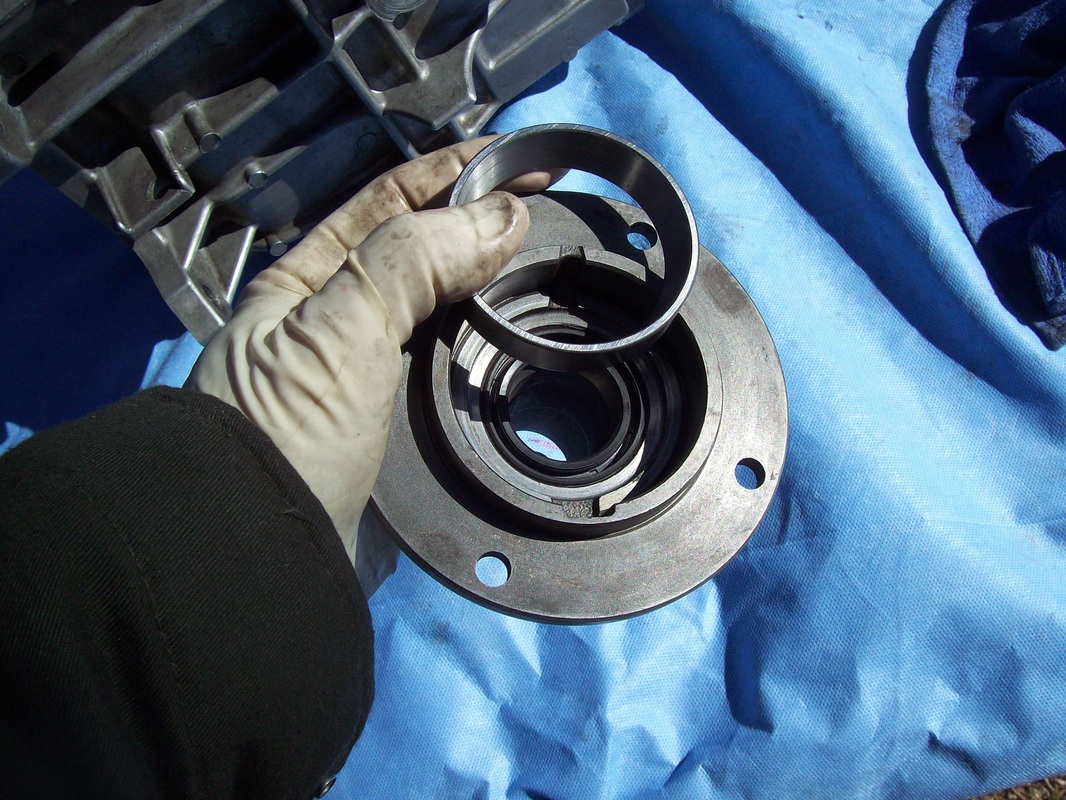
Put the race inside the input shaft bearing retainer. Then align the inner notches correctly with the case notches and bolt it on. The new inner seal was installed last night. Assembly of the 5th gear slider is very similar to the other sliders. New springs and key inserts are installed. 
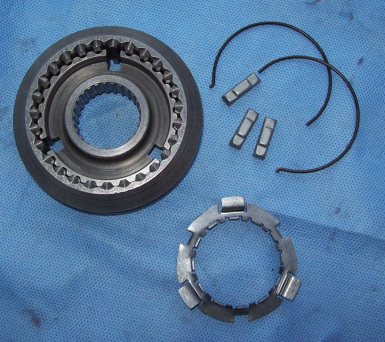
The 5th gear shifter fork gets new pads. The slider gets a new brass blocking ring. 
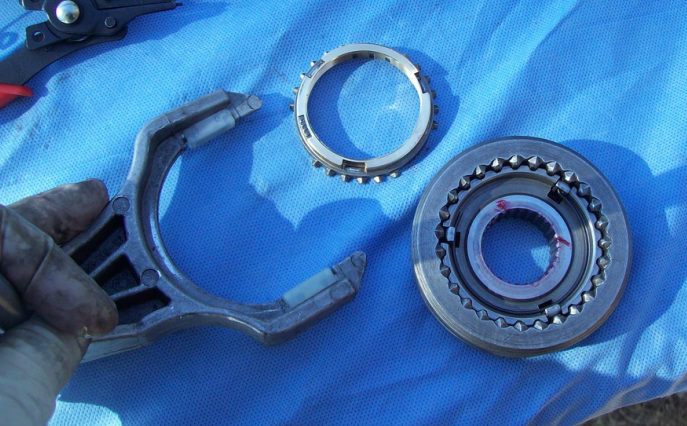
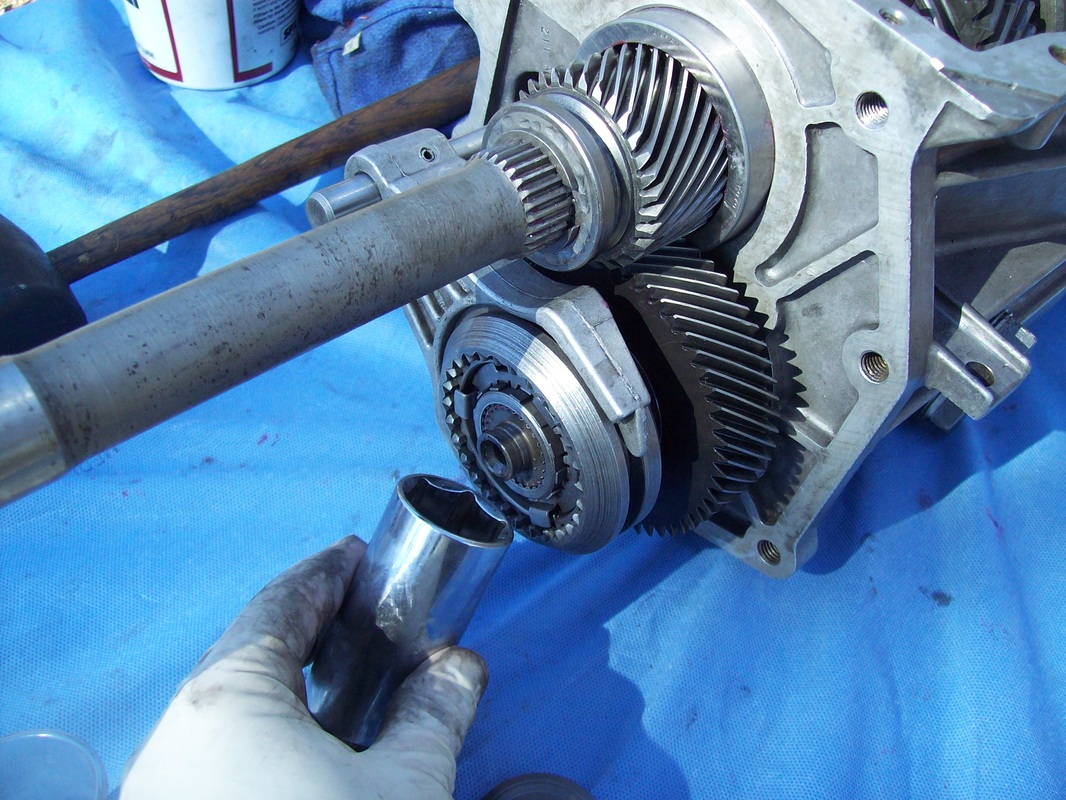
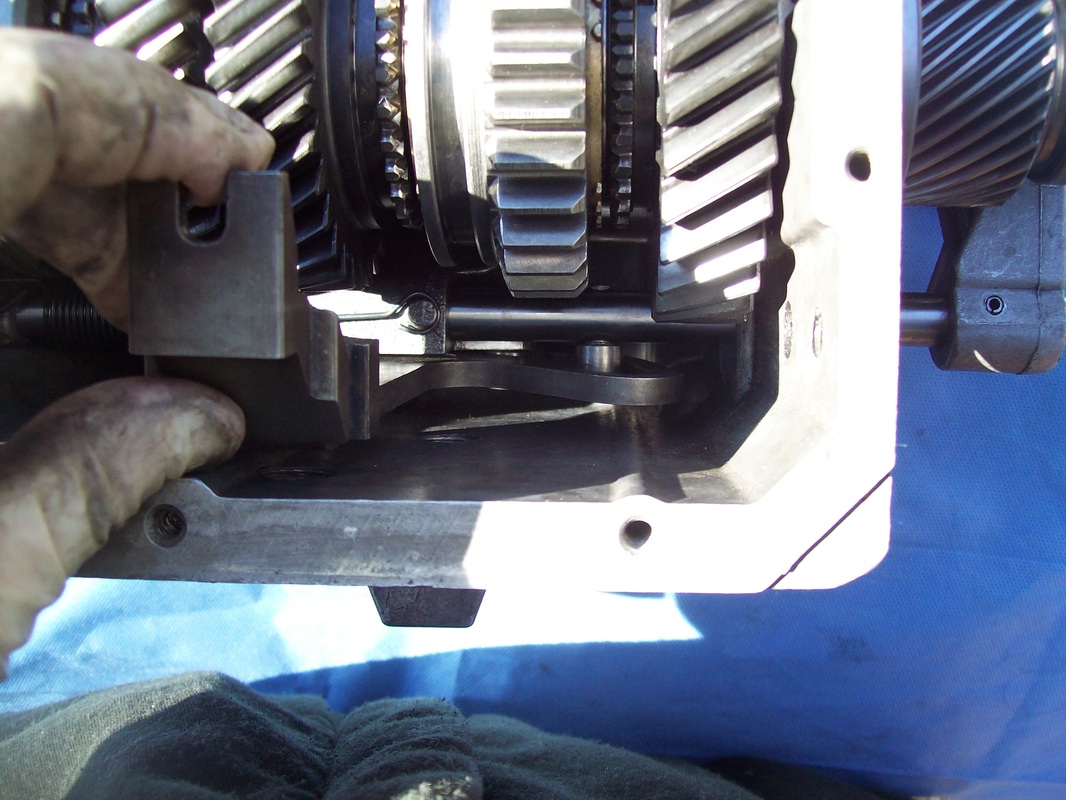
Slide the 5th gear shifter fork partially into place and then install the countershaft gear that drives 5th gear. Slip the 5th gear slider into the fork, Push the 5th gear slider onto the countershaft and simultaneously guide the fork rod through the reverse fork and spring and finally into the guide hole at the front of the case. Not difficult to do, just hard to explain. I used a large socket as a mandrel to fully seat the slider onto the countershaft splines. 
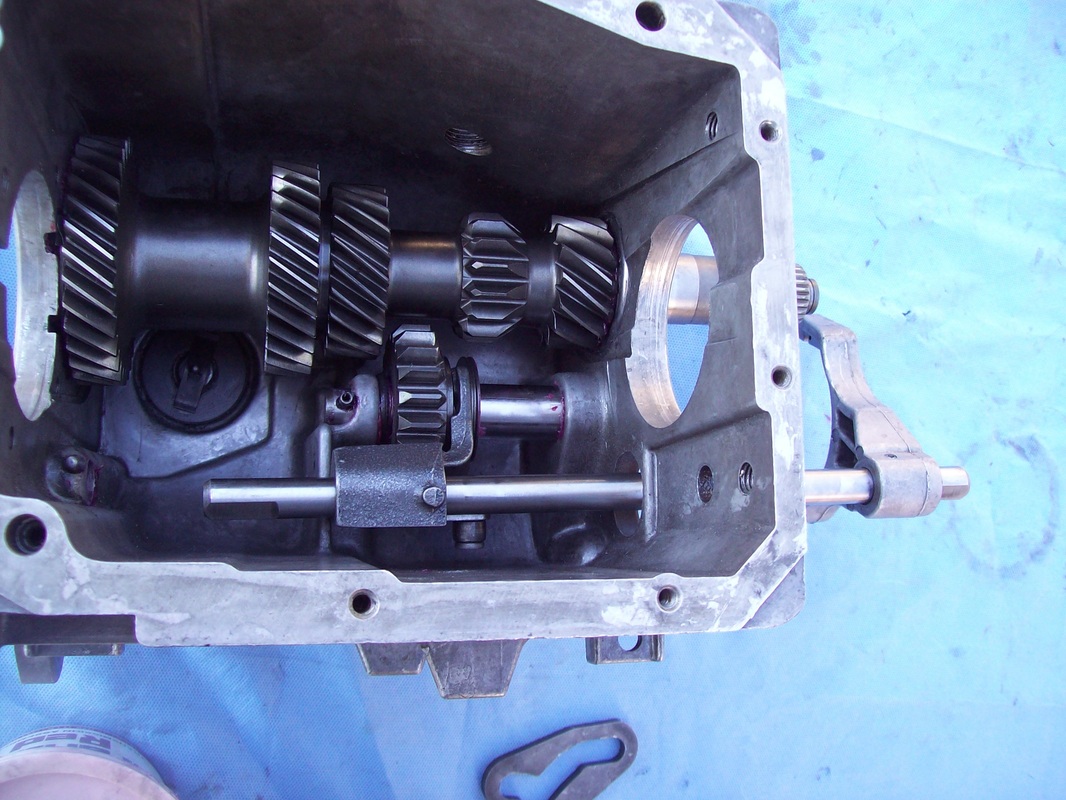
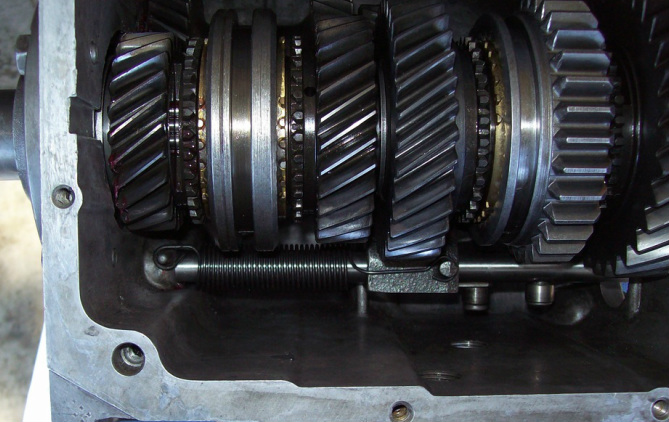
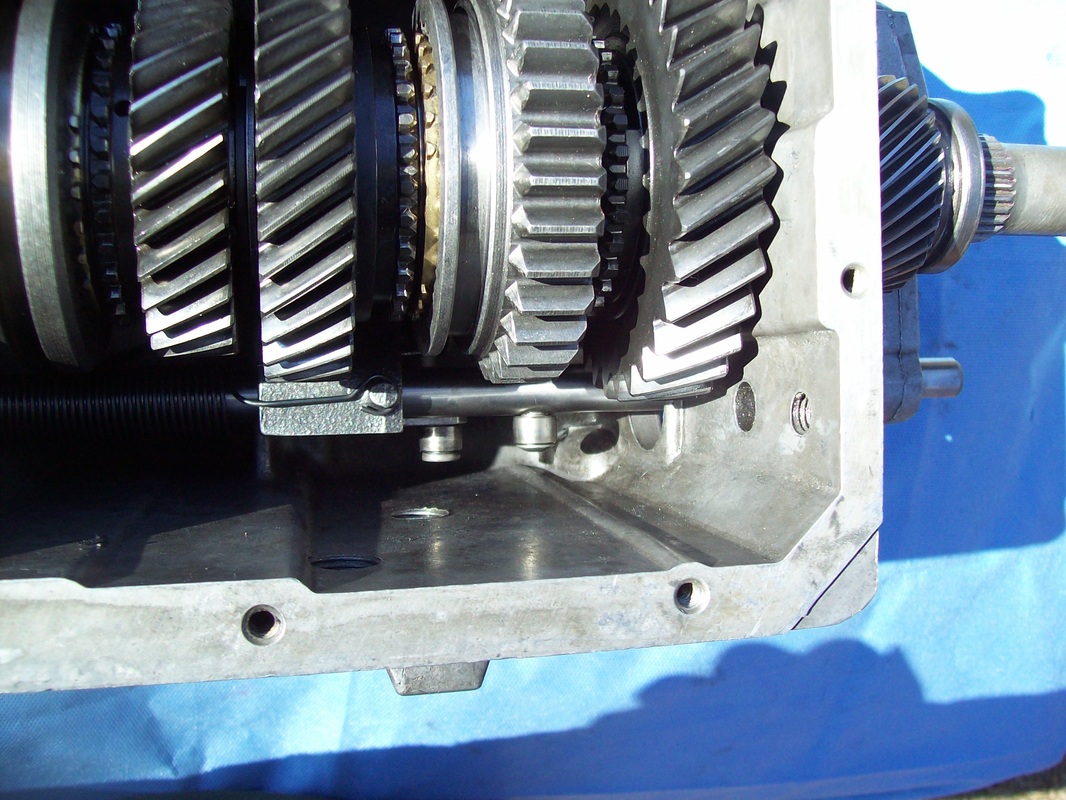
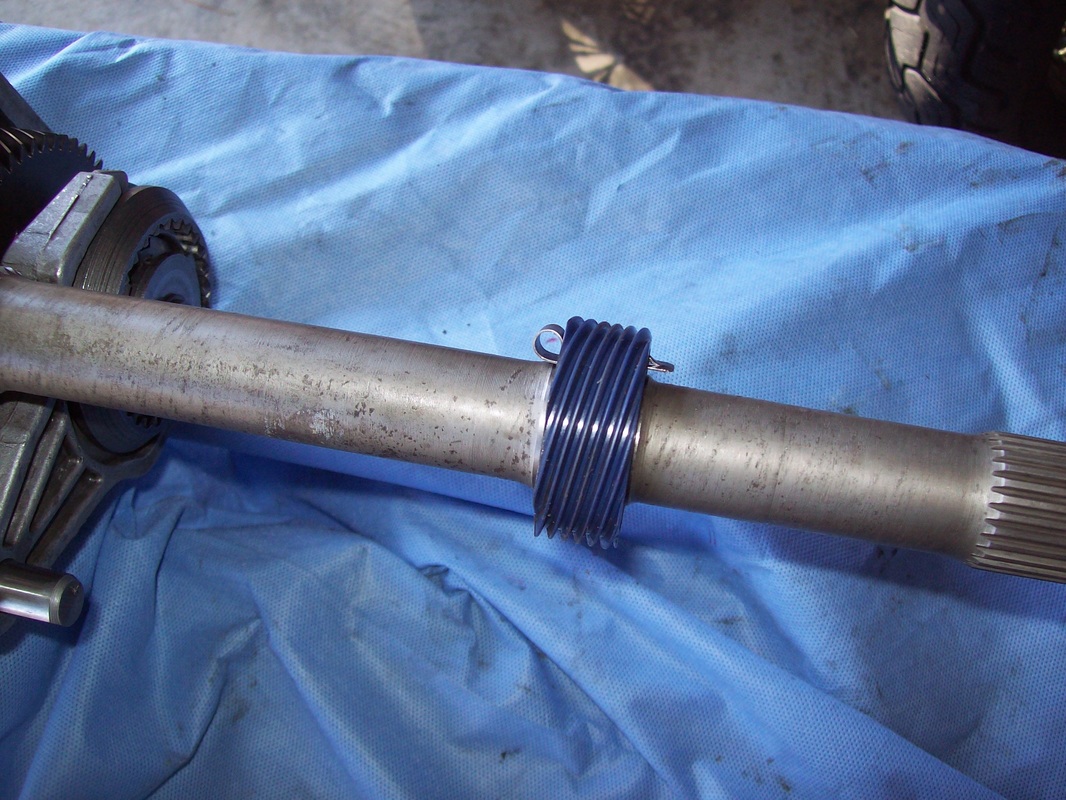
Here's a look at the 5th gear shifter fork rod after installation is complete and the spring is secured. 
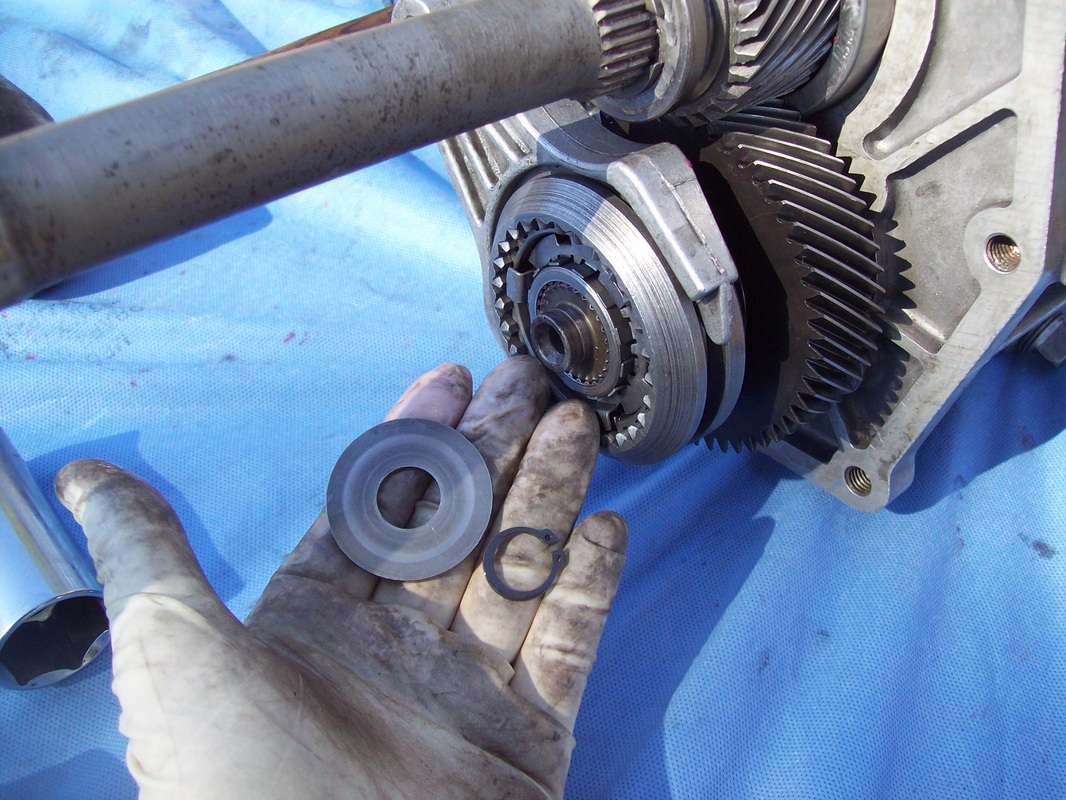
To finish up the 5th gear slider, I need to install the larger washer and a snap ring. 
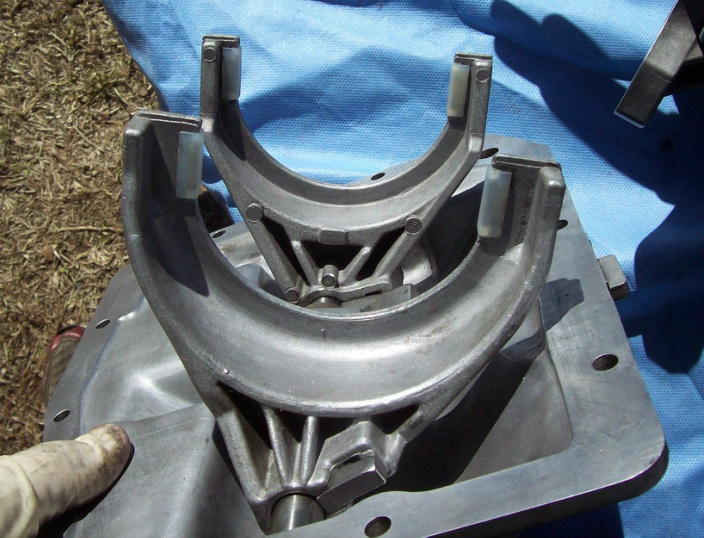
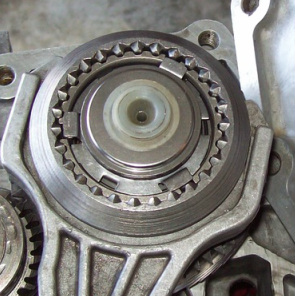
The reverse/5th gear lever goes in next. 
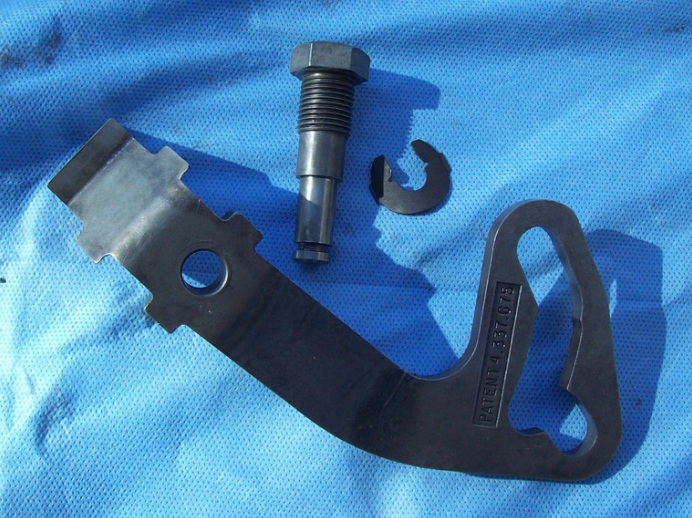
It slides over the 2 rollers. One roller is on the 5th gear shifter rod and the other is on the reverse shift fork. All held together by a bolt and clip. Install new shifter fork pads. 
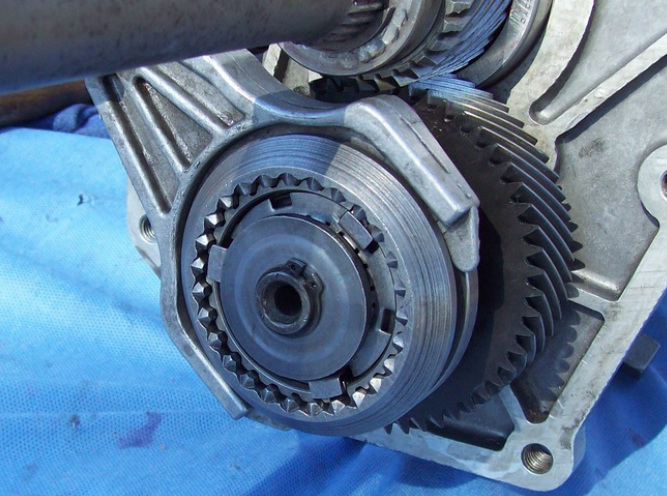
Install a 7 tooth Drive Gear and clip. I might change to a different tooth count depending on tire size. 
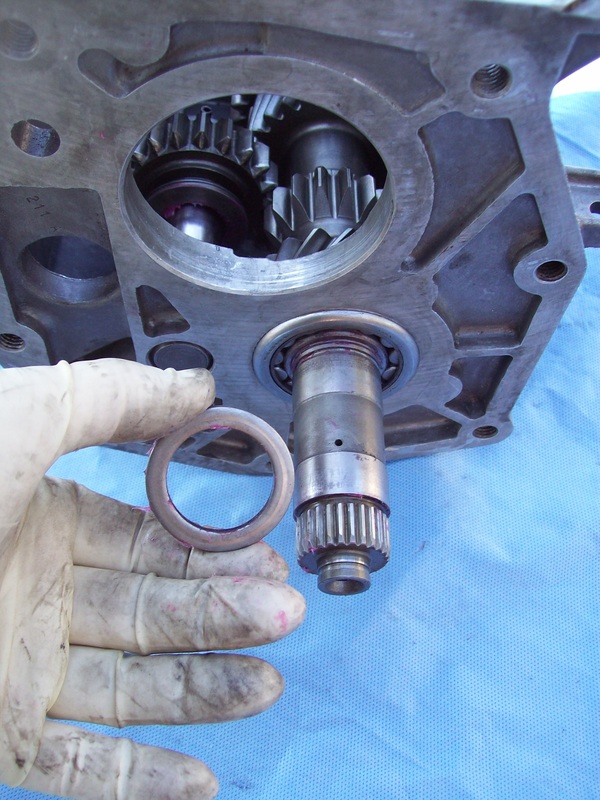
The tail shaft is tipped up in the air for this photo. The bearing and race go onto the end of the countershaft and surround the snap ring. The oil funnel is then inserted into the end of the countershaft. During assembly of the tail housing, these pieces must line up with the corresponding areas inside the tail housing. (See the circles just to the right of my hand.) The tail housing is carefully slid over the shaft while simultaneously connecting these final parts to the shifter rod. After installing the reverse light switch and drain and fill bolts, I don't have any parts left over. 
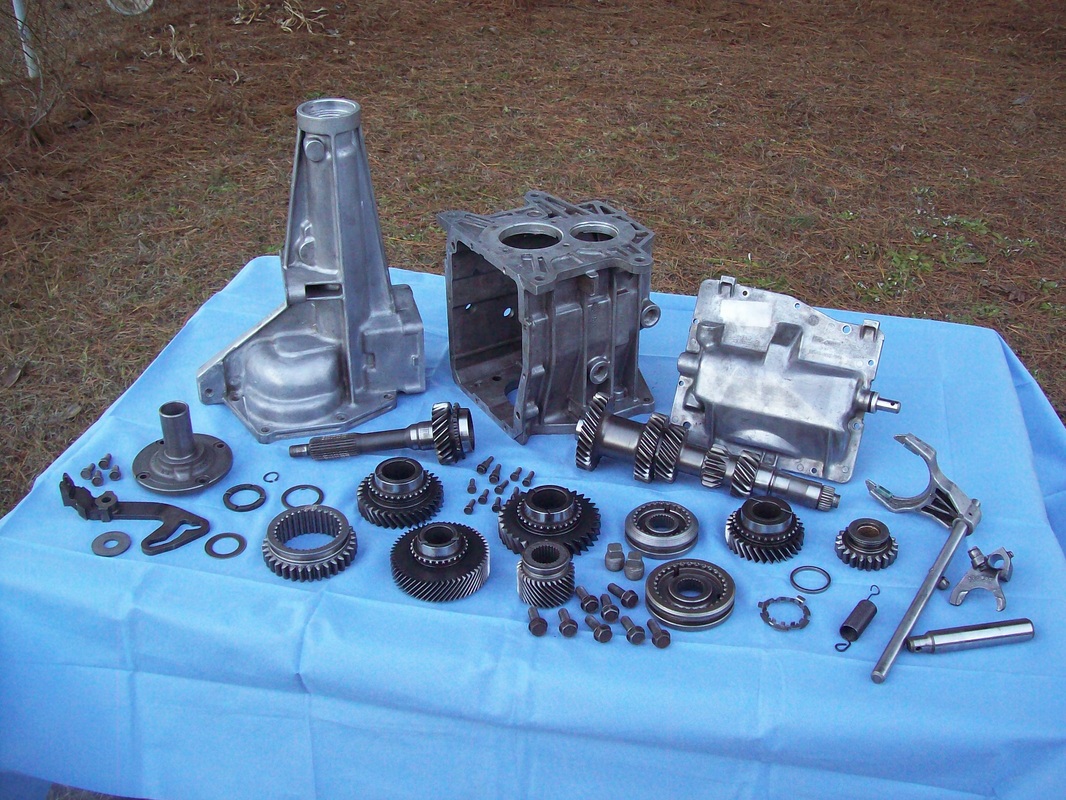
I started with a rebuild kit and all of this stuff. 
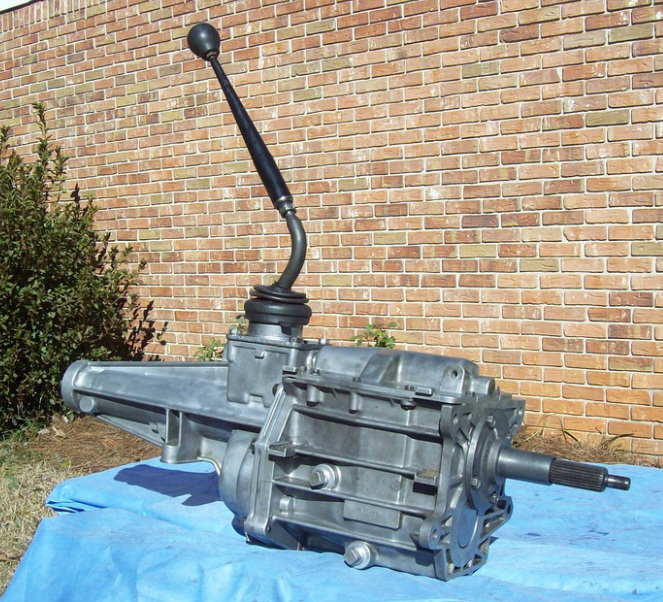
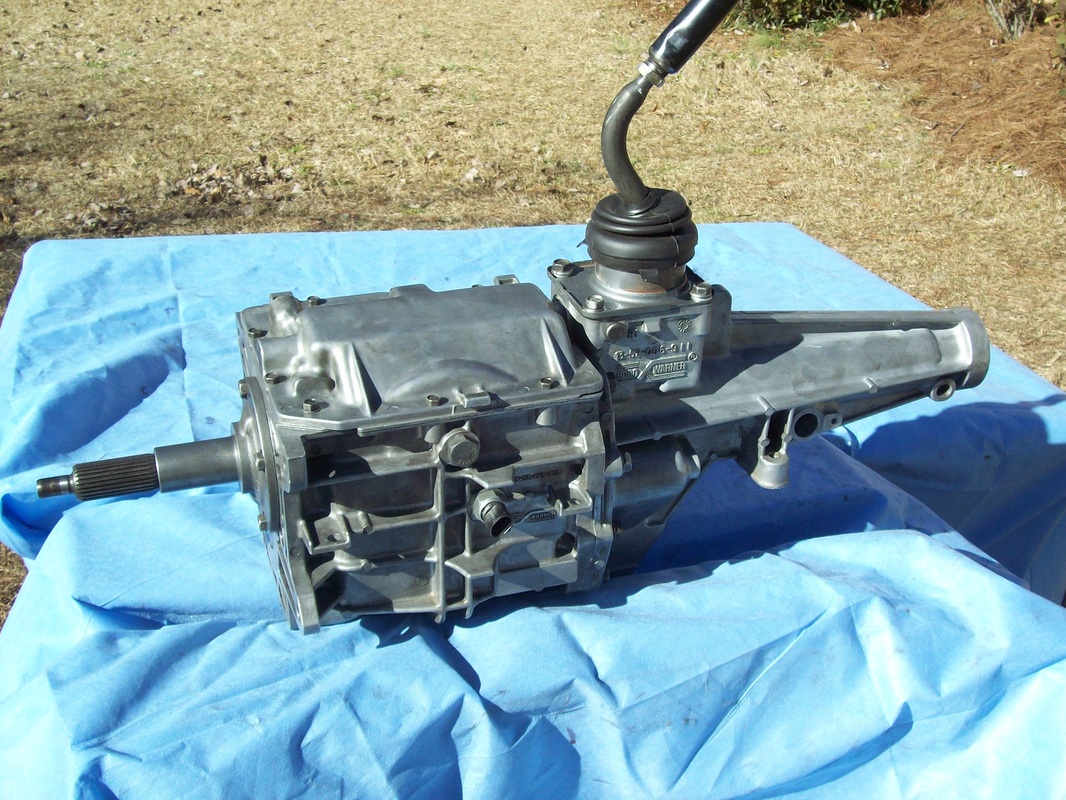
This is what I ended up with. A V8 Camaro NWC T5 that has been modified with an S10 case cover and cable speedo drive S10 main shaft and tail housing. This will be perfect for my 1965 Chevy C10 truck with a bench seat and original instrument cluster. Thanks for following along.
4 Comments
David N Leach
4/30/2022 04:46:26 pm
Will I be able to use the shifter lever with the original bend with a bench seat in my 1953 3100 pick up? Will it clear the bench seat in 2/4/R and the dash in 1/3/5 ?
Reply
Jay
4/30/2022 05:46:15 pm
The shifter stem can be bent if heated with a torch. I have no idea how much room you have between the seat and dash but other folks I know who own 1947-55 Chevy trucks have these S10 T5s and had success by straightening the shifter stem some using a torch.
Reply
Darren
5/8/2022 01:32:44 am
Wondering if u can give me some ideas of how to get a peice of the needel nose bearing out of the front of the transmission... I only counted 14 not i5 ..but I cant see the missing one or hear it rolling around..I tipped the transmission and shook it and nothing came out ... I'm lost on what to do ..
Reply
Jay
5/8/2022 04:13:30 am
The magnet on the bottom of the case is probably holding onto the bearing. I highly recommend opening the lid of the transmission so you can use a telescoping magnet stick to retrieve it. You can also give the case a good cleaning at the same time.
Reply
Leave a Reply. |
See my BLOG entries from prior months below:
April 2024
My Hobbies are:Auto Restoration Categories |
- Main BLOG Page
- Steering Column Page
-
T5 Info Page
- Thinking about installing a T5? READ THIS FIRST
- My T5 videos
- Making a Custom Shifter
- Complete T5 Driveline - Installation from Engine to Rear Axle
- S10 T5 Transmission Jeep Shaft Swap - DIY and skip the adapter plate.
- Camaro Drive Gear Relocation
- T5 Tail Stock with a Cable Speedo Connection
- World Class and Non-World Class versions of the T5 - How to tell them apart.
- How to determine the T5 gearing
- A possible solution for cable speedometers.
- T5 Transmission Identification - What the Tags and Markings Mean
- What's the difference between a Camaro T5, an S10 T5, and an Astro T5?
- T5 Transmission Tear Down
- T5 S10 Transmission Rebuild
- T5 Transmission Rebuild
- T5 pre-purchase inspection and questions
- T5 Resource List
- T5 Case Inspection
- Bell housing differences
- T5 Drive Gear and Driven Gear Combinations
- A Camaro T5 with the S10 Conversion
-
Tips & Tricks Section
- DIY Wiring Tips
- Oil Pump Priming Tool
- Piston Stop Tool
- Broken Bolt Extraction
- DIY 3 Point Seat Belt Installation
- 1963 Chevy C10 Steering Column Removal
- 1963 Chevy C10 Steering Column Disassembly
- 1963 Chevy C10 Steering Column Rebuild
- 1963 Chevy C10 Steering Column Installation
- Easy Clutch Pedal Adjustment
- Making the Steering Column Safer
- Power Steering
- How to improve gauge cluster lighting.
- Stripping Paint - Polycarbide Abrassive Wheel
- Jeep Cherokee Door Check Modification - Very Simple
- Keeping the hood aligned
- DIY All Cable Ebrake System for 1963-1972 C10
- Alignment Tools - Easier than you think
- Conversion to dual master cylinder brakes 1963-1966 C10.
- Steering column modification
- A simple way to remove old control arm bushings.
- An easy way to adjust brake shoes
- How to remove a pilot bushing from the crankshaft.
- Cutting spot welds
- E-brake clip removal made easy
- Harmonic Balancer Installation - Tapping threads in the crank
- POR 15 with less mess.
- Engine Run Stand
- Engine Dolly - EZ to make
- Steering Wheel Restoration Page
- Sway Bar Info
- Power Brake Booster Page
-
Other Projects
- 1934 Chevy Coupe Build Page
- 1934 Chevy Master 5 Window Coupe
- 1963 Body repairs
- Anvil
- Hot Rod 283 SBC Build
- Grand Cathedral Game
- 1968 C10 Short Fleet
- Rockwell Drill Press
- 283ci SBC Engine
- Safety Stand for Lift
- Coat Hook
- Engine Run Stand
- 1963 Short Fleet Project
- Metal sculpture figures
- Shop Project
- Shop Sign
- Lean-to Shop Addition
- Air Compressor Project
- 2 Post Automotive Lift
- 1963 Chevy Custom C10 SBFS BBW
- Metal Top Outdoor Work Table
- Bearings to grenade
- Bar Stool Go Kart
- Special Bolts Plaque
- Vise Stand
- Grinder Stand
-
Random Pics
- 2021 Stovebolt Jamboree Pictures
- 1963 Custom Comfort Seat
- Flywheel differences
- Carb spacer
- Bimini 2019
- T5 shifter ideas
- Engine Torque and HP
- LUGNUTZ DIY Shop
- Alaska 2018
- 2019 ODSS Homecoming
- Chevy 3 speed transmission ID
- 2018 Stovebolt Homecoming Pics
- Anvil
- Pallet Rack Shelving
- Reference PICS
- shop plywood walls
- Welding Stuff